

Introduction
With Windows 8.1, Microsoft has introduced a lot of new programmatic capabilities. One of the features announced as part of Build 2013 was the introduction of APIs that would allow Windows Store applications to work with scanners.
The scanning APIs are located in the Windows.Devices.Scanners namespace. The scanning APIs are built on top of native Windows Image Acquisition (WIA) APIs. Only scanners that are installed with WIA drivers can be used through the scanning APIs.
To build support for scanning in a Windows Store application, you need to list all available scanners by retrieving all devices with a DeviceClass type of ImageScanner.
Hands On
Let us build a simple Windows Store application that works with scanners.
Create a new Windows Store application in the Visual Studio 2013 Express Preview for Windows, titled Windows8.1ScanningDemo.
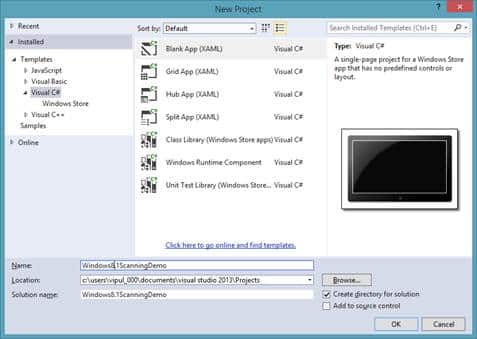
New Project
Next, on MainPage.xaml, add two buttons titled “Get Scanner” and “Start Scanning”.
Open the code behind for MainPage.xaml.cs, and include the namespace for Scanners: Windows.Devices.Scanners
using Windows.Devices.Scanners;
Now, we will add an instance ImageScanner as a class variable.
public sealed partial class MainPage : Page
    {
        ImageScanner myImageScanner;
        public MainPage()
        {
            this.InitializeComponent();
        }
    }
We will now retrieve a scanner object. Note that only scanners with a WIA driver can be accessed with the APIs.
Next we will implement the event handler for the click event for the “Get Scanner” button.
For the click event handler, we will retrieve the device selector string for scanners.
Then, we will list all devices that match the device selector. If there is more than one device, we will list the first scanner, else we will report that no devices are present.
private async void buttonGetScannerObject_Click(object sender, RoutedEventArgs e)
        {
            string deviceSelector = ImageScanner.GetDeviceSelector();
            var deviceInfoCollection =await Windows.Devices.Enumeration.DeviceInformation.FindAllAsync(deviceSelector, null);
            if (deviceInfoCollection.Count != 0)
            {
                myImageScanner = await ImageScanner.FromIdAsync(deviceInfoCollection[0].Id);
            }
            else
            {
                Windows.UI.Popups.MessageDialog md = new Windows.UI.Popups.MessageDialog("No scanners found")
                await md.ShowAsync();
            }
        }
Next, we will implement the event handler, which will actually scan and store the scanned image as part of the click event for “Start scanning” button.
For this example, we will store the image in the Pictures library.
private async void buttonStartScanning_Click(object sender, RoutedEventArgs e)
        {
            Windows.Storage.StorageFolder sf = Windows.Storage.KnownFolders.PicturesLibrary;
            var result = await myImageScanner.ScanFilesToFolderAsync(ImageScannerScanSource.Default, sf);
        }
If you want to build the functionality to stop scanning while in progress, you can use a CancellationTokenSource class in your application. The logic is to get a token instance when you start scanning, and when cancelation of scanning is invoked, you can call the Cancel() property on the token instance.
You can now build and compile the application. To test the application, you will need a scanner connected to the Windows 8.1 device on which you want to run the application. If you have trouble following along, you can download a sample of the code below.
Summary
In this article, we learned how to build a simple Windows Store application that can work with scanners. To keep the topic simple, we used the system defaults. Readers are encouraged to try out the other combinations of the APIs to test advanced scenarios.
About the author
Vipul Patel is a Program Manager currently working at Amazon Corporation. He has formerly worked at Microsoft in the Lync team and in the .NET team (in the Base Class libraries and the Debugging and Profiling team). He can be reached at vipul.patel@hotmail.com