

Azure SQL Database supports query editor (previews) for writing SQL queries. The query editor is a tool available in the Azure portal used for running SQL queries against an Azure SQL Database or data warehouse in Azure Synapse Analytics. In this article, database administrators and developer will learn how to create a database in Azure SQL, as well as, experiment with some create and select queries.
How to Create a Database in Azure SQL
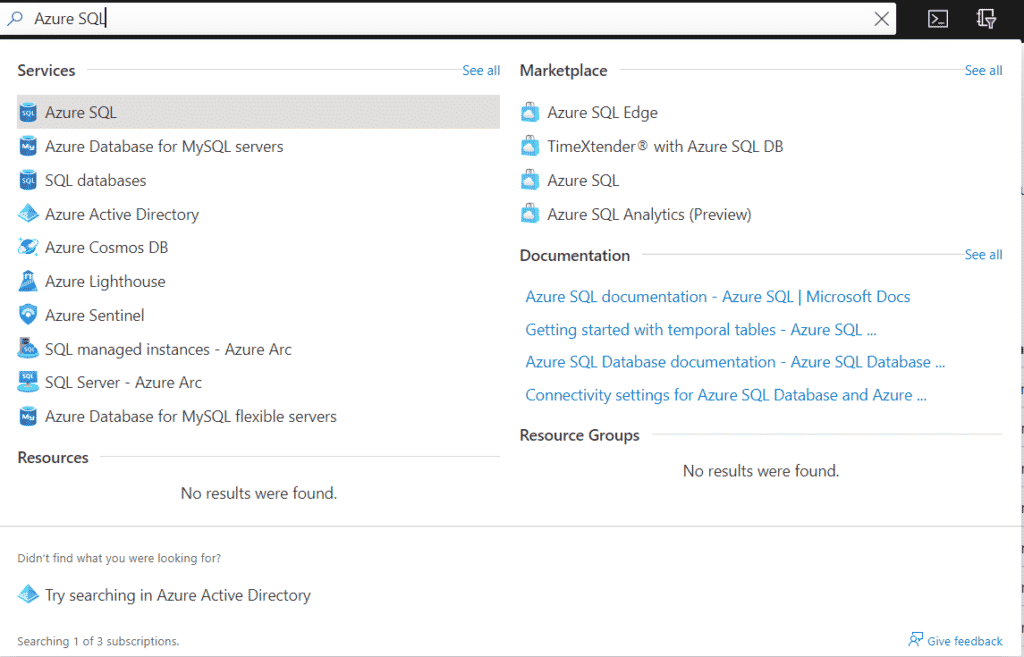
First of all, we will create and manage our Azure SQL Database through the Azure Portal. Login to Azure Portal and search for the phrase Azure SQL, as depicted below:
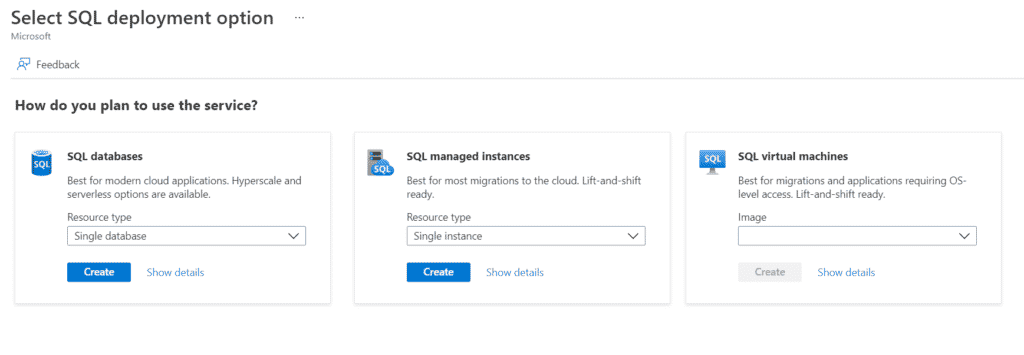
Next, click Create:

Now we must create a Single Database. Under Azure SQL in the Dashboard, select the SQL Database – Single Database (option 1) and click on Create:
In the Create SQL Database page, fill in the details for your Resource Group, the select the Database Name and Server. Switch the SQL elastic pool radio button to No and choose Locally redundant backup storage-Preview, as shown below:
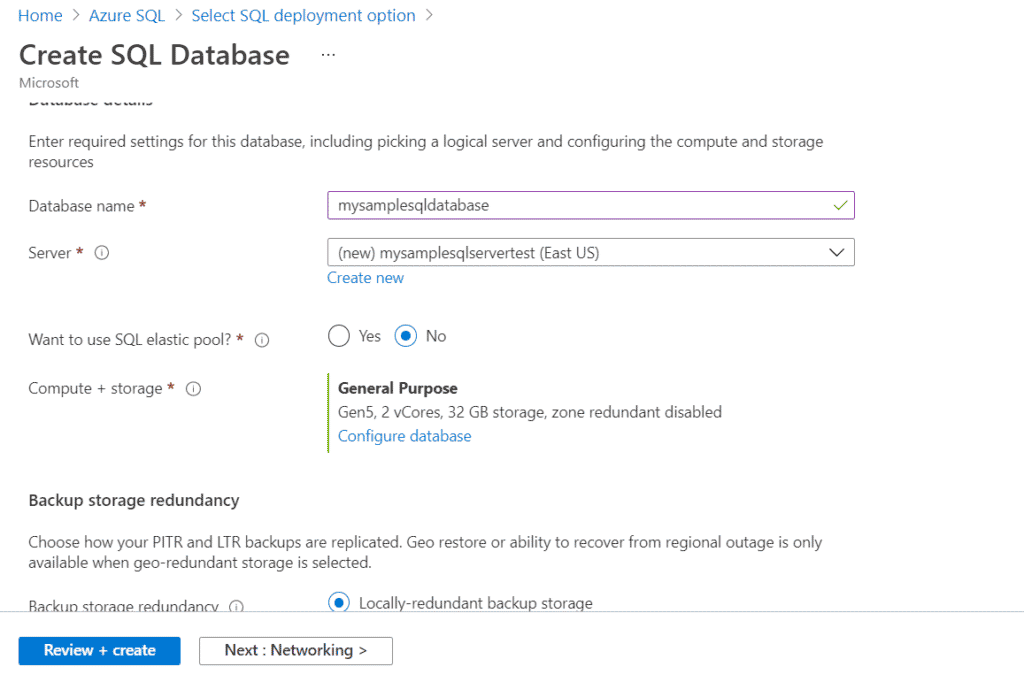
If the database server is not there, you have to create one yourself by clicking on Create New in the server option.
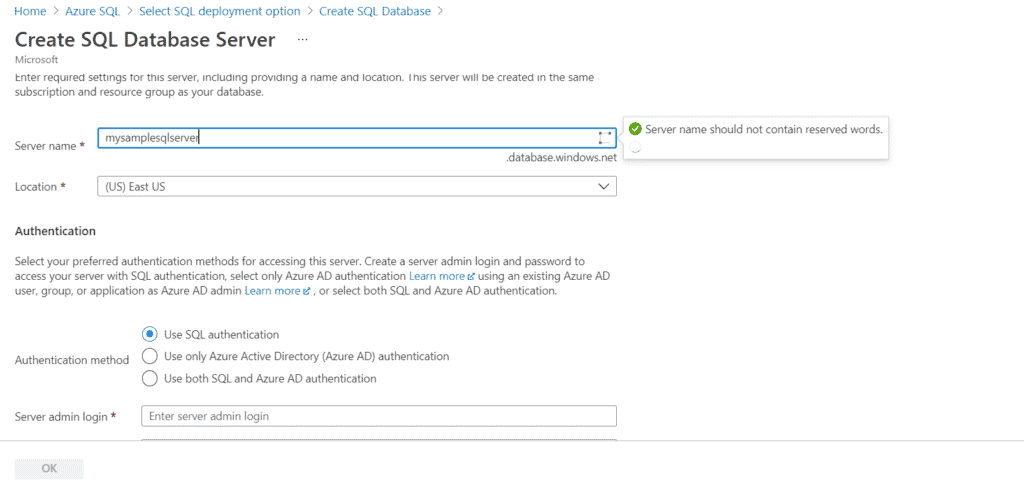
Fill in the Server Name, Location, and Authentication Method of Use SQL Authentication, then enter your Server admin login and Password:
Next, in the Networking tab, select the Public Endpoint and choose No for Firewall Rules. Choose Default for the Connection Policy.
After this, choose Security, then choose Not Now on Azure Defender for SQL, and then select Next: Additional Settings. Under Use Existing Data, select Sample. Finally, select Review + Create:
Read: Azure Service Bus Publisher and Subscriber
Deploy SQL Database
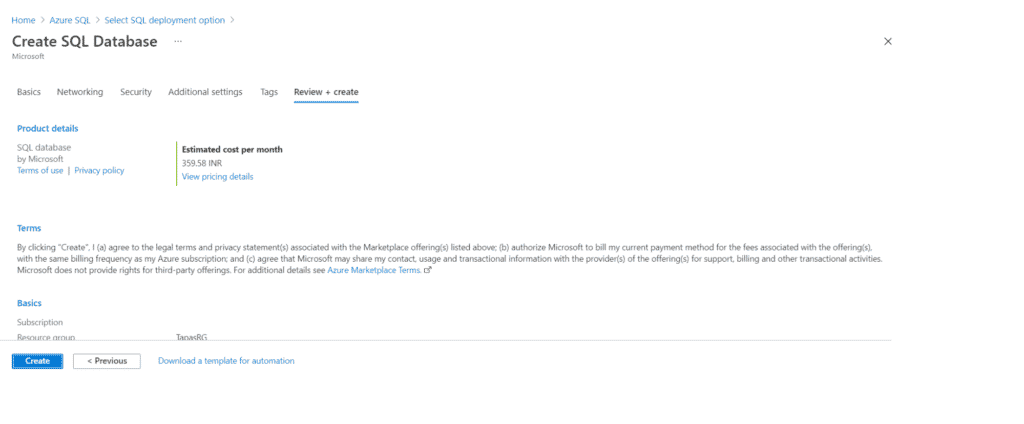
In the Review screen, we can see the product details and the estimated cost for a month. Now, click on Create and wait for the SQL database to be created. As we are creating the database, deployment submission notifications pop-up. The Deployment in Process page is updated as new resources are created.
Finally, the Deployment Is Complete text pops up as the database is deployed. Click on Go To Resource.
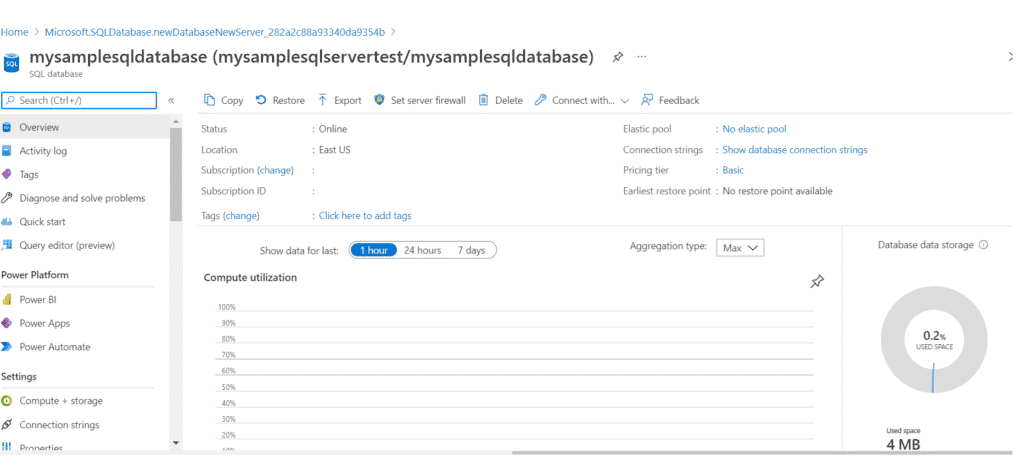
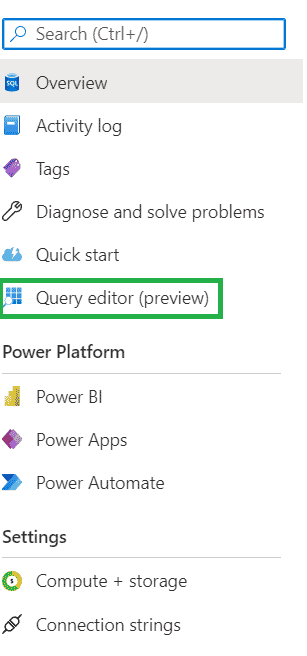
Now, click on Query Editor, as depicted below:
We will see the following Welcome page. On the left-hand side we have the SQL Server Authentication with Login and Password option. In the previous step, we already created a user id and password credential for logging in:
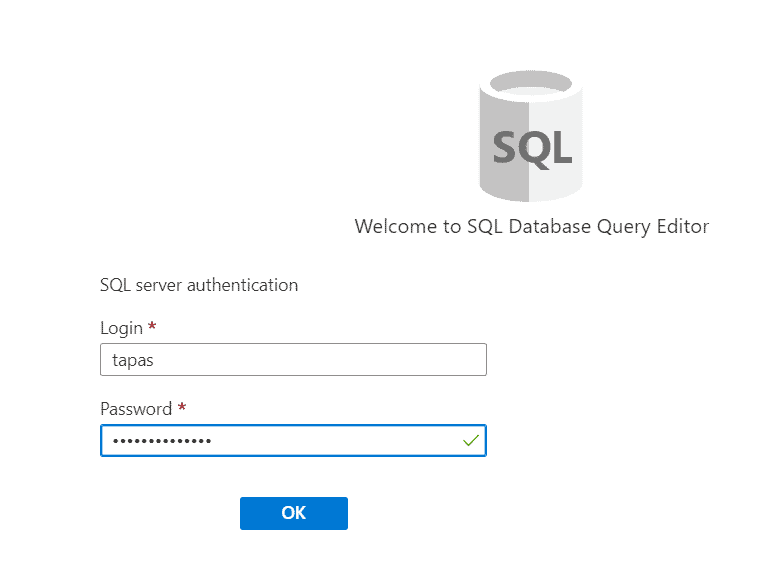
Enter those credentials now and and press Ok. We will see the prompt: “Cannot open server.”
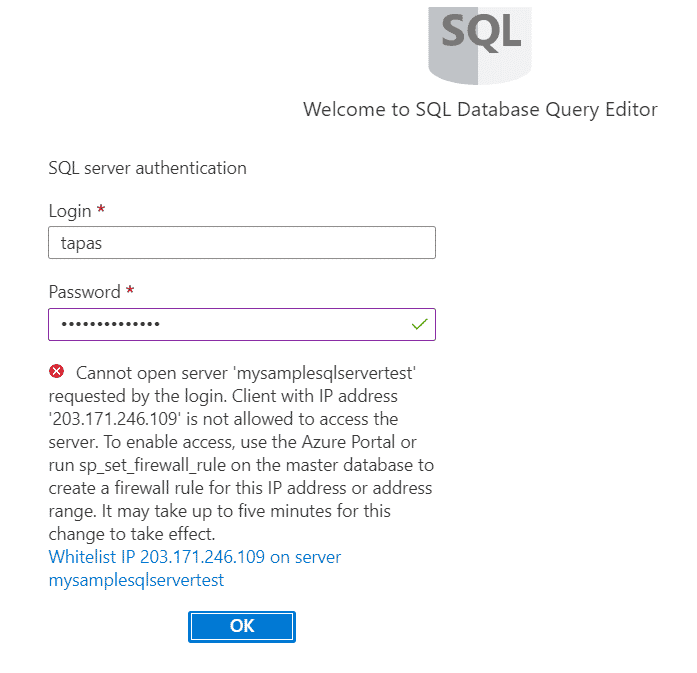
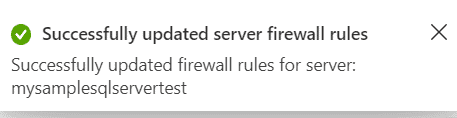
To fix this, click on Whitelist IP 2X.XX.XX.X. Once done, click on OK to login.
Read: Read Azure App Settings from .NET
Working with Query Editor in Azure SQL
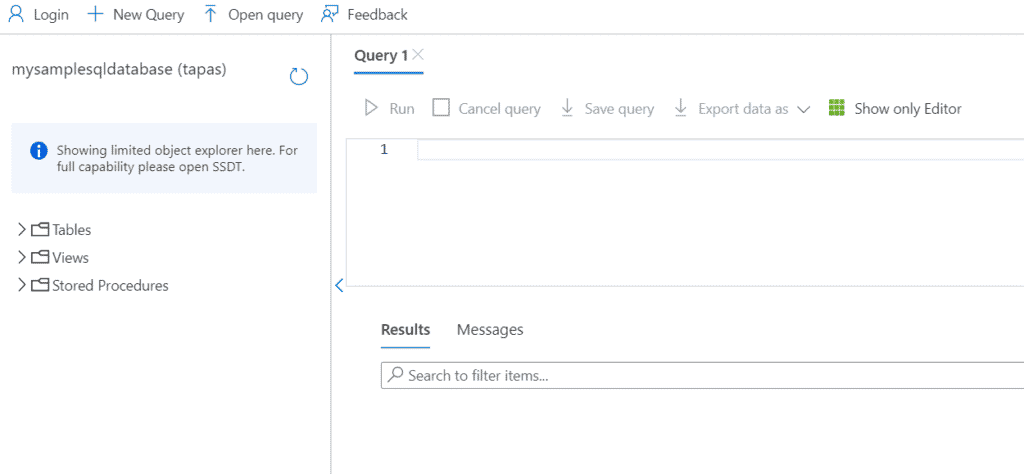
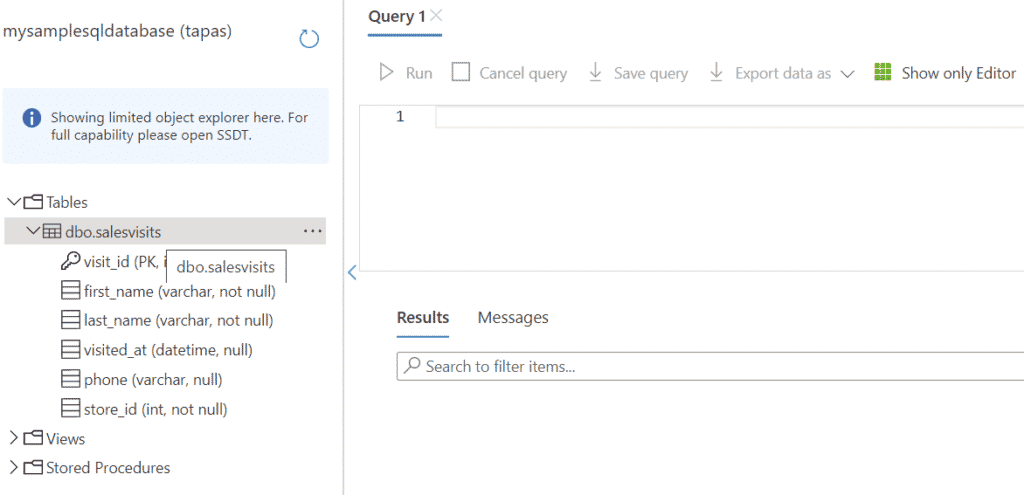
Now, the query editor can be viewed. In the below image, we can see Query1. We can use our SQL commands to execute queries and the output will pop-up in the Results. We can also expand Tables, Views, and Stored Procedures.
Now, let’s execute an SQL create table query, as depicted below:
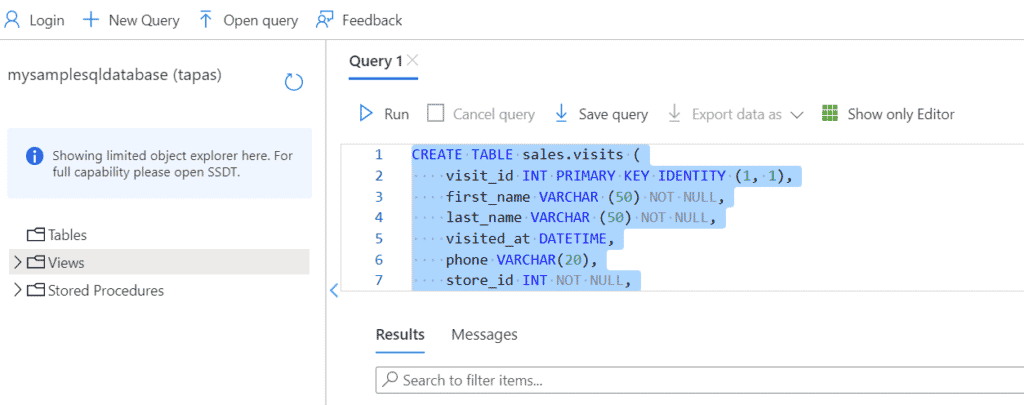
After execution, you can see the table is created:
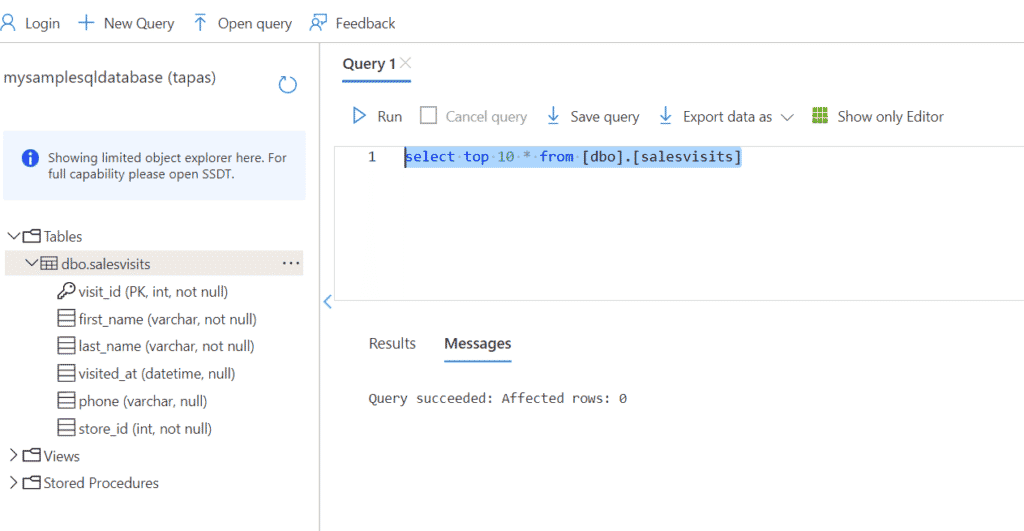
Finally, execute an SQL select query to list records from the table created above.
Conclusion to Using Database Query Editor for Azure SQL
I hope this article will be helpful for developers to start using the Azure SQL Query Editor. We learned through a step-by-step process how to create a single database in Azure SQL, how to write a query, and check the results. Happy Coding!
Read more Azure database programming and cloud computing tutorials.