

This tutorial dives into the nitty gritty of IBM DB2 Universal Database (UDB) application development using the DB2 Development Add-In for Visual Studio .NET. It walks through the development of a simple database application (an employee management system that views employee details) using Visual C#. A basic knowledge of these products is necessary to complete the tutorial, as are the following system and software requirements:
- A basic P4 Machine with 512 MB RAM and about 20 GB HDD space Windows 2000 and above
- A personal copy of DB2 UDB (The demonstration uses the Personal Edition of DB2 UDB 8.1 for Windows, but any edition will do.)
- Microsoft Visual Studio.NET 2003 (Professional, Enterprise Developer, or Enterprise Architect)
- An install of the DB2 Add-in, once you have completed the installation of DB2 UDB
Once you’ve verified that you meet the requirements, you’re ready to develop your employee management system.
Install the DB2 Add-In
First, if you have not installed the DB2 Add-In for VS.NET, follow these steps: Click on Start -> Programs -> IBM DB2 -> Setup Tools -> Register Visual Studio Add-Ins as shown in Figure 1.
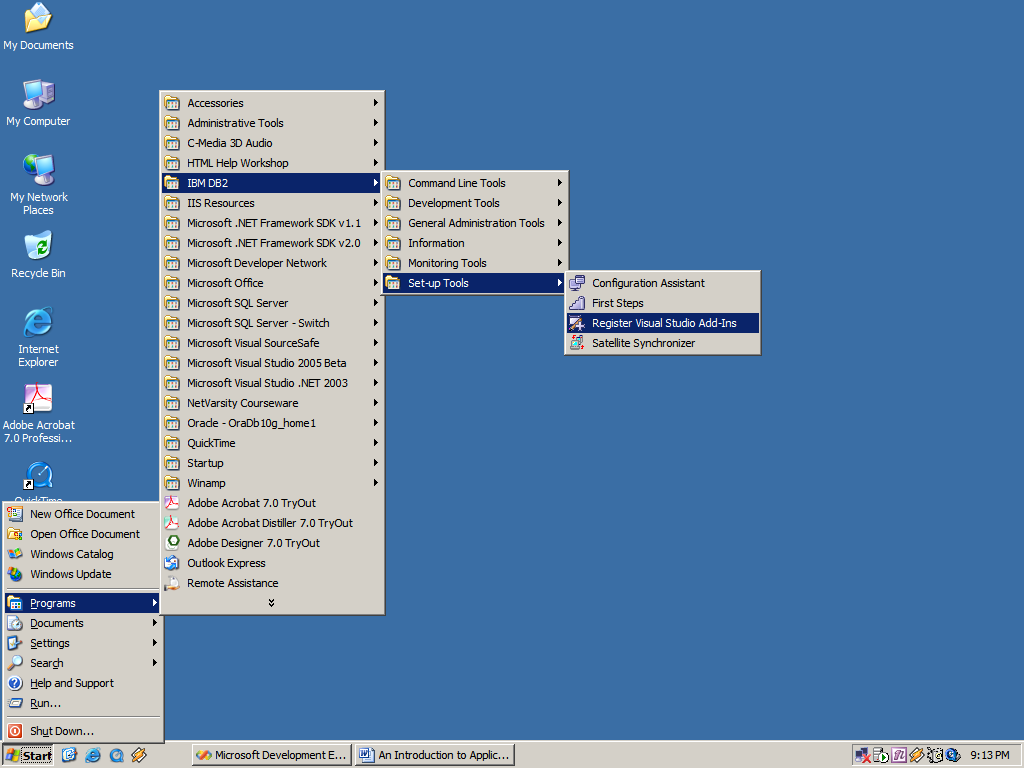
Figure 1. Install the DB2 Add-In for VS.NET
You will see a command prompt window stating that the Add-Ins were installed successfully.
Next, you need to start a new DB2 project within VS.NET. Start VS.NET and you will notice a new icon called DB2 Tools along with the other languages you have installed. Create a new project and give it a sensible name, such as EmployeeApp (as shown in Figure 2).
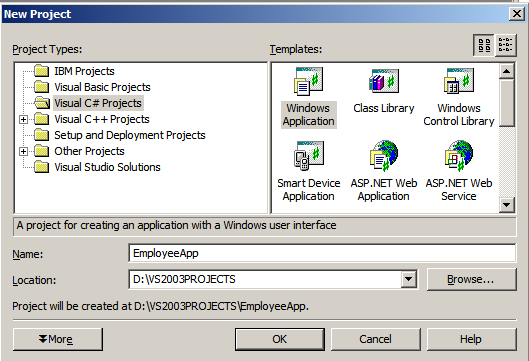
Figure 2. Create and Name Your New DB2 Your Project
The screen shown in Figure 3 will appear by default.
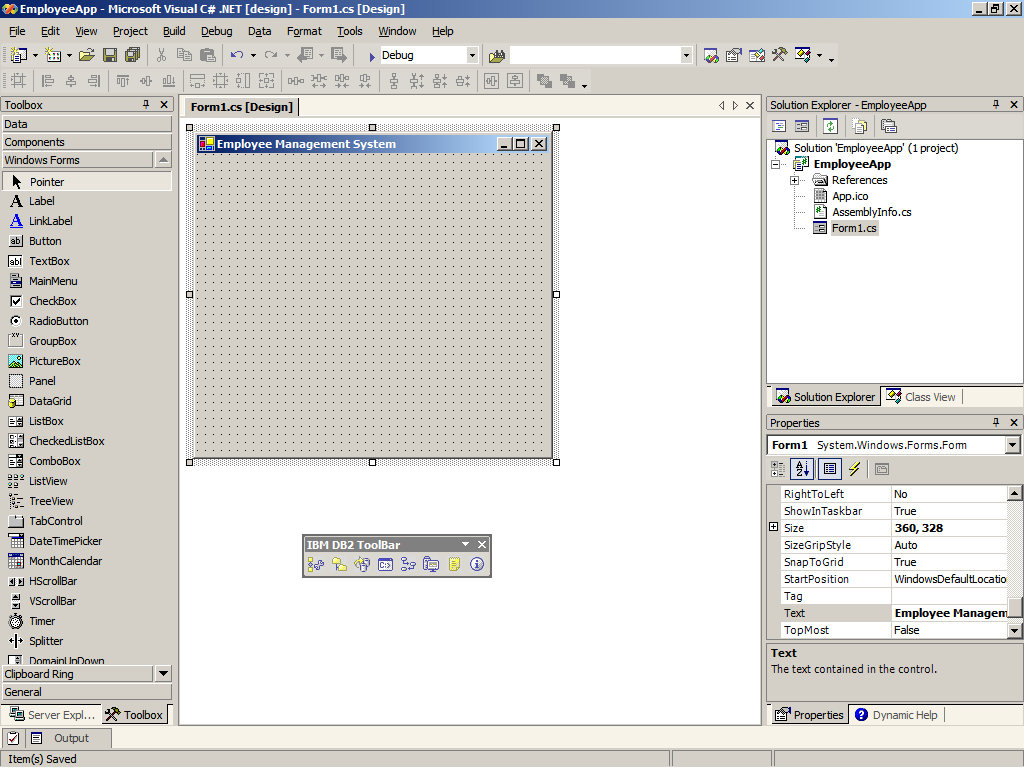
Figure 3. Your New DB2 Your Project
You will notice a new toolbar called the IBM DB2 Toolbar in your IDE. (For convenient viewing, I dragged the toolbar below the form in Figure 3 above.) This toolbar isn’t just a collection of icons; it acts as an interface between your DB2 Client tools and your DB2 Server. You can launch the Control center within VS.NET using it, instead of going through the traditional launch procedure.
You are now ready to start building your application.
Establish a Database Connection and Configure Your Data Adapter
Establish a connection to the database using the appropriate connection and data adapter. This tutorial uses the DB2 Data Adapter Control to build a database connection and fetch the Employees Table from the SAMPLE database provided by DB2 UDB.
Drag and drop a DB2 Data Adapter onto your form. Rename it to db2Adp under the properties window. Click on Configure Data Adapter. You are presented with the DB2 Data Adapter Configuration Wizard (see Figure 4).
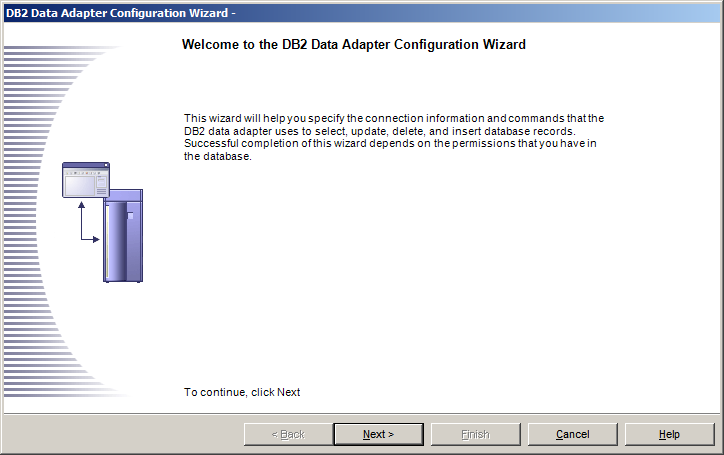
Figure 4. The DB2 Data Adapter Configuration Wizard
Depending on the permissions set by your DBA, you will be able to access the respective database objects. Click Next, and you will be presented with the screen in Figure 5.
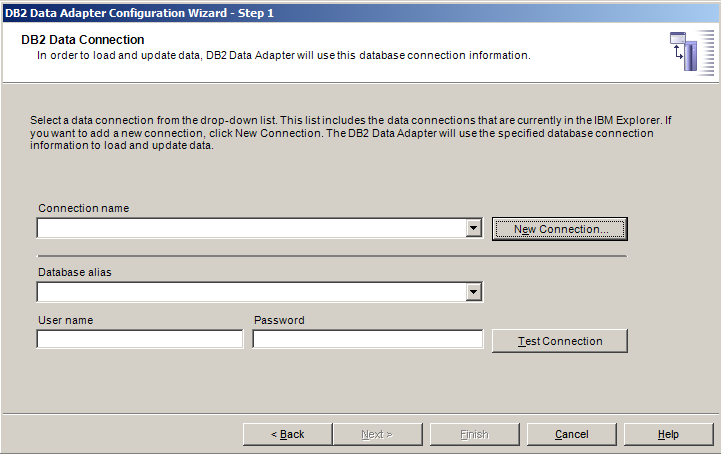
Figure 5. DB2 Database Connection Information Screen
You now specify the parameters for each database connection. Since you have not established a connection yet, you need to do so first. Click the New Connection Button and you will be presented with the main connection parameters dialog, wherein you should specify the following details:
- Connection Name: This is your connection name. (Your Database Name becomes your connection name.)
- Database Alias: You can specify the database to which you wish to connect. In this case, you connect to the SAMPLE database.
- User Name: This is your db2 username. (Use your credentials.)
- Password: This is your db2 password. (Use your credentials.)
Click on Test Connection. You should get the result shown in Figure 6.
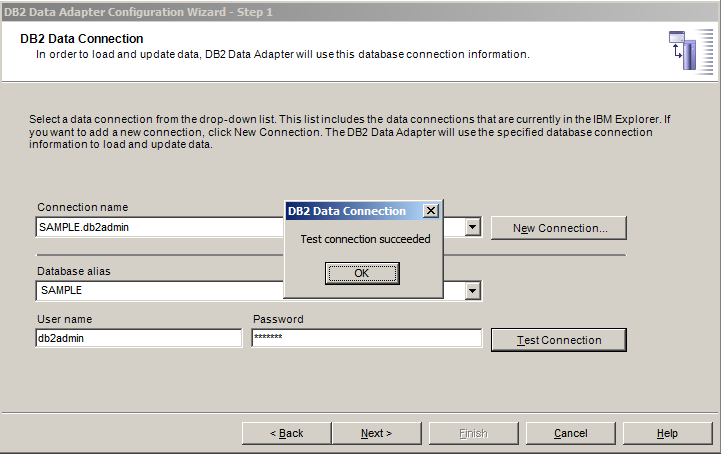
Figure 6. Successful Connection Test
Click Next and deselect all the default options as shown in Figure 7, since you are only going to display data.
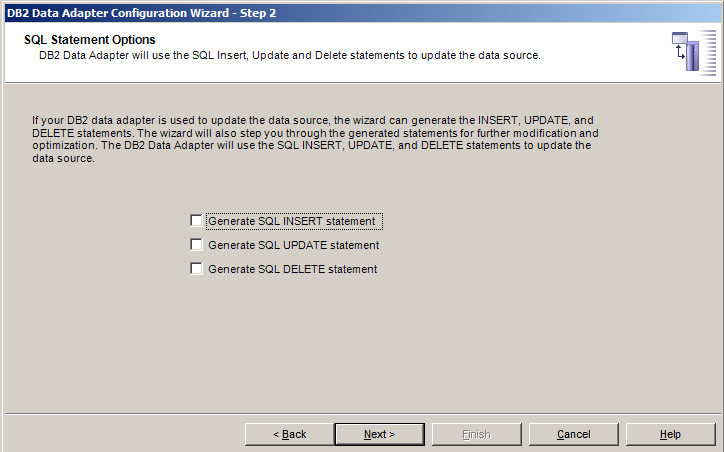
Figure 7. Deselect All the SQL Statement Options
Next, you are presented with a query editor that allows you to enter custom SQL statements. Since you will retrieve the details of all employees, enter the following query, replacing DATABASEARCHITECT with your schema and user credentials:
SELECT * FROM DATABASEARCHITECT.EMPLOYEE AS EMPLOYEE;
The query should look like the one in Figure 8.
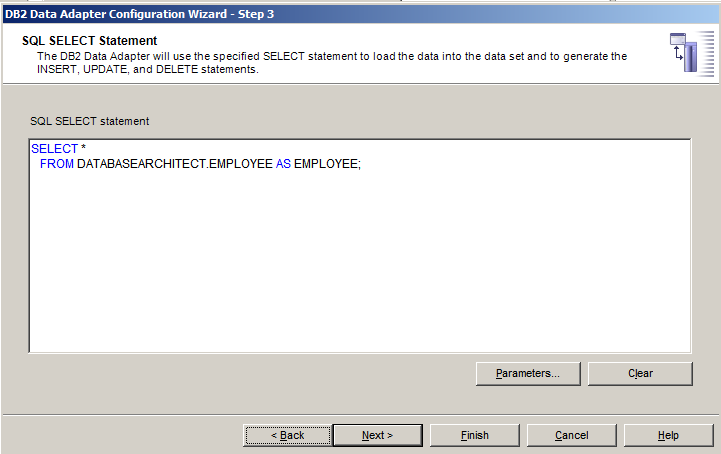
Figure 8. Query to Retrieve the Details of All Employees
Click Next. As Figure 9 shows, the Summary screen appears with all the parameters.
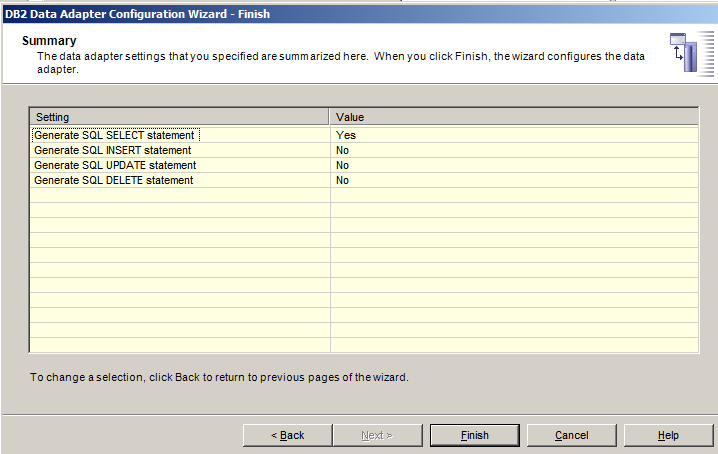
Figure 9. The Summary Screen with All the Parameters
Click Finish and you’ve configured your DB2 database to listen to your application.