

In this day and age of powerful graphic-orientated computing devices, it’s always useful to know exactly what you’re dealing with when you have to analyze an image file. With an ever increasing global online photo album, containing millions of images across millions of websites, we as a society put millions, maybe even billions, of new photographs, images, sketches, and many other content types on line on a daily basis.
.NET includes some useful functionality to help you make use of all of these images, but specifically it makes it quite easy for you to extract basic details, such as height, width, image type, and so on. These functions allow you to easily classify and catalogue the images you need to deal with.
What Exactly Is Meta Data?
In short meta data is, data about data.
Yes, I expected that phrase to make you do a double take, and don’t worry. I did exactly the same when I first heard it.
A typical image has a number of properties that we use to classify it. At a base level, the first things most people think of are image width, image height, and how many colours the image contains, but the fact of the matter is, many images actually contain a staggering amount more than this. In some cases the make and model of camera used to take the photo, or the software used to create the image are included.
This “data” is often embedded inside the image itself, and often in a format that is specific to the image type being handled. The meta data for this data (the description of the data, if you like) is often also held inside the image, but in a slightly more universal way, by using data schemes such as EXiF.
The basic data, such as width and height, is often worked out from decoding the image type by whatever software was used to decode the image, because it generally needs to know this information to decode it reliably.
So, How Do You Decode the Image?
Under .NET, we have a quite powerful graphics API known as GDI+. GDI+ is the API that powers most of the graphics you see in a typical Windows Forms application, and if you’ve ever drawn anything onto a form using .NET code, you’ve almost certainly used it.
In our case, we’re going to be looking at a class called “System.Drawing.Bitmap”, which is the main GDI+ assembly used to load image data into a .NET application. The newer “Windows Presentation” framework also has a new API for dealing with the same tasks, which we’ll cover in the future.
First things first. Fire up Visual Studio, and create a simple console mode application.
Make sure your using list has the following assemblies added to it:
using System;
using System.Drawing;
using System.Drawing.Imaging;
Then, find some images to test with. I added a ‘Jpeg’, ‘Png’, ‘Bmp’, and ‘Tif’ image to my project by using the “Add Existing Item” menu option on my project in Solution Explorer.
After I added these four images, I then set their build action property to “Content” and the “Copy to Output Directory” property to “Copy if Newer”. This ensured that, when I built my project and ran it, the images would be copied to the same folder so the application could find them.
I choose four different image types so that you can get an idea of the level of information that can be obtained from the different formats.
My Solution Explorer looks like Figure 1:
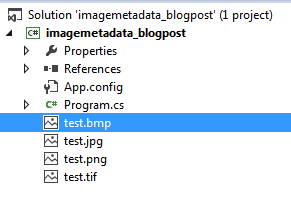
Figure 1: The Solution Explorer files
Once you have an image to test with, and have your project set up, the next step is to add the following code inside your “Main” method:
Bitmap MyPhoto = new Bitmap(@"test.jpg");
Place a break point on this line, and press F5 to run your application.
When the application stops at your break point, press F10 once to execute and step over, and then look in your debugger “Autos” tab. You should see your Bitmap object and, if you expand it, you should see the basic properties of your image, something like what’s shown in Figure 2:

Figure 2: The image’s properties
As you can see, you immediately have access to the basic properties, such as Height and Width. Other useful properties are the Horizontal and Vertical resolution, which are used if you need to print the image, for example, so you can get the scaling correct.
One property you might imagine would be there, would be a property telling you the image type. Unfortunately, there is no such property on the Bitmap object to tell you this (and judging by the amount of times the question gets asked on stack overflow, I can’t see any reason why it’s not), all is not lost, however.
If you look closely, you can see a property labelled as “RawFormat”. More specifically, you can see that this property has a further sub-property which is, in fact, just a normal .NET GUID property. This GUID is actually (or should be) a match to the various GUIDs that .NET keeps available in the Windows Registry, all of which are also available in the “ImageFormat” enumeration that’s available as part of the “System.Drawing” assembly.
If you switch to your “Watch” debugging tab, and enter “MyPhoto.RawFormat” as a watch variable, then just below it, enter “ImageFormat.Jpeg”, and then examine the values in your debugger, you should be able to see that they both have the same GUID value:

Figure 3: Showing the same GUID value
Using this information, you now can easily construct a very simple set of if/then statements as follows, to detect the image type.
if(MyPhoto.RawFormat.Guid.Equals(ImageFormat.Jpeg.Guid))
{
   // DO something here to set a variable indicating file
   // is a JPEG
   Console.WriteLine("Image Type is JPEG");
}

if (MyPhoto.RawFormat.Guid.Equals(ImageFormat.Png.Guid))
{
   // DO something here to set a variable indicating file
   // is a PNG
   Console.WriteLine("Image Type is PNG");
}

if (MyPhoto.RawFormat.Guid.Equals(ImageFormat.Bmp.Guid))
{
   // DO something here to set a variable indicating file
   // is a BMP
   Console.WriteLine("Image Type is BMP");
}

if (MyPhoto.RawFormat.Guid.Equals(ImageFormat.Tiff.Guid))
{
   // DO something here to set a variable indicating file
   // is a TIFF
   Console.WriteLine("Image Type is TIFF");
}
While this solution works, going by modern coding standards it’s not quite elegant and, what’s more, it’s certainly going to be very error prone, especially if you decide to expand things to include all the different possible graphics formats supported by the assembly. With a little bit of creative thinking, however, you can make the decision logic a lot simpler and a lot less error prone.
Dictionary<String, String> ImageTypeDictionary =
   new Dictionary<String, String>();

var imageFormats =
   typeof (ImageFormat).GetProperties(System.Reflection.BindingFlags.
         Public | System.Reflection.BindingFlags.Static)
      .ToList()
      .ConvertAll(property => property.GetValue(null, null));

foreach (var format in imageFormats)
{
   var formatType = format as ImageFormat;
   if (formatType != null)
      ImageTypeDictionary.Add(formatType.Guid.ToString(),
      format.ToString() );
}

Console.WriteLine("Image is of type {0}",
   ImageTypeDictionary[MyPhoto.RawFormat.Guid.ToString()]);
Although this is still a little cumbersome to use (mainly due to the constant Guid.ToString conversion), it’s definitely an improvement to using a large list of multiple if then statements. In truth, though, we can even tame that by doing something like creating a hash for the GUID and storing that in the lookup dictionary instead.
I leave that up to you as an exercise, however. If you look at the following code, you should also realise that the loop to fill the types dictionary only needs to be created once, so you could quite easily turn this into an extension method, something like the following:
using System;
using System.Collections.Generic;
using System.Drawing;
using System.Drawing.Imaging;
using System.Linq;
using System.Reflection;

namespace imagemetadata_blogpost
{
   public static class ExtensionMethods
   {
      private static readonly Dictionary<String, String>
         _imageTypeDictionary =
         new Dictionary<String, String>();

      static ExtensionMethods()
      {
         var imageFormats =
            typeof(ImageFormat).GetProperties(BindingFlags.Public
                  | BindingFlags.Static)
               .ToList()
               .ConvertAll(property =>
                  property.GetValue(null, null));

         foreach (var format in imageFormats)
         {
            var formatType = format as ImageFormat;
            if (formatType != null)
               _imageTypeDictionary.Add(formatType.Guid.ToString(),
               format.ToString());
         }

      }

      public static string ImageType(this Bitmap bitmap)
       {
         string result;

         try
         {
            result =
               _imageTypeDictionary[bitmap.RawFormat.Guid.ToString()];
         }
         catch (Exception)
         {
            result = "Unknown";
         }

         return result;
      }


   }


}
This now allows you to do something like the following:
if(MyPhoto.ImageType() == "Jpeg")
{
   // DO something with a Jpeg image
}
Tidying things up in an extension method like this still leaves room for improvement. You might, for example, choose to return an enumerated value. One other rather nice solution I’ve seen floating around is to use the collection returned by “ImageCodecInfo.GetImageDecoders()” and then use this to extract and return an actual HTTP mime type based on the loaded image. This feature comes in quite handy for web API end points returning images to a browser client.
For now, however, we’ll leave this post here. In a future post, I’ll cover using the property item collection of the Bitmap class to get things like Camera Model, Colour Balance, and all sorts of other interesting info.
In Conclusion
This post is a rather special post for the .NET Nuts and Bolts column. Why, you might ask? Well, it marks a year’s worth of posts. A year ago, I took over writing this column on behalf of “CodeGuru.Com”. I’ve learned a lot over the last 12 months and I hope to learn more in the coming months and years.
I’ve had a lot of fun writing these posts, and often exploring dark corners of the .NET ecosphere, a lot of which was new even to me. I hope I continue to get suggestions and requests for posts to write and assemblies to document and demonstrate, along with other interesting nuggets of .NET code.
If you’ve got something you’d like me to cover, please feel free to reach out to me on Twitter as ‘@shawty_ds’, or hunt me down on the world wide web (I’m not difficult to find, I promise) by popping ‘Shawty_ds’ into Google.
Until next time, happy imaging.