This article explains step by step how to install features, how to add custom pages and how to add custom bread crumbs to the above web pages in SharePoint Central Administration 2007.
Part 1: Installing features and adding breadcrumbs to custom web pages in SharePoint Central Administration
Steps to be followed:
- Creating and installing features in Central Administration.
- Creating and placing custom web pages in Central Administration.
- Adding breadcrumbs to above custom web pages in Central Administration.
Create Feature.xml and CustomBreadCrumbs.xml
- Create folder (CACAdminPages) in [Installation Drive]/Program files/Common Files/Microsoft Shared/web server extensions/12/Template/Features/
- Create Feature.xml and CustomBreadCrumbs.xml in [Installation Drive]/Program files/Common Files/Microsoft Shared/web server extensions/12/Template/Features/ CACAdminPages
feature.xml <Feature Id="7030911B-BB77-4152-9254-96FEC3F312BB" Title="CAC Administration" Description="CAC Administration" Version="12.0.0.0" Scope="Site" AutoActivateInCentralAdmin="True" ActivateOnDefault="False" AlwaysForceInstall="True" > <ElementManifests> <ElementManifest Location="CustomBreadCrumbs.xml"/> </ElementManifests> </Feature> - The Id in above feature.xml file is the GUID value
- Open Visual studio
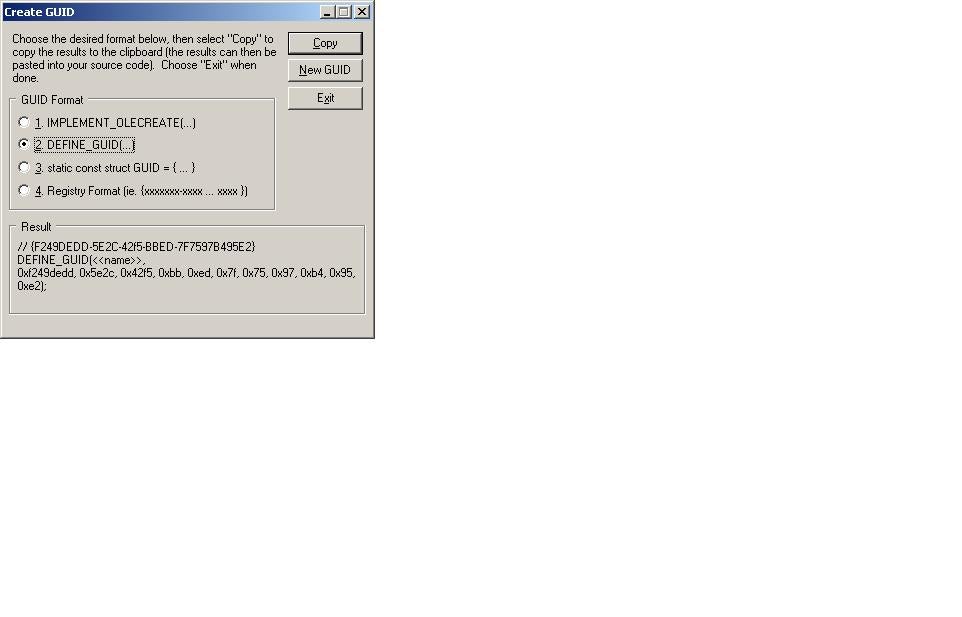
- Go to Tools menu and select “Create GUID” menu item.

The Create GUID screen - Select the default option “Define GUID” as given in the above screen and click ok
- The auto generated GUID should be copied and pasted in the Id value of the Feature.xml file.
- Feature.xml refers to the other xml file CustomBreadCrumbs.xml in the location property of ElementManifest tag.
- Create CustomBreadCrumbs.xml
CustomBreadCrumbs.xml <?xml version="1.0" encoding="utf-8"?> <Elements > <CustomActionGroup Id="CcAdministration" Location="Microsoft.SharePoint.Administration.Operations" Title="Custom Breadcrumb" Sequence="1000" /> <CustomAction Id="Management" GroupId="CcAdministration" Location="Microsoft.SharePoint.Administration.Operations" Sequence="10" Title="Navigate To Page 1"> <UrlAction Url="/_admin/CACAdminPages/CustomPageOne.aspx"/> </CustomAction> <CustomAction Id="Management" GroupId="CcAdministration" Location="Microsoft.SharePoint.Administration.Operations" Sequence="10" Title=" Navigate To Page 5"> <UrlAction Url="/_admin/CACAdminPages/CustomPageFive.aspx"/> </CustomAction> </Elements>- Id of CustomActionGroup tag (ie CcAdministration should be same as the GroupId of CustomAction tag)
- Location property of CustomActionGroup tag is used to specify where the links should appear. In the above example it appears in Operations tab of Central Administration.
- Title that is given in CustomActionGroup tag ie “Custom Breadcrumb” appears as header under Operations tab.
- The text that is given in the Title property of the CustomAction tag is the name of the hyperlink which appears under “Custom Breadcrumb”.
- The above xml code displays the hyperlinks in Central Administration Operations tab as shown in the screen “Hyperlinks screen”
- Two Hyperlinks named “Navigate To Page 1” and “Navigate to Page 5” are displayed under “Custom Breadcrumb” header. On click of the “Navigate to Page 5” hyperlink CustomPageFive.aspx opens as Url property of UrlAction tag is set to CustomPageFive.aspx.
NOTE: We need to add the aspx pages to refer in the Url property of the UrlAction tag. That we can see in the next step. For time being lets assume that we have the aspx pages already created.
- Install the feature.xml file in order to make the hyperlinks appear as shown in the above image.
Navigate to [Sharepoint Installation Drive]\Program Files\Common Files\Microsoft Shared\web server extensions\12\BIN in Visual Studio Command Prompt and then execute the below command to install the feature.
Stsadm -o installfeature -name [folder name] { which we have created to place the feature.xml and CustomBreadCrumbs.xml, in our case it is Custom Breadcrumb}NOTE: To uninstall the feature forcefully
Stsadm -o uninstallfeature -name [folder name] -force - Now check whether the hyperlinks are appearing in the Central Administration.As the aspx pages are not yet created don’t click on hyperlinks otherwise displays error message.