

In the previous articles of the series we’ve seen how to create WP7 Silverlight applications, use the app bar, navigate through the pages and managing the life cycle of the application and persist application data. In this new installment we’ll discuss two controls: pivot and panorama.
Overview
These two controls are available in the Microsoft.Phone.Controls namespane from the assembly with the same name. They are similar controls allowing you to organize the visual content of your page into smaller parts (subpages or columns), which you can navigate through by sweeping the finger on the screen. Basically pivot and panorama are like a tab control for desktop applications. Each “subpage”, called item (pivot item or panorama item) has a header and you can also navigate through the items by taping on the header. Both look like a big sheet or canvas grouped into subpages, and you have a view port into one of the subpages at a given time.
Pivot and panorama differ in the way the control title and the headers look and how the transition from one item to another occurs, the transition being smoother with panorama.
The following image from Microsoft’s UI Design and Interactions Guide for Windows Phone 7 shows how a panorama control looks like. The control has one big title, which can be visible only partially at a time, as you navigate through the items (of course, you can tweak that and use a text and an image, like a logo, or just an image). Each item has a header with a text. The rest of the page is for the content of the item, which can be anything.

On the other hand, the pivot, shown in the following image from the same Microsoft document, has a much smaller title, leaving more space for the content of each item. Header items are similar to panorama’s.

Using one or the other requires same development effort and in fact is very easy to switch between the two controls as we will see in this article. You can read the guidelines paper for more information and suggestions on the two controls.
Demo application
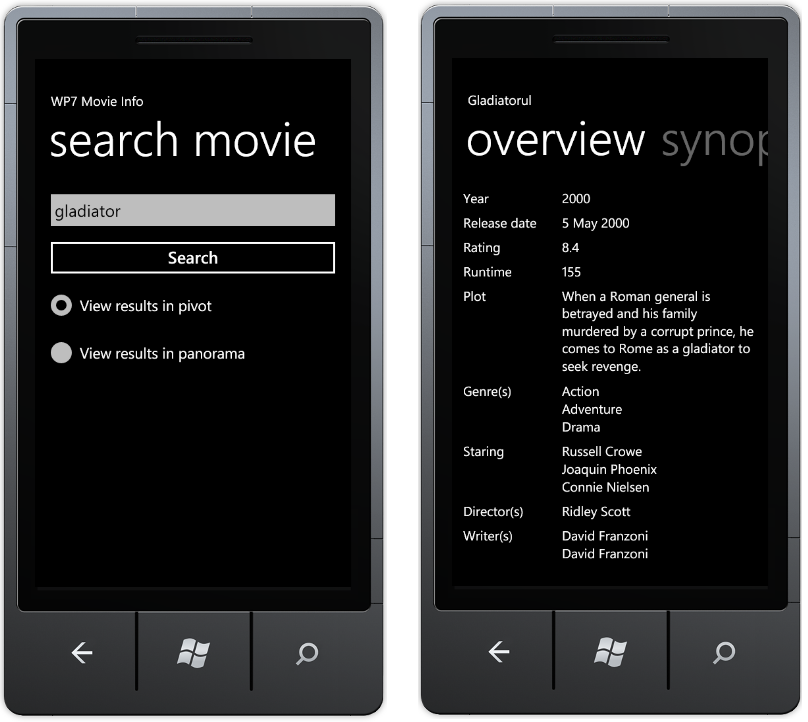
In this article we’ll create a simple application that will show how to use the pivot and panorama controls and what the differences between the two are. This application will have a main page with a text block that allows us to enter the title of a movie, a Search button to search the movie in the IMDB database and two radio buttons that specify in which format the results should be displayed, pivot or panorama. Both controls will have four items:
- overview, with several information about the movie such as release date, plot, main actors, list directors and writers,
- synopsis, listing the summary of the movie,
- cast, displaying a list of the actors, and
- poster, containing the main poster for the movie (as listed in the IMDB database).
The following image shows the main page and the first item of the pivot control displaying results for the “Gladiator” movie.
Note: IMDB does not provide a service to query its database. To retrieve information about a movie I used a modified version of an ASP.NET scrapper API implemented by Abhinay Rathore and available here. What it does is performing a Google search for a movie title with the “I’m Feeling Lucky” option, which automatically directs the result to the IMDB website. The returned HTML page is then parsed with regular expressions to extract data from it. Not the best possible approach, but better than nothing. And anyways, the point of the article is presenting the pivot and panorama controls, and not APIs for fetching movie information.