

Introduction
Windows Phone platform offers rich APIs to capture user input. Not only does the platform offer input via keyboard, but also in the form of touch. Developers can use this ability to create drawing applications using touch inputs.
In “Understanding Touch Support in Windows Phone“, we learned about the touch support available on the Windows Phone platform. We will use this information to build a drawing application that uses touch as input.
Let’s get hands on.
Hands-On
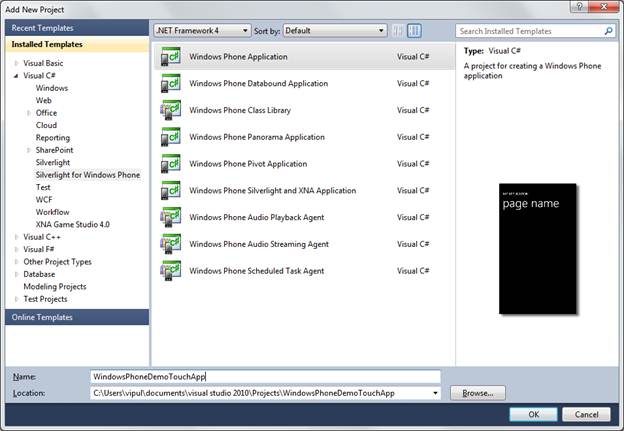
Create a new Silver for Windows Phone project called WindowsPhoneDemoTouchApp.
When prompted, select OS Version 7.1 and click OK.
Windows Phone Application
Open the default MainPage.xaml and remove the default Grid that is created. We should now have only the following in the MainPage.xaml.
<phone:PhoneApplicationPage
    x:Class="WindowsPhoneDemoTouchApp.MainPage"
    xmlns="http://schemas.microsoft.com/winfx/2006/xaml/presentation"
    xmlns:x="http://schemas.microsoft.com/winfx/2006/xaml"
    xmlns:phone="clr-namespace:Microsoft.Phone.Controls;assembly=Microsoft.Phone"
    xmlns:shell="clr-namespace:Microsoft.Phone.Shell;assembly=Microsoft.Phone"
    xmlns:d="http://schemas.microsoft.com/expression/blend/2008"
    xmlns:mc="http://schemas.openxmlformats.org/markup-compatibility/2006"
    mc:Ignorable="d" d:DesignWidth="480" d:DesignHeight="768"
    FontFamily="{StaticResource PhoneFontFamilyNormal}"
    FontSize="{StaticResource PhoneFontSizeNormal}"
    Foreground="{StaticResource PhoneForegroundBrush}"
    SupportedOrientations="Portrait" Orientation="Portrait"
    shell:SystemTray.IsVisible="True">

    <!--LayoutRoot is the root grid where all page content is placed-->


    <!--Sample code showing usage of ApplicationBar-->
    <!--<phone:PhoneApplicationPage.ApplicationBar>
        <shell:ApplicationBar IsVisible="True" IsMenuEnabled="True">
            <shell:ApplicationBarIconButton IconUri="/Images/appbar_button1.png" Text="Button 1"/>
            <shell:ApplicationBarIconButton IconUri="/Images/appbar_button2.png" Text="Button 2"/>
            <shell:ApplicationBar.MenuItems>
                <shell:ApplicationBarMenuItem Text="MenuItem 1"/>
                <shell:ApplicationBarMenuItem Text="MenuItem 2"/>
            </shell:ApplicationBar.MenuItems>
        </shell:ApplicationBar>
    </phone:PhoneApplicationPage.ApplicationBar>-->

</phone:PhoneApplicationPage>
Now, we need to add a few objects to enable an area to capture and render the user touches. We need a Grid object to capture user input, and an InkPresenter to render the information we have captured. We also need a dictionary to store which finger strokes we captured so that we can render it appropriately.
Change the MainPage class’s declaration as show below.
public partial class MainPage : PhoneApplicationPage
    {
        InkPresenter myInkPresenter = new InkPresenter();
        Grid grid = new Grid { Height = 800, Width = 480 };
        Image backGnd = new Image();
        Popup popup = new Popup { IsOpen = true };
        Dictionary<int, Stroke> strokes = new Dictionary<int, Stroke>();
Next, the constructor needs to be updated so wireup the grid object.
public MainPage()
        {
            InitializeComponent();
            this.grid.Children.Add(this.backGnd);
            this.grid.Children.Add(this.myInkPresenter);
            this.popup.Child = this.grid;

        }
To capture touches, we need to trap the FrameReported event. We do this in the OnNavigatedTo and OnNavigatedFrom events.
protected override void OnNavigatedTo(System.Windows.Navigation.NavigationEventArgs e)
        {
            base.OnNavigatedTo(e);
            this.popup.IsOpen = true;
            Touch.FrameReported += Touch_Reported;
        }
protected override void OnNavigatedFrom(System.Windows.Navigation.NavigationEventArgs e)
        {
            base.OnNavigatedFrom(e);
            this.popup.IsOpen = false;
            Touch.FrameReported -= Touch_Reported;
        }
Finally, we write the code to implement the Touch_Reported method.
We need to capture the touch points using the GetTouchPoints method on the TouchFrameEventArgs object. For each TouchPoint, we will inspect whether it was a touch action that was down, up or move and process the action accordingly. For down events, we will construct a stroke object and add it to the InkPresenter instance.
void Touch_Reported(object sender, TouchFrameEventArgs e)
        {

            TouchPointCollection tpCollection = e.GetTouchPoints(this.myInkPresenter);

            foreach (TouchPoint tp in tpCollection)
            {
                if (tp.Action == TouchAction.Down)
                {
                    Stroke stroke = new Stroke();
                    stroke.DrawingAttributes.Color = Color.FromArgb(1, 0, 255, 0);
                    stroke.StylusPoints.Add(new StylusPoint(tp.Position.X, tp.Position.Y));
                    this.strokes[tp.TouchDevice.Id] = stroke;
                    this.myInkPresenter.Strokes.Add(stroke);
                }
                else if (tp.Action == TouchAction.Move)
                {
                    if (this.strokes.ContainsKey(tp.TouchDevice.Id))
                        this.strokes[tp.TouchDevice.Id].StylusPoints.Add(new StylusPoint(tp.Position.X, tp.Position.Y));
                }
                else if (tp.Action == TouchAction.Down)
                {
                    if (this.strokes.ContainsKey(tp.TouchDevice.Id))
                        this.strokes.Remove(tp.TouchDevice.Id);
                }
            }
        }
Now, our application is ready. Compile and run this. If you have any issues following along, you can download the source of the application below.
Note that touch events only work with real devices and not in the emulator. When testing the application, please be sure to select Windows Phone Device as the target.
When you run the application on the device, you will notice that all user touches are rendered as strokes on the screen.
Summary
In this article, we learned about creating a touch based drawing application in Windows Phone. Please be very careful to detach FrameReported handlers as soon as possible. Unintended consequences can occur if an application navigates away from the page.
About the author
Vipul Patel is a Program Manager currently working at Amazon Corporation. He has formerly worked at Microsoft in the Lync team and in the .NET team (in the Base Class libraries and the Debugging and Profiling team). He can be reached at vipul_d_patel@hotmail.com