

Visual Studio IDE is a highly extensible and customizable application. In this article I will take you through a few extensibility features of Visual Studio that are not only helpful but are nice to know.
Visual Studio 2010 provides a separate section for the extensibility projects as shown in Fig 1.0.
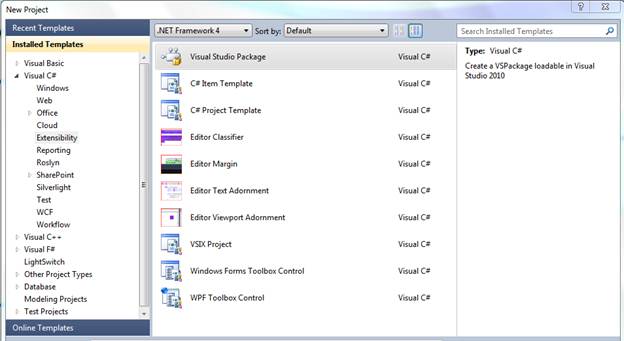
Fig 1.0: Visual Studio 2010 New Project
Visual Studio Shell
Visual Studio Shell is the skeleton of the actual Visual Studio, which provides all basic IDE features like the code editor, solution explorer, etc. both not integrated with any programming languages. Visual Studio shell is available in two modes.
Integrated Mode
Visual Studio Shell works in an integrated mode with the actual Visual Studio IDE. You can integrate your own languages and tools into this shell and can improvise it to work as a development environment for your own language. The integrated mode Visual Studio Shell can be downloaded from here.
Isolated Mode
This mode of the shell is completely independent of the Visual Studio IDE. You can use it to develop power tools like a custom source code editor or your own branded IDE with its own features. Since most of the basic IDE features are provided by the shell it saves you a great amount of development effort. You only concentrate on the extra features required for your custom IDE. The isolated mode Visual Studio Shell can be downloaded from here.
Templates
If you are a developer wondering how Visual Studio manages to put the default content for a class file for example, then the answer for you is it’s all the magic done through by the Visual Studio templates. As the name explains these are the pre-defined templates that are installed along with the Visual Studio. Visual Studio templates are .zip files, which have the template files with place holders and one .vstemplate file containing the metadata about the template. These templates are language specific since the syntax is not the same between two languages. There are two major template types in Visual Studio.
2.Project Template The list of templates that are displayed when you select Add New Project are the in-built project templates. These templates are located at C:\Program Files\Microsoft Visual Studio 10.0\Common7\IDE\ProjectTemplates\CSharp.
The important point here to note is that Visual Studio allows you to create your own project / item template, which can be used in your project or can be shared with your team.
Creating Your Own Project Template
In this section let’s look at creating a project template that is a class library, has a class, an interface and refers only to the library System. The simplest way is to create such a project and save all the files. Take the .csproj file along with the class and interface files in the project, create a .vstemplate file named MyProject.vstemplate. Add the below XML content to the file.
<?xml version="1.0" encoding="utf-8"?>
<VSTemplate Version="3.0.0" Type="Project" xmlns="http://schemas.microsoft.com/developer/vstemplate/2005">
       <TemplateData>
              <Name>MyProjectTemplate</Name>
              <Description>This is my custom project</Description>
              <Icon></Icon>
              <TemplateID>Microsoft.CSharp.ClassLibrary</TemplateID>
              <ProjectType>CSharp</ProjectType>
              <RequiredFrameworkVersion>2.0</RequiredFrameworkVersion>
              <SortOrder>20</SortOrder>
              <NumberOfParentCategoriesToRollUp>1</NumberOfParentCategoriesToRollUp>
              <CreateNewFolder>true</CreateNewFolder>
              <DefaultName>MyProject</DefaultName>
              <ProvideDefaultName>true</ProvideDefaultName>
       </TemplateData>
       <TemplateContent>
              <Project File="ClassLibrary1.csproj" ReplaceParameters="true">
                     <ProjectItem ReplaceParameters="true" TargetFileName="Properties\AssemblyInfo.cs">AssemblyInfo.cs</ProjectItem>
                     <ProjectItem ReplaceParameters="true" OpenInEditor="true">MyClass.cs</ProjectItem>
                     <ProjectItem ReplaceParameters="true" OpenInEditor="true">MyInterface.cs</ProjectItem>
              </Project>
       </TemplateContent>
</VSTemplate>
Zip all the files into a single file and place it in C:\Users\<user name>\Documents\Visual Studio 2010\Templates\ProjectTemplates\Visual C#\. Now open up Visual studio 2010 and select Add New Project. In the project list notice the MyProjectTemplate is listed as shown in Fig 2.0.
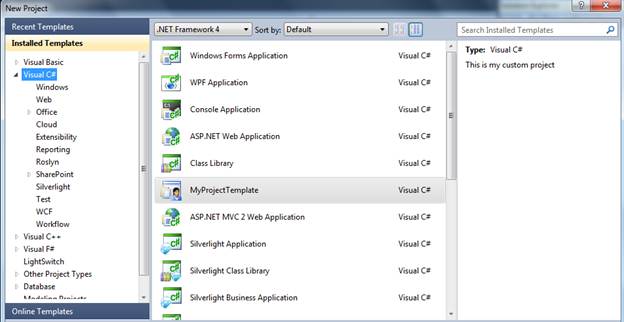
Fig 2.0: MyProjectTemplate
When you create the MyProjectTemplate project you will find the expected items in the project as configured in the template. Fig 2.1 shows the sample project structure.
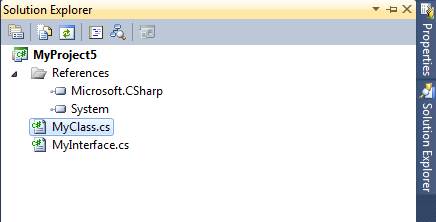
Fig 2.1: Sample project structure
Code Snippets
Code snippets act as a short cut in the Visual Studio code editor for a repeatedly used code format, like a property with a get and set accessors. To insert such a property just type prop and do a double tab, that is a property is created with a get and set accessor. The in-build code snippets are available at C:\Program Files\Microsoft Visual Studio 10.0\VC#\Snippets\1033\Visual C#\ and are simple XML files. These code snippets can also be extended. Extension of the code snippet file should be .snippet. The example below is a sample snippet to insert code where text with the current date is written to the console.
<?xml version="1.0" encoding="utf-8" ?>
<CodeSnippets  xmlns="http://schemas.microsoft.com/VisualStudio/2005/CodeSnippet">
       <CodeSnippet Format="1.0.0">
              <Header>
                     <Title>cd</Title>
                     <Shortcut>cd</Shortcut>
                     <Description>Code snippet for to print a custom text with current date.</Description>
                     <Author>Arun Karthick</Author>
                     <SnippetTypes>
                           <SnippetType>Expansion</SnippetType>
                     </SnippetTypes>
              </Header>
              <Snippet>
                     <Code Language="csharp">
                           <![CDATA[Console.WriteLine("Today's date is {0}", DateTime.Now.Date);]]>
                     </Code>
              </Snippet>
       </CodeSnippet>
</CodeSnippets>
Name the file as cd.snippet and place it at C:\Users\<user name>\Documents\Visual Studio 2010\Code Snippets\Visual C#\My Code Snippets\. Now in the code editor type cd and do a double tab, which will insert the below statement.
Console.WriteLine("Today's date is {0}", DateTime.Now.Date);
I hope this article has given an overview about the main features of Visual Studio IDE, which most developers would be interested in. Happy reading!