

What is Node.js
Node.js (also called Node) is an event driven platform to develop fast, scalable network applications. It is based on JavaScript runtime (the same engine that powers Google Chrome). It was created by Ryan Dahl in 2009. It is available for free under the MIT licensing agreement.
Node.js received the InfoWorld Technology of the year award for 2012.
What Node.js Offers (Event-driven Server Side Programming)
Applications can be written in JavaScript and can perform asynchronous IO operations to minimize overhead and maximize scalability. Node does this by telling the operating system to notify it when a new connection is made and goes to sleep to reduce its footprint. When there is a new connection, a callback is executed resulting in only a small heap allocation.
Also, Node has baked in support for eventing by having the event loop as a language construct instead of a library. Typically, this would be a blocking call to process the even loop, however, in its event driven model, there is nothing like a start-of-loop. This behavior is similar to the behavior exhibited by browser JavaScript.
Node has first class support for HTTP.
Azure Support for Node.js
Windows Azure as a cloud platform is open and it allows running applications built using any language, tool or framework. Windows Azure supports applications built in Node.js to run in the cloud. Besides Node.js, Windows Azure supports running applications built in .NET, Java, PHP and others.
Azure Resources for Node.js Developers
Microsoft offers great support for Node.js developers targeting the Windows Azure platform. It offers the “Windows Azure SDK for Node.js”, a single download, which contains (1) Node.js for Windows, and (2) Windows Azure PowerShell support for Node.js.
Developers need to only install this SDK and they can start building applications in Node.js
Getting the Development Environment Setup for Node.js Developers to Use Azure (Installing Windows Azure SDK for Node.js)
Developers can get the Windows Azure SDK from Node.js by visiting http://www.microsoft.com/click/services/Redirect2.ashx?CR_EAC=300036459
When you click the link, you will be asked to install the Web Platform Installer, if you don’t already have it installed. If you have been doing cloud development using Visual Studio, you should already have the Web Platform installer.
The Web platform installer will fail to install the SDK if it does not have administrative privileges.
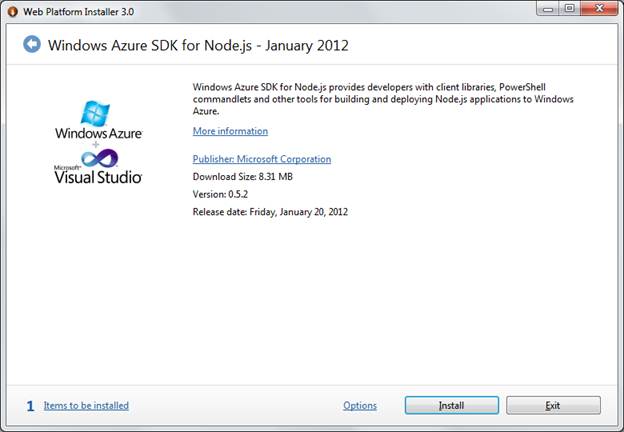
Windows Azure SDK for Node.js
Click Install and you will be prompted with the following screen.

Web Platform Installation
Click Accept and the installation will start.
Once installation is completed, you will be greeted with an acknowledgment.
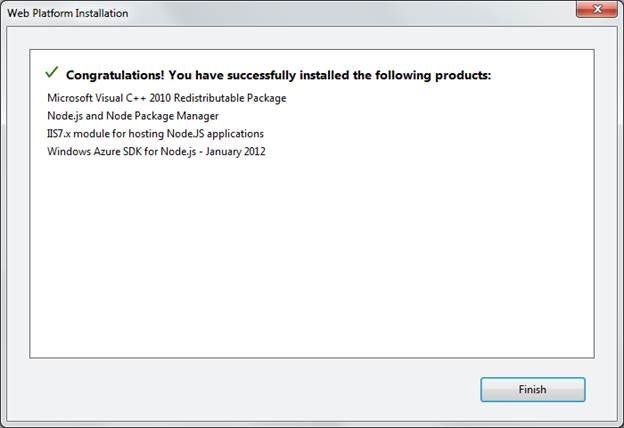
Successful Install
Click Exit on the Web Platform Installer dialog to exit the installer after you are done installing.
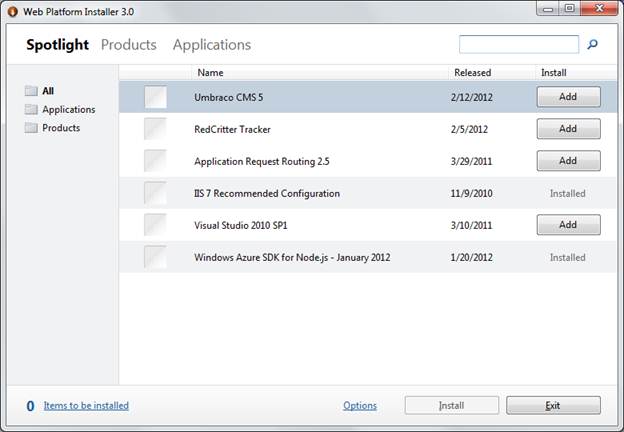
Web Platform Installer 3.0
If you had not previously installed any Azure SDK, the installation will result in a new Program Group under Start -> Programs called “Windows Azure SDK for Node.js – November 2011”.
Fire up PowerShell and in your PowerShell window, type:
PS C:\windows Get-help new-Azure*
If you do not get any output from that command, the PowerShell registration has failed. This can usually happen if you had a prior version of an Azure SDK installed.
To fix a failed PowerShell registration, follow the steps below:
a.Install the Azure Cmdlets.
Run an elevated command shell window, and execute the following command (the success of Web Platform Installer operation above would have deployed the Azure cmdlets at the below referenced location).
C:\windows\microsoft.net\framework64\v2.0.50727\installutil.exe
"C:\Program Files (x86)\Microsoft SDKs\Windows
Azure\Nodejs\Nov2011\PowerShell\AzureDeploymentCmdlets.dll"

C:\windows\microsoft.net\framework64\v2.0.50727\installutil.exe
"C:\Program Files (x86)\Microsoft SDKs\Windows Azure\Nodejs\Nov2011\PowerShell\Microsoft.WindowsAzure.Diagnostics.dll"

C:\windows\microsoft.net\framework64\v2.0.50727\installutil.exe
"C:\Program Files (x86)\Microsoft SDKs\Windows
Azure\Nodejs\Nov2011\PowerShell\Microsoft.WindowsAzure.StorageClient.dll"
b. Now launch PowerShell as Administrator and execute the following command to add the Azure PowerShell cmdlets to the snapin.
PS C:\Windows\system32> Add-PSSnapin AzureDeploymentCmdLets
c. Keep the PowerShell session alive as you will need it going forward in the exercise. If you start a new PowerShell session, remember to always launch it as Administrator as the Azure emulator needs elevated privileges to execute, and to add the snapin to the current PowerShell session (see step (b) above).
Understanding the Features of Windows Azure PowerShell for Node.js
Windows Azure SDK for Node.js developers created PowerShell scripts, which enables Node.js developers to call simple cmdlets in PowerShell to do certain repeated tasks. There are PowerShell cmdlets to create a node, create a new service. Here is a list of all Azure PowerShell cmdlets.
|
Azure PowerShell cmdlet |
Description |
|
New-AzureService |
It is used to create the plumbing for a new Windows Azure service (configuration files, etc.). |
|
Add-AzureNodeWebRole |
It is used to add a Windows Azure web role to the current application. |
|
Add-AzureNodeWorkerRole |
It is used to add a Windows Azure worker role to the current application. |
|
Set-AzureInstances |
It is used to set the number of role instances for the specified role. |
|
Set-AzureDeploymentLocation |
It is used to set the deployment location for the current service. |
|
Set-AzureDeploymentSlot |
It is used to set the deployment slot for the current service. |
|
Set-AzureDeploymentStorage |
It is used to set the storage account to be used when publishing the service to the cloud. |
|
Set-AzureDeploymentSubscription |
It is used to set the subscription name to be used when publishing the service to the cloud. |
|
Import-AzurePublishSettings |
It is used to import the Publish Profile to enable publishing to the cloud. |
|
Publish-AzureService |
It is used to publish the current service to the Azure cloud. |
|
Get-AzurePublishSettings |
It is used to download a Windows Azure Publish Profile. |
|
Get-AzureStorageAccounts |
It is used to retrieve and display the storage account details for a specified Azure subscription. |
|
Start-AzureEmulator |
It is used to execute a service in the Azure emulator. |
Code Walkthrough – How to Build a Basic Node.Js Web Application
Let us walkthrough an exercise where we will build a very basic Node.js web application.
Open a PowerShell session as an administrator (if you have a session from step (b) above, use the same PowerShell window).
1. Create a new folder in PowerShell to host your project.
PS C:\Users\vipul\Documents\articles\node.js> md .\nodeproject
    Directory: C:\Users\vipul\Documents\articles\node.js
Mode                LastWriteTime     Length Name
----                -------------     ------ ----
d----         2/15/2012  12:02 AM            nodeproject
PS C:\Users\vipul\Documents\articles\node.js> cd .\nodeproject
PS C:\Users\vipul\Documents\articles\node.js\nodeproject>
2. Create Azure Service : Now create an Azure Service in node.js using the Azure cmdlets New-AzureService. Here, we will create an Azure Service called MyNodeJsAzureService.
PS C:\Users\vipul\Documents\articles\node.js\nodeproject> New-AzureService "MyNodeJsAzureService"

Service has been created at C:\Users\vipul\Documents\articles\node.js\nodeproject\MyNodeJsAzureService
You can check the files that were created as a result of creating this service. You will notice that there are 2 versions of the .cscfg file (one for cloud and one for local).
PS C:\Users\vipul\Documents\articles\node.js\nodeproject\MyNodeJsAzureService> dir
    Directory: C:\Users\vipul\Documents\articles\node.js\nodeproject\MyNodeJsAzureService
Mode                LastWriteTime     Length Name
----                -------------     ------ ----
-a---         2/15/2012  12:07 AM         67 deploymentSettings.json
-a---         2/15/2012  12:07 AM        289 ServiceConfiguration.Cloud.cscfg
-a---         2/15/2012  12:07 AM        289 ServiceConfiguration.Local.cscfg
-a---         2/15/2012  12:07 AM        249 ServiceDefinition.csdef
These files are the supporting files, which are needed to support the Azure project. The detailed description of the files is in the table below.
|
File |
Purpose |
|
deploymentSettings.json |
This file store settings used by Azure cmdlets. |
|
ServiceConfiguration.Cloud.cscfg |
Contains service configuration information for the cloud. |
|
ServiceConfiguration.Local.cscfg |
Contains service configuration information for the local emulator. |
|
ServiceDefinition.csdef |
Contains service definition information. |
3. Now, we need to add a webrole to our Azure project. We can use “Add-AzureNodeWebRole” cmdlets to do this.
PS C:\Users\vipul\Documents\articles\node.js\nodeproject\MyNodeJsAzureService> Add-AzureNodeWebRole -Name MyNodeJsWebRole

Role has been created at C:\Users\vipul\Documents\articles\node.js\nodeproject\MyNodeJsAzureService\MyNodeJsWebRole. For easy access to Windows Azure services from your application code, install the Windows Azure client library for Node.js by running `npm install azure'.
We can see that a new folder called MyNodeJsWebRole is created with the following contents.
PS C:\Users\vipul\Documents\articles\node.js\nodeproject\MyNodeJsAzureService\MyNodeJsWebRole> dir
    Directory: C:\Users\vipul\Documents\articles\node.js\nodeproject\MyNodeJsAzureService\MyNodeJsWebRole
Mode                LastWriteTime     Length Name
----                -------------     ------ ----
d----         2/15/2012  12:22 AM            bin
-a---         12/8/2011  11:54 AM        214 server.js
-a---         12/8/2011  11:54 AM       1187 Web.cloud.config
-a---         12/8/2011  11:54 AM       1006 Web.config
The server.js file contains the auto-generated code, which has been created by the cmdlets.
Open up the server.js file to inspect the auto-generated code.
// Listing1
var http = require('http');
var port = process.env.port || 1337;
http.createServer(function (req, res) {
    res.writeHead(200, { 'Content-Type': 'text/plain' });
    res.end('Hello World\n');
}).listen(port);
Now, let us modify this file to print out the current date.
Our listing will look like this:
// Listing for server.js
var http = require('http');                             // Line 1
var port = process.env.port || 1337;            // Line 2
var currentTime = new Date();                   // Line 3
var month = currentTime.getMonth() + 1;              // Line 4
var day = currentTime.getDate();                // Line 5
var year = currentTime.getFullYear();           // Line 6
                                     // Line 7
http.createServer(function (req, res) {              // Line 8
    res.writeHead(200, { 'Content-Type': 'text/plain' });// Line 9
    res.write('day '  + day + '\n');            // Line 10
    res.write('month ' + month + '\n');              // Line 11
    res.write('year ' + year + '\n');           // Line 12
    res.end('\n');                         // Line 13
}).listen(port);                           // Line 14
Let us understand what this code does. At line 3 through 6, we calculate the current date. Note that January is set as month 0, so we need to add 1 to make it human readable. Line 2 asks to listen to the port specified in the environment variable or fallback to port 1337. Finally, at lines 8 through 14, we create a new HTTP server. If you are a node.js developer, feel free to swap the contents of the listing with the application code you want to deploy on Windows Azure.
4. Now it is time to launch to emulator to test out application. Call the Start-AzureEmulator cmdlets with the “-launch” argument to start the emulator.
PS C:\Users\vipul\Documents\articles\node.js\nodeproject\MyNodeJsAzureService\MyNodeJsWebRole> Start-AzureEmulator  -launch


Creating local package...
Starting Emulator...
Role is running at http://127.0.0.1:81
Started
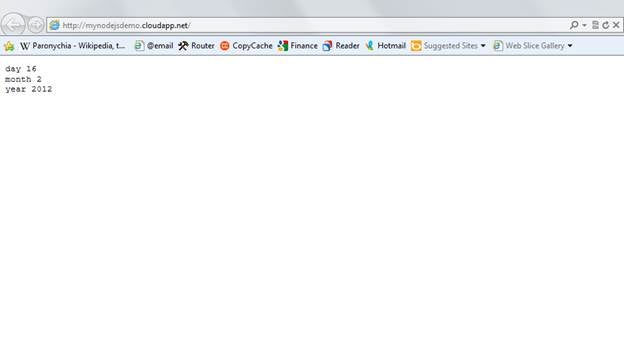
A new browser window will open and will show the following:
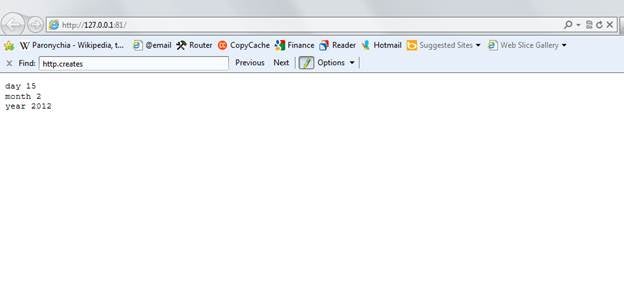
A new browser window will open
We can see that we just created a new Node.js Azure web application, which shows us the current date. If you have problems in getting the code working, you can download the sample code from download-link and compare it to find out what you might have omitted.
Deploying the Application to the Cloud
We are now ready to deploy our Node.js application to the cloud. To begin with, if you have not yet signed up for a Windows Azure account, please visit http://www.developer.com/services/step-by-step-guide-to-setting-up-a-windows-azure-free-trial.html to see how you can set up a 3 month free Azure trial subscription.
The first step towards deploying the application to the cloud is to get the Azure publish settings. You can use Get-AzurePublishSettings cmdlets to do this.
Running the cmdlets opens up a browser window. If your azure session has expired, it will ask you to login again. After you provide your login credentials, you will be prompted to down your Azure publish settings.
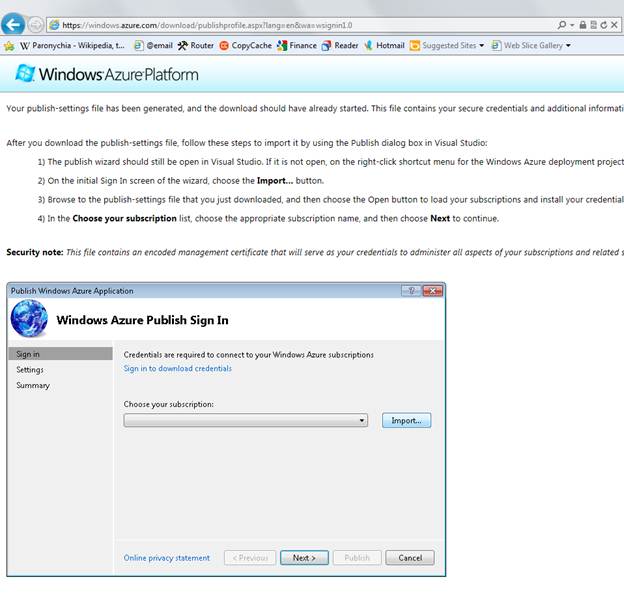
Azure Publish Settings
Note down the path you download the Publish settings file to.
Next, we need to import the Azure Publish Settings by running the Import-AzurePublishSettings cmdlets and passing in the path to the settings file as an argument.
PS C:\Users\vipul\Documents\articles\node.js\nodeproject\MyNodeJsAzureService\MyNodeJsWebRole> Import-AzurePublishSettings  "C:\Users\vipul\Downloads\Vipul's azure plan-2-16-2012-credentials.publishsettings"
Certificate imported into CurrentUser\My\Vipul's azure plan-2-16-2012-credentials
Publish settings imported
If the operation succeeds, you will see a message stating “Publish settings imported”.
Now that your local application project is configured with your real Azure cloud publish settings, you are ready to publish your application. To publish your application, we can use Publish-AzureService cmdlet.
To see how to use the cmdlets, we can execute the get-Help cmdlet and see the syntax of the Publish-AzureService cmdlet.
Syntax listing
PS C:\Users\vipul\Documents\articles\node.js\nodeproject\MyNodeJsAzureService\MyNodeJsWebRole> get-help Publish-AzureService

NAME
    Publish-AzureService

SYNOPSIS
    Publish the current service to the cloud


SYNTAX
    Publish-AzureService [-Subscription <String>] [-Name <String>] [-StorageAccountName <String>] [-Location <String>]
    [-Slot <String>] [-Launch] [<CommonParameters>]


DESCRIPTION
    Publish the current service to the cloud. Publishing settings (Name, Subscription, StorageAccountName, Location, Slot) can be specified on the command line, or in local settings via one of the Set-Azure* commands.


RELATED LINKS
    Import-AzurePublishSettings
    New-AzureService
    Set-AzureDeploymentLocation
    Set-AzureDeploymentSlot
    Set-AzureDeploymentStorage
    Set-AzureDeploymentSubscription
    Set-AzureInstances

REMARKS
    To see the examples, type: "get-help Publish-AzureService -examples".
    For more information, type: "get-help Publish-AzureService -detailed".
    For technical information, type: "get-help Publish-AzureService -full".
We see that we need to pass in a name, location. We can pass in an extra parameter “-launch” to open the browser window pointing to our application running on the Azure cloud. When we pass in this information to the cmdlets, it creates a payload, which will be deployed to Windows Azure. If a storage account does not exist, it will create one in the cloud. Next, it will create a new hosted service, and finally, it will publish the payload to the cloud, making it a true cloud based application.
Note that this process takes time and it might take around 10 minutes for the deployment to succeed.
PS C:\Users\vipul\Documents\articles\node.js\nodeproject\MyNodeJsAzureService\MyNodeJsWebRole> Publish-AzureService -nam
e  MyNodeJsDemo -location "North Central US" -launch


Publishing to Windows Azure. This may take several minutes...

9:49:56 PM - Preparing deployment for MyNodeJsDemo with Subscription ID: 3a686862-2f6c-4cd3-a69f-7d6b55bc12cc...
9:50:25 PM - Connecting...
9:50:28 PM - Creating...
9:50:30 PM - Created hosted service 'MyNodeJsDemo'.
9:50:30 PM - Verifying storage account 'mynodejsdemo'...
9:52:36 PM - Uploading Package...
9:54:31 PM - Created Deployment ID: 62a2c65b64e74555b2275a215ce4238e.
9:54:31 PM - Starting...
9:54:32 PM - Initializing...
9:54:44 PM - Instance MyNodeJsWebRole_IN_0 of role MyNodeJsWebRole is creating the virtual machine.
9:59:37 PM - Instance MyNodeJsWebRole_IN_0 of role MyNodeJsWebRole is busy.
10:00:27 PM - Instance MyNodeJsWebRole_IN_0 of role MyNodeJsWebRole is ready.
10:00:28 PM - Created Website URL: http://MyNodeJsDemo.cloudapp.net.
10:00:28 PM - Complete.
As you can see, it took about 10 minutes to finally set my cloud app at http://mynodejsdemo.cloudapp.net/.
Demo Cloud App
You can see that as part of deployment, it created a hosted service, created a storage account, uploaded the package, started a virtual machine and started the application instance.
We can see that the cloud Node.js application renders the same output that our emulator did. Our cloud application is now live.
You can also visit the Azure Management Portal and check that our newly deployed application shows up.
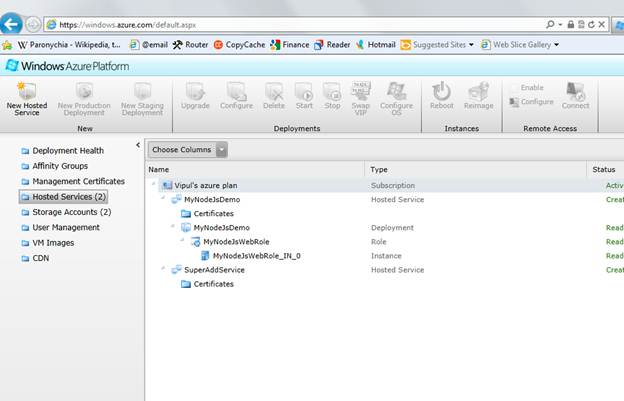
Azure Management Portal
Congrats, you just created a Node.js cloud based application running on Windows Azure, without opening Visual Studio.
Stopping and Removing the Application
While it is easy to forget that our application is now running in the cloud, it is important to remember that the billing meter is continuously ticking, especially if you are no longer in the free trial period. If you are simply checking Azure as a development platform, you would be interested to know how to stop and remove the cloud based application.
To stop your Azure application, you can run the Stop-AzureService cmdlets .
PS C:\Users\vipul\Documents\articles\node.js\nodeproject\MyNodeJsAzureService\MyNodeJsWebRole> Stop-AzureService
10:27:11 PM - Stopping service MyNodeJsDemo...
10:27:42 PM - Complete
If you accidentally stopped your Azure application and you want to restart it, you can run the Start-AzureService cmdlets.
Note that a suspended service still continues to accrue charges. You can check the status of your stop request on the Azure management portal
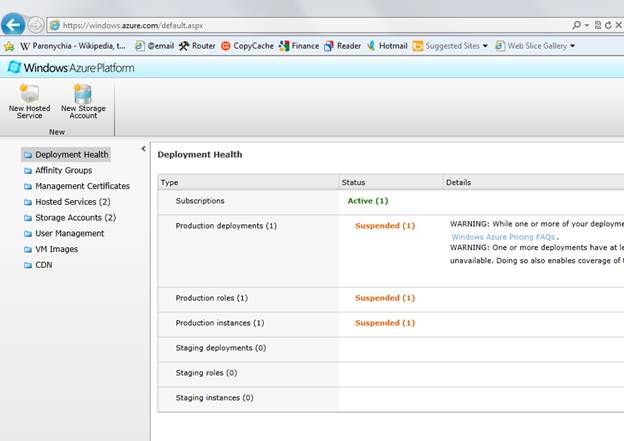
Check the status of your stop request
To stop being charged, you need to remove the service, which can be done by calling the Remove-AzureService cmdlets. When you execute the cmdlets, it will ask to confirm your decision.
PS C:\Users\vipul\Documents\articles\node.js\nodeproject\MyNodeJsAzureService\MyNodeJsWebRole> Remove-AzureService

Confirm
Are you sure you want to remove service \"MyNodeJsDemo\"?
[Y] Yes  [A] Yes to All  [N] No  [L] No to All  [S] Suspend  [?] Help (default is "Y"): Y


10:35:42 PM - Removing service MyNodeJsDemo...
10:35:42 PM - Removing deployment
10:36:00 PM - Removing service...
10:36:00 PM - Removing service MyNodeJsDemo
10:36:01 PM – Complete
You can confirm that the service has been deleted from the Azure Management Portal.
Additional Scenarios
Stage an Application
Sometimes there is a business need to have a test environment (also called staging environment), which is different from the production environment. The application is typically tested in the staging environment before it is signed off to be used in the production environment. “Windows Azure PowerShell for Node.js” supports publishing to a staging environment in the form of a flag to Publish-AzureService cmdlets.
PS C:\Users\vipul\Documents\articles\node.js\nodeproject\MyNodeJsAzureService\MyNodeJsWebRole> Publish-AzureService -Slot staging


Publishing  to Windows Azure. This may take several minutes...

11:01:29 PM - Preparing deployment for MyNodeJsDemo with Subscription ID: 3a686862-2f6c-4cd3-a69f-7d6b55bc12cc...
11:01:43 PM - Connecting...
11:01:44 PM - Creating...
11:01:46 PM - Created hosted service 'MyNodeJsDemo'.
11:01:46 PM - Verifying storage account 'mynodejsdemo'...
11:01:46 PM - Uploading Package...
11:03:17 PM - Created Deployment ID: 00d30780d41d400e9e5d4af26d751c4f.
11:03:17 PM - Starting...
11:03:17 PM - Initializing...
11:03:28 PM - Instance MyNodeJsWebRole_IN_0 of role MyNodeJsWebRole is creating the virtual machine.
11:08:53 PM - Instance MyNodeJsWebRole_IN_0 of role MyNodeJsWebRole is busy.
11:10:24 PM - Instance MyNodeJsWebRole_IN_0 of role MyNodeJsWebRole is ready.
11:10:25 PM - Created Website. Please use the Azure Portal at http://windows.azure.com to find the deployment URL.
11:10:25 PM - Complete.
Once the Publish-AzureService cmdlets completes successfully, you can check the output of the command does not list the URL of the staging website. Instead, it points us to the Azure Management Portal and if we check out the Management portal and check the service property state, you can see that the environment is listed as Staging.
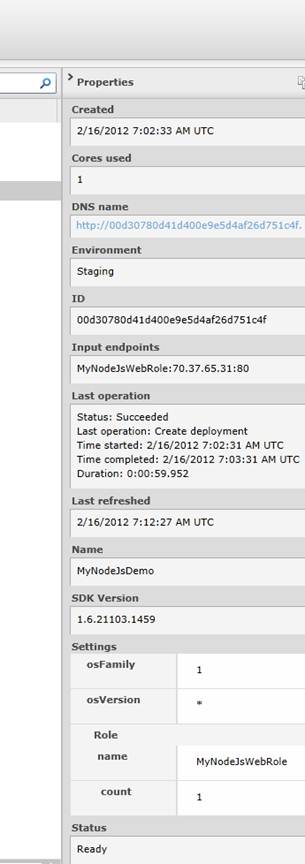
The Environment is listed as Staging
Instead of an easy to understand URL, we have an obfuscated URL, which is the staging location of our application. This helps keeps the application hidden (since the DNS name is hard to guess).
If I click on the DNS name link, it opens up http://00d30780d41d400e9e5d4af26d751c4f.cloudapp.net/, which in the browser shows the same output as before.
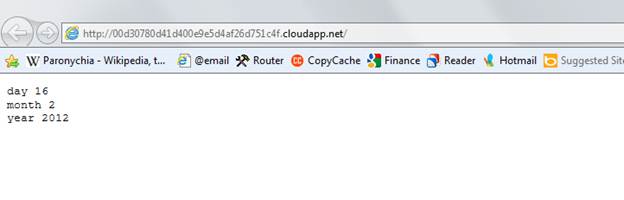
Browser Output
When we are done testing the staging application, we can promote it to production. You can use the Azure Management Portal to do this.
Summary
In this article we learned about Node.js and walked through a very detail hands-on lab on creating a Node.js application running on Windows Azure. I hope you have found this information useful.
About the Author
Vipul Patel is a Program Manager currently working at Amazon.com. In the past, he has worked at Microsoft in the Microsoft Lync team and well as in the Base Class libraries and the Debugging and Profiling team. He can be reached at vipul_d_patel@hotmail.com