

One of the biggest drawbacks of programming in Visual C++/MFC was its lack of support for even the most basic of imaging functions—such as loading and displaying an image. Therefore, this article illustrates how incredibly easy .NET makes displaying a user-selected image and allowing the user to dynamically resize that image.
The File Open Dialog
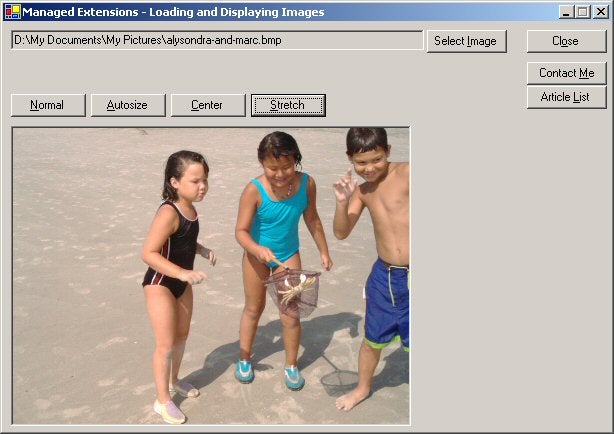
The following figure shows the accompanying demo for this article. As you can see, the user can select an image file to display:
As opposed to MFC, where you instantiate and use a CFileDialog class, using the Windows Forms version of the common file open dialog involves these steps:
- From the form’s designer, open the Toolbox and then drag and drop the OpenFileDialog control on the form. An icon will appear below the form and the control’s ID will be automatically named. One advantage to this type of programming is that you can set its properties (such as InitialDirectory, Filter, and so on) in the designer instead of in code.
- Specify the OpenFileDialog control’s properties. Below, I copied and pasted the portion of the demo code that sets the initial directory that will be displayed when the open file dialog displays, the filter list (the available options in the dialog’s filter combo box), and the filter index.
The OpenFileDialog::Filter property is a string that represents the types listed in the File Types combo box when the dialog is displayed. Each type is represented by a pair of values delimited by a vertical bar where the first value is the text that the user will see and the second value is the filter that the dialog will use in determining which files to display. Here are some examples to illustrate my point:
Only display GIF files
"GIFs (*.gif)|*.gif"

Two filters--GIF and JPG
"GIFs (*.gif)|*.gif|JPEGs (*.jpg)|*.jpg;*.jpeg"

One combined filter (GIF and JPG)
"GIF & JPG (*.gif;*.jpg;)|*.gif;*.jpg;"
The FilterIndex property is used to specify which of the filters is the default.
Note: Because index values in C++ are always relative to 0, C++ programmers naturally think to set the FilterIndex property to a value of 0 when they want the first element. However, don’t be fooled. Whereas setting the value to 0 will select the first entry, that’s only because any invalid index value defaults to the first entry. To correctly specify the index value, you must state it relative to 1 (in other words, 1 is the first entry—not 0).
Here’s the code pasted from the demo where the user is allowed to specify an image file to open. As you can see, the OpenFileDialog::ShowDialog is used to display the dialog and the return value is DialogResult::OK if the user selected a file (as opposed to canceling the dialog):
dlgOpenFile->InitialDirectory = S"C:\\";

dlgOpenFile->Filter =
  S"All Image Formats (*.bmp;*.gif;*.jpg;*.jpeg;*.tif)|"
  S"*.bmp;*.gif;*.jpg;*.jpeg;*.tif|"
  S"Bitmaps (*.bmp)|*.bmp|"
  S"GIFs (*.gif)|*.gif|"
  S"JPEGs (*.jpg)|*.jpg;*.jpeg|"
  S"TIFs (*.tif)|*.tif";

dlgOpenFile->FilterIndex = 1;

if (DialogResult::OK == dlgOpenFile->ShowDialog())
{
  // Display the image
}
Displaying an Image on a PictureBox Control
Once the user has selected a file using the OpenFileDialog, its FileName property (or FileNames if you specified to allow a multi-file selection) will contain the name of the selected file. Loading the image is as simple as calling the static Image::FromFile method. The following snippet sets the PictureBox::Image property to the Image object returned from Image::FromFile:
picImage->Image = Image::FromFile(dlgOpenFile->FileName);
Sizing an Image Within a PictureBox Control
You can use four basic values for displaying an image. You can specify this value in the designer (via the PictureBox control’s SizeMode property) or in code if you want the user to be able to dynamically control this settings (as the demo illustrates).
- Normal—Displays the image from the top-left corner of the PictureBox. If the image is smaller than the PictureBox, the image is displayed and the rest of the PictureBox is simply left blank. If the image is too large to be fully displayed, the image is cropped on its right and bottom sides.
- Autosize—This value causes the PictureBox control to automatically resize itself to fit the image. If the PictureBox becomes too large for the form, it is cropped unless you specify a Form::AutoScroll value of true (in which case, the form will automatically display scrollbars).
- Center—As the name implies, this value centers the image relative to the center of the PictureBox control.
- Stretch—This will autosize the image to fit the horizontal and vertical size of the PictureBox control.
Note: If you allow the user to switch between sizing modes, you need to be aware of the fact that once you specify the Autosize mode (where the PictureBox control resizes itself to conform to the image’s size), you’ll need to reset the PictureBox::Width and PictureBox::Height properties when switching to any of the other modes.