

Introduction
As a .NET trainer, the very first question I get asked when teaching a class is: “How do I create a game?” Obviously there are many answers and many examples at my (and their) disposal, but the very first thing that you have to learn is to make objects move, and then, possibly, determine when objects collide. With this article I will demonstrate how to make objects move, as well as determine when they collide. After this skill is learned and understood, you can move on to much more complicated topics concerning GDI+, animation and game programming.
I have always been a firm believer of starting with the basics. Yes, there are numerous tools that aid with Graphics and Game Programming, but if you don’t understand the basic concepts, none of those tools will ever help you. I have decided to stick with VB.NET with this article. This means that I will show you pure VB.NET code, without the use of any other tool or framework. I will link to these tools, as well as more Graphics articles at the end of this article. These will be your next steps to take in becoming a great game programmer.
Enough talk…
Let us start with the practical part of this article. The aim of this project you will build today is to make objects move as well as to determine when one object collides with another object.
Design
Fire up VB.NET and create a new Windows Forms application. You may give it any name you like. Design your Form to resemble Figure 1. Keep in mind that although you may name your objects anything you like, I have given my objects different names.
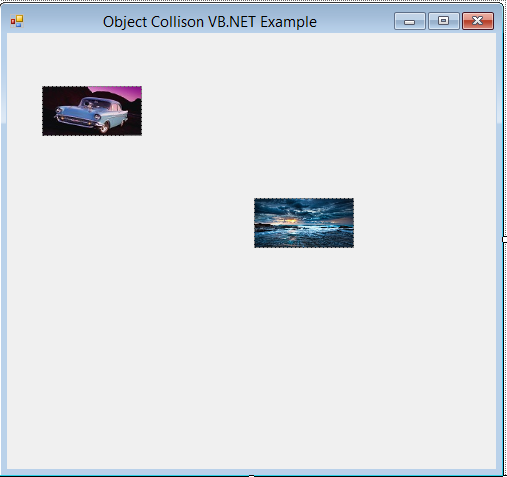
Figure 1 – Our Design
You may also use any pictures, as long as they are not too big.
Making Objects Move
My first topic that I will explain today is to make pictures move. Once you have designed your Form to resemble mine, open up the Code Window and add the following code inside the Form’s KeyDown event:
    Private Sub frmCollide_KeyDown(ByVal sender As Object, ByVal e As System.Windows.Forms.KeyEventArgs) Handles Me.KeyDown

        Dim ptCurrLoc As Point 'Current Location Of picMove

        Select Case e.KeyCode 'Determine Which Key Was Pressed

            Case Keys.Left 'Left Key Pressed

                If Not picMove.Location.X - 5 < 0 Then 'If Not Out Of Screen Bounds

                    ptCurrLoc = New Point(picMove.Location.X - 5, picMove.Location.Y) 'New Picture Location

                    picMove.Location = ptCurrLoc 'Set Location

                End If

            Case Keys.Right 'Right Key Pressed

                If Not picMove.Location.X + 5 > Me.Width - picMove.Width - 5 Then 'If not Out Of Screen Bounds

                    ptCurrLoc = New Point(picMove.Location.X + 5, picMove.Location.Y) 'Move Right

                    picMove.Location = ptCurrLoc 'Set New Location

                End If

            Case Keys.Up 'Up

                If Not picMove.Location.Y - 5 < 0 Then 'If Not Out Of Top Frame

                    ptCurrLoc = New Point(picMove.Location.X, picMove.Location.Y - 5) 'Move Up

                    picMove.Location = ptCurrLoc 'Record New Location

                End If

            Case Keys.Down 'Down

                If Not picMove.Location.Y - 5 > Me.Height - picMove.Height * 1.5 Then 'If Not Out Of Bottom Bounds

                    ptCurrLoc = New Point(picMove.Location.X, picMove.Location.Y + 5) 'Move Down

                    picMove.Location = ptCurrLoc

                End If

        End Select

    End Sub
Let me break this code down into more digestible pieces:
First, I created an object named ptCurrLoc. This variable will hold the current X and Y location of the object being moved. The X location is the Left or Right position. The Y location means Up or Down location. After this, I started a Select Case statement determining which key was pressed.
If the Left key is pressed, I checked if the object is still currently inside the visible boundaries of the screen. If it is, then I minus the current X location with 5. This causes the object to move five pixels to the left every time you press the Left arrow key. The Y location remains the same, as the object is only intended to move left.
If the Right key is pressed, I do the same check to see if the object is still inside the legitimate screen boundaries; then, I simply add five to the X coordinate. This causes the object to move five pixels to the right on each Right arrow key pressed.
If the Up key is pressed, the object will move up five pixels on the Y axis. If Down is pressed the object will move downwards five pixels at a time on the Y axis.
You can experiment a little with the number of pixels the object is supposed to move, for more precision. The greater the number, the quicker and less precise the movements will be and vice versa.
If you were to run this app now, you can see that depending on which arrow button was pressed the object will move in that direction. You may also notice that if the object currently being moved comes into the vicinity of the stagnant object, nothing will happen. That is what you will learn now.
Determining a Collision
Funny story, about a month ago, as I was turning into my lane with my car, on the way to work, a motorcycle collided with me! The person doesn’t have a license, and the motorbike neither; so you can imagine how I needed some type of warning saying : “Hey, there is an object approaching!” and “Hey, something has hit you!” Now back to the point…
Add this piece of code just after the End Select statement inside the Form_KeyDown procedure:
        If picMove.Bounds.IntersectsWith(picStay.Bounds) Then 'Determine If The Two PictureBoxes Collided

            picStay.Location = New Point(RandomLocation(Me.Width, 10), RandomLocation(Me.Height, 10)) 'Move To New Location

            MessageBox.Show("Crash Boom Bang!")

        End If
Here I made use of the IntersectsWith Property of my Picturebox to determine if an object has entered the specified object’s bounds. If picMove has entered picStay’s bounds, a MessageBox will show and picStay will be relocated. If you were to run your application now, you will get errors as you haven’t added the RandomLocation function yet. Let us do that now:
    'Function To Set New Random Location
    Private Function RandomLocation(ByVal Max As Integer, ByVal Min As Integer) As Integer

        'Intitialize Random Object
        Dim rndCollide As New Random(System.DateTime.Now.Millisecond)

        Return rndCollide.Next(Min, Max) 'Next Location

    End Function
This function simply generates a random location for picStay. This makes this little app fun, as once the two pictureboxes collided, picStay gets moved, and you can move picMove onto it again.
In case you have missed a step or two, I am attaching a working example project below for you to study from.
Further Reading
These articles will help you further your studies into animation and Games.
https://www.codeguru.com/visual-basic/animation-in-vb-part-1/
https://www.codeguru.com/dotnet/3d-animation-in-vb-net-using-wpf-part-1/
http://www.youtube.com/watch?v=hiu9BqOyE8U
Conclusion
Short and sweet! I hope you have enjoyed today’s little, yet powerful article. Until next time, Cheers! Now let me see if I can get my insurance to pay out for my car’s damage…