

There are some special steps that you will need to be aware of when building custom controls. Custom controls are fun and rewarding to build, and you will save yourself some frustration by taking a few minutes to read this article.
This article demonstrates the DefaultValueAttribute and introduces adding classes as properties to custom controls, UITypeEditors, and GDI+. Specifically, if you combine all of the information in this article then you will be able to successfully incorporate classes that have UITypeEditors defined for them as members of your custom controls.
I encountered a problem when adding an Image property to a custom control. The property showed up in the Properties window, and I was able to assign an image to the property. What I was not able to do is set the image back to null in the Properties window. An ImageEditor exists in the .NET Framework; the ImageEditor is derived from the UITypeEditor and supports associating an image with the Image property, visually. The ImageEditor needs a default value or you will not be able to remove an image association. The DefaultValueAttribute provides the solution. I will demonstrate a custom control and the proper application of the DefaultValueAttribute that will let you manage images in the Properties window at design time.
Creating a Custom Control
To create a custom control, start a new class library project. For our purposes we will indicate that the class in the library project inherits from System.Windows.Forms.Control. We will need to add a reference to the System.Windows.Forms assembly (refer to figure 1), and we can shorten the class header by adding an Imports statement to the class module. The code as described is shown in listing 1.
Listing 1: A custom control derived from the System.Windows.Forms.Control class.
Imports System.Windows.Forms

Public Class Picture
  Inherits Control

End Class
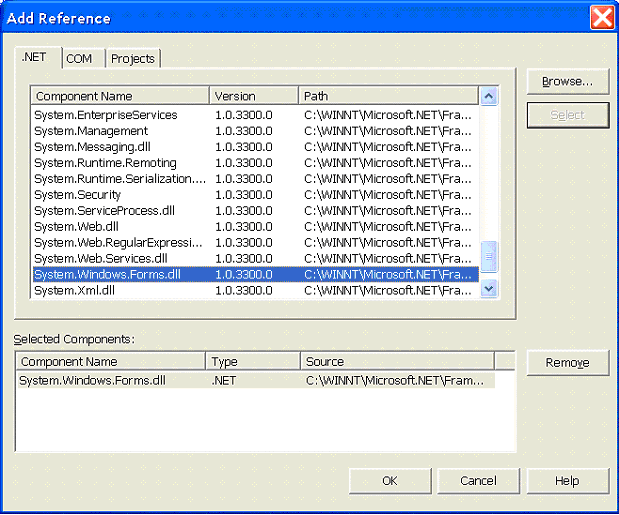
Figure 1: Add a reference to System.Windows.Forms in the Add Reference dialog.
Adding an Image Property
The next step is to add an image field and property to our custom control. Adding an OnPaint method to render the image will provide us with a control that roughly approximates the PictureBox control. We will need to include an imports statement for the System.Drawing namespace and add a reference to that assembly too. (System.Drawing.dll is the assembly that contains the GDI+ classes.) The updated code is provided in listing 2.
Listing 2: The Picture control with the Image field and property, and the overloaded OnPaint method.
Imports System.Windows.Forms
Imports System.Drawing

Public Class Picture
  Inherits Control

  Private FImage As Image

  Public Sub New()

    MyBase.New()
    SetStyle(ControlStyles.ResizeRedraw, True)

  End Sub

  Public Property Image() As Image
    Get
      Return FImage
    End Get

    Set(ByVal Value As Image)
      FImage = Value
      Invalidate()
    End Set
  End Property

  Protected Overrides Sub OnPaint(ByVal e As PaintEventArgs)
    MyBase.OnPaint(e)
    If( FImage Is Nothing ) Then Exit Sub
    e.Graphics.DrawImage(FImage, 0, 0, ClientRectangle.Width, _
      ClientRectangle.Height)
  End Sub


End Class
The image is stored in the field named FImage. When the property setter is invoked the control will be invalidated, and the OnPaint method will be called. We have to call the inherited OnPaint method-demonstrated by MyBase.OnPaint-to ensure the inherited OnPaint behaviors is called too. If the image contains an Image object then GDI+ is used to draw the image, stretching it to the client region of the control.
ImageEditor Class
If we add the control to the Toolbox then the ImageEditor that is associated with the Image class will support using an Open dialog to find and pick an image as shown in figure 2, and figure 3 shows our new control with a selected .jpg file displayed.
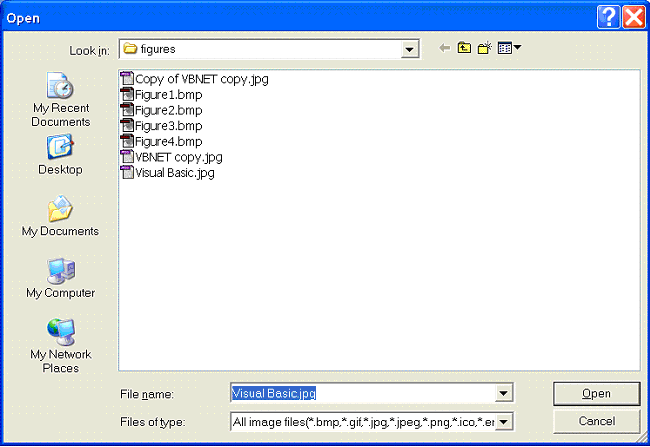
Figure 2: The Open dialog displayed the ImageEditor associated with Image properties.
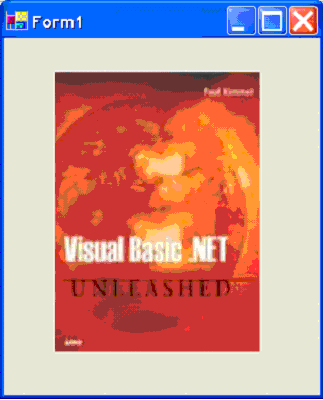
Figure 3: The custom Picture control displaying a selected .jpg file.
As you can see from figure 4, our Image property will be displayed in the Properties window. Unfortunately, if we leave our custom control coded as are then we will not be able to clear a selected image. We’ll need to use the DefaultValueAttribute to complete our control.

Figure 4: The Image property for our custom Picture control.
Using the DefaultValueAttribute
Attributes are special classes that allow you to associate metadata with other classes. (Think of metadata as extra descriptive information that gets compiled into your assembly.) The DefaultValueAttribute lets you provide a default value for a property. Classes can use DefaultValueAttributes to initialize a field, and UITypeEditors can use default values to restore properties like the Image property back to some reliable default.
For our Image property to work correctly in the Properties window we need to include the DefaultValueAttribute immediately before the Image property. I will demonstrate just the change to the property next.
<DefaultValue(GetType(Image), "None")> _
Public Property Image() As Image
  Get
    Return FImage
  End Get

  Set(ByVal Value As Image)
    FImage = Value
    Invalidate()
  End Set
End Property
With the change you can select the value of the Image property and press the delete key to reset the Image property to none.
Registering and Testing the Control
To test the control you can add the compiled class library assembly to the toolbox from the Toolbox’s context menu, Customize Toolbox menu item (see the Customize Toolbox dialog shown in figure 5). After you have added the control you can drop it onto a Windows Form and modify the Image property at design time to test the control.
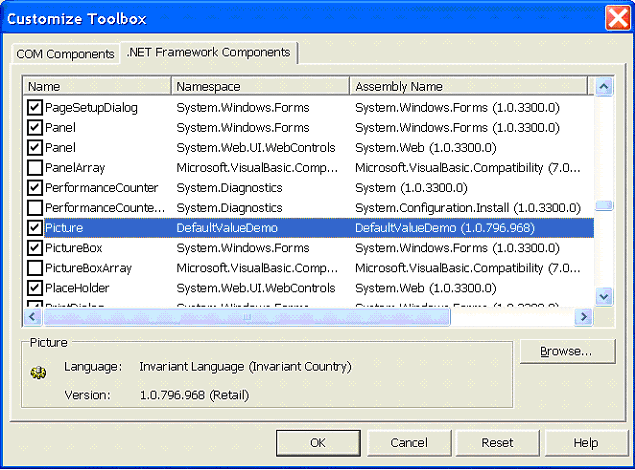
Figure 5: Customize Toolbox dialog for adding controls to the Visual Studio .NET toolbox.
Summary
The test of a great tool is whether or not the tool is self-extensible. That is, can we use Visual Basic .NET to extend Visual Basic .NET. The answer is yes, now more so than ever.
Visual Basic .NET enables you to create custom controls and editors for Visual Studio .NET, but you will have to learn about some of the new features like inheritance and attributes. In this article you learned how to use the DefaultValueAttribute and the ImageEditor to support managing Image properties in Visual Studio .NET at design time.
About the Author
Paul Kimmel is a freelance writer for Developer.com and CodeGuru.com. Look for his recent book Visual Basic .Net Unleashed on Amazon.com. Paul Kimmel is available to help design and build your .NET solutions and can be contacted at pkimmel@softconcepts.com.