

Introduction
Developers often resort to code reuse techniques in their projects. As far as ASP.NET framework server side
programming is concerned classes, class libraries, components, custom server controls and user controls are popular code reuse
techniques. Modern ASP.NET web applications no longer restrict themselves only to server side programming. They also
make use of client side scripting to render rich web forms. No wonder that Microsoft Visual Studio 2010 includes
jQuery library by default as a part of newly created web site. If you are using jQuery for client side scripting then one way to reuse
your client side code is to create a jQuery plug-in. Creating a plug-in allows you to bundle your reusable jQuery code in a neat way and
then reuse it across web forms. In this article you will learn how to create a simple jQuery plug-in from scratch. You
will also learn about certain guidelines that help you build professional jQuery plug-ins.
Sample jQuery Plugin
As an example of creating a jQuery plug-in, you will create a Count Down plug-in. The Count Down plug-in essentially displays a
count down ticker that starts at a number you specify (say 10) and keeps decrementing it by one after certain configurable time gap
(say 1 sec.) till it reaches zero. Such a count down ticker can be used on your ASP.NET web forms in the following situations:
- You want to present a download link to a user but want the user to pay
attention to some advertisement or notice for some time. So you can display a count down
ticker for a
certain period and display the actual download link only when it reaches
zero. - You have some terms & conditions listed on your website. A common
tendency is to ignore them and proceed with the download or registration. You
can introduce some delay using the count down ticker so that users are
prompted to carefully read the terms & conditions before proceeding further. - You have moved some content of your website from one location to
another. When a user tries to access older location you wish to display a
message informing him about the changed location and then after certain
period automatically redirect him to the new location.
Creating a Plug-in
To create a jQuery plug-in, begin by creating a new website in Microsoft Visual Studio 2010. You will find that
the default web site template already includes jQuery library in the Scripts folder. The following figure shows the
jQuery library files included by default.
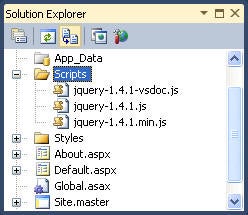
Figure 1
Add a new JavaScript file (.js) named CountDown.js to the Scripts folder. This file will contain your jQuery plug-in
code. Open the CountDown.js file and add the following skeleton code to it.
(function( $ ){
  $.fn.CountDown = function() {

  };
})( jQuery );
Here, you are creating a new function property to jQuery.fn object. The name of the plug-in is defined by the name of
the property (CountDown in this case). It is recommended that you pass jQuery to a self executing function so that the
$ sign used by jQuery library is not overwritten by another JavaScript library.
Passing Parameters
The newly created plug-in can take parameters just like any other JavaScript function. However, considering future changes and
extensibility the recommended way of passing parameters to a plug-in is as follows:
$.fn.CountDown = function(params) {
...
}
The function parameter – params – is an object that encapsulates all the configurable aspects of the plug-in. For example, our
CountDown plug-in requires the following aspects to be configurable:
- Count down start value: You should be able to specify the initial value from
where the count down operation will begin e.g. 10, 100 etc. - Interval: Interval is the time in milliseconds after which the counter
is decremented. Setting the interval essentially governs the speed of the
count down operation. - On complete notification: You may want to get a notification once the
count down reaches 0 so that you can take further action in your code. The
count down plug-in should callback a function when this happens.
Passing the above settings wrapped in an object allows you to add more settings in the future with minimum changes to the calling
code. A sample object that encapsulates the above settings is shown below:
{
  'counter': '10',
  'interval': '1000',
  'onComplete': MyCallback,
}
It is quite possible that developers using your plug-in may omit some of the above configuration settings. It would be better if
you provide some default values for such omitted settings. The following code shows how this can be done:
$.fn.CountDown = function(params) {
 var defaults = {
   'counter': '10',
   'interval': '1000',
   'onComplete': null
 };
 if (params) {
  $.extend(defaults, params);
}
The modified CountDown function defines certain default settings as indicated
by defaults variable. We need to merge the default settings and the ones
supplied as the parameter to arrive at the final settings to be applied further.
This is done with the help of $.extend() method of jQuery. So, if params object
is passed as :
{
  'interval': '2000',
  'onComplete': MyCallback,
}
the final settings after calling $.extend() method will be:
{
  'counter': '10',
  'interval': '2000',
  'onComplete': MyCallback
}