Azure Active Directory (Azure AD) is Microsoft’s enterprise cloud-based Identity and Access Management (IAM) solution. Azure AD is designed for Internet scale and Internet-based standards and protocols. Azure AD identifies apps, APIs, and users using Internet-ready standards. Azure AD supports protocols like OAuth, WS-federation, and more. Azure AD lets developers focus on building applications by making it fast and simple to integrate with a world-class Identity Management platform used by millions of organizations around the world.
In this article, we will create an ASP.NET MVC web application that can support Azure AD Authentication.
How to Create an MVC App for Azure AD Authentication
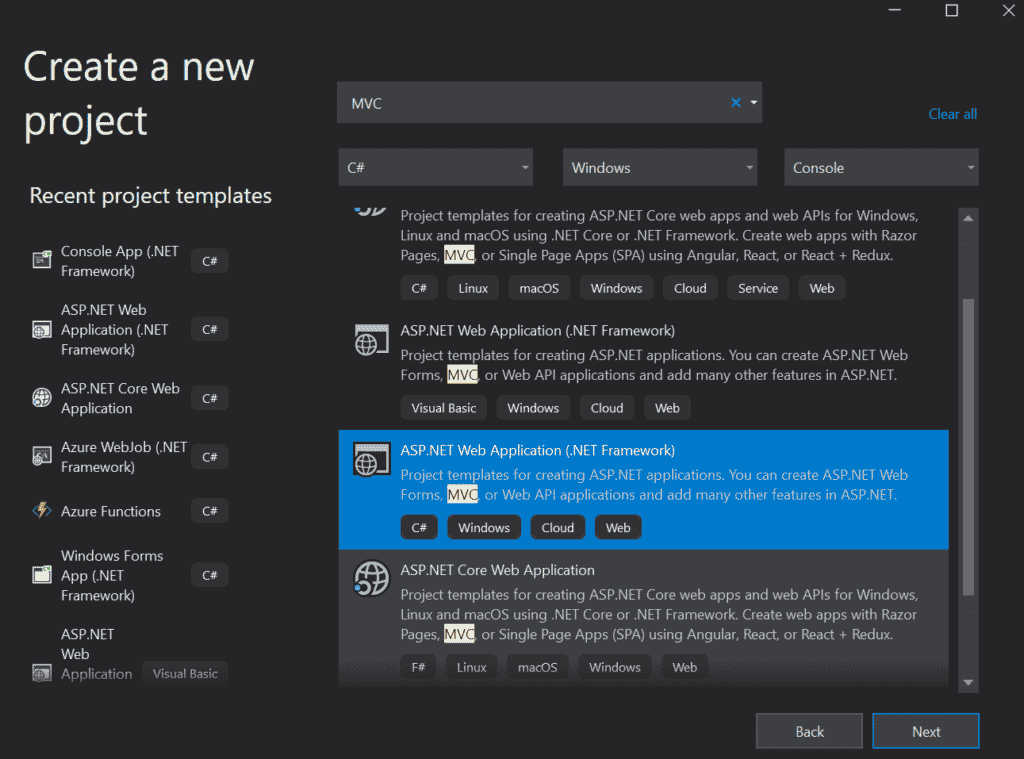
To begin, open Visual Studio and search for an MVC Web Application and select ASP.NET Web Application Template, as depicted below:
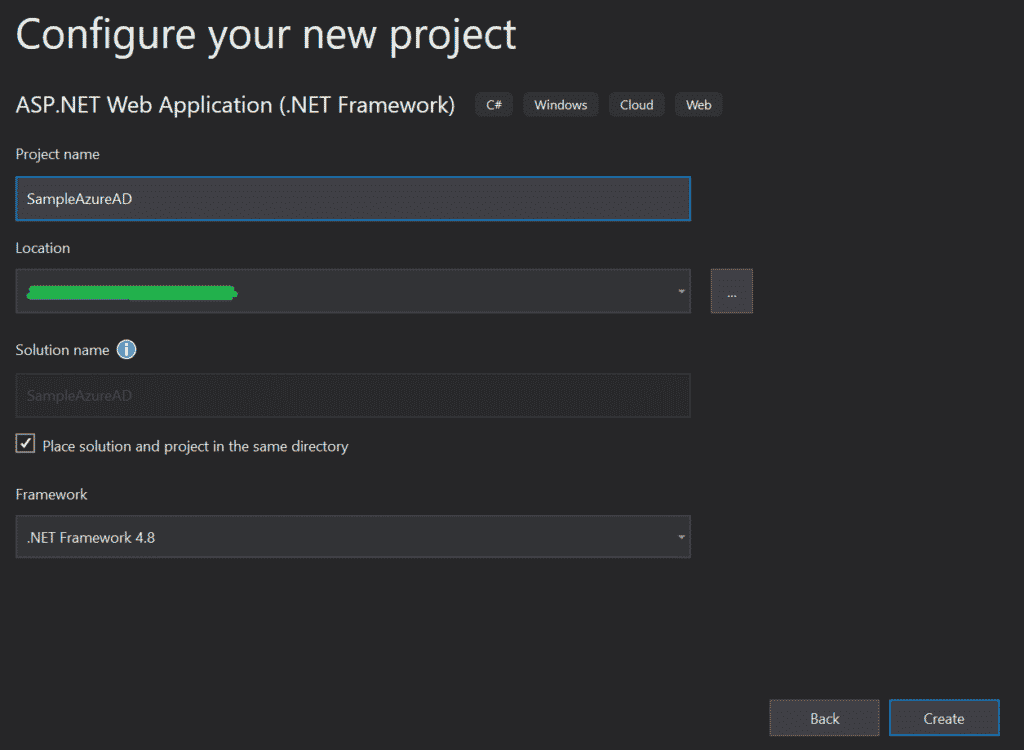
Next, add the Project Name, select the Location of the project to be created and the .NET framework version:
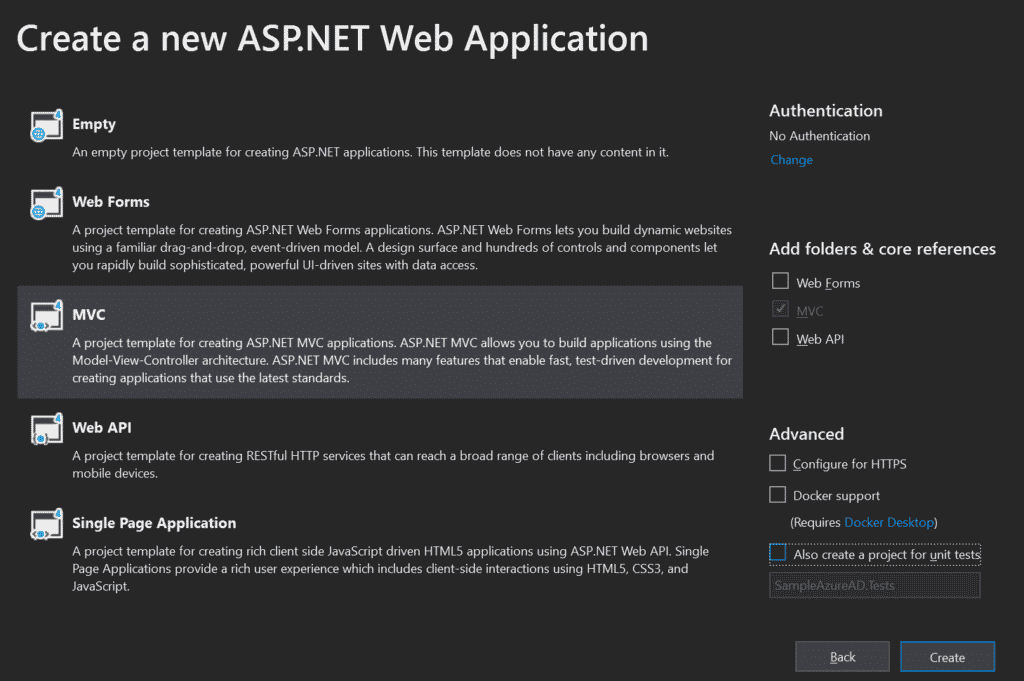
In the next screen, select MVC Project Template and make sure that the Authentication option is set to No Authentication. Then, hit OK:
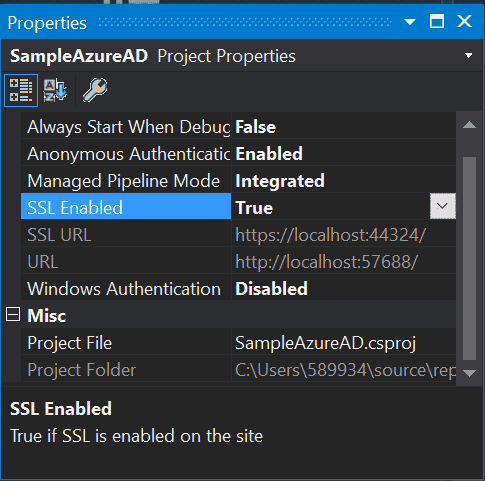
Once the Visual Studio solution is created, select your project under Solution Explorer. Then, you will see the Project Properties window – if not, press the F4 key to open it.
Change the SSL Enabled property value to True, then copy the value of the SSL URL property, because you will need it to configure Azure AD in a little bit:
Next, install all of the necessary libraries to make the MVC application support Azure AD Authentication. To install all necessary libraries, open the Package Manager Console from Tools -> NuGet Package Manager > Package Manager Console. Then, install the following packages one by one using the following commands:
Install-Package Microsoft.Owin
Install-Package Microsoft.Owin.Security.OpenIdConnect
Install-Package Microsoft.Owin.Security.Cookies
Install-Package Microsoft.Owin.Host.SystemWeb
Install-Package Microsoft.IdentityModel.Protocol.Extensions
Install-Package System.IdentityModel.Tokens.Jwt
You can also install the above packages using the NuGet Package Manager UI.
Read: Integrating ASP.NET MVC with GitHub
Adding Keys to Web.config
Now, add the following keys in the Web.config file. Open your Web.config XML file and then copy the XML lines below – paste them inside the tag, which lives inside of the tag:
<add key="ClientId" value="" />

<add key="Tenant" value=" " />

<add key="AADInstance" value="https://login.microsoftonline.com/" />

<add key="PostLogoutRedirectUri" value="https://localhost:44324/" />
Above, ClientId and Tenant have empty values because these values will be coming from Azure AD. Note the following:
- ClientId – Represents the Application ID
- Tenant – Represents domain name on Azure AD
- AADInstance – Represents login URL that allows accessing Azure AD for Authentication
- PostLogoutRedirectUri – Represents app local URL
Creating the Startup Class
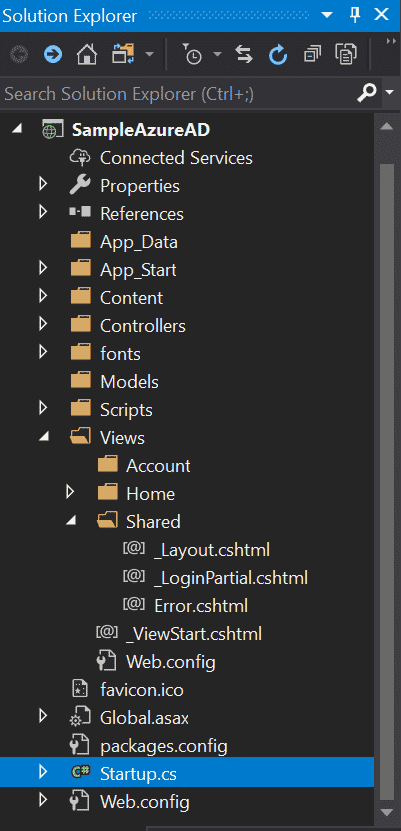
Next, right-click on your web application project and then add a C# file and name it Startup.cs. The file will contain a Startup class that has a void method Configuration:
Next, add the following code in the Startup class:
using System;
using System.Collections.Generic;
using System.Linq;
using System.Web;
using Owin;


namespace SampleAzureAD
{
    public class Startup
    {
        public void Configuration(IAppBuilder app)
        {
            ConfigureAuth(app);
        }
    }
}
Read: Understanding Action Filters in ASP.NET MVC
Creating Startup.Auth.cs
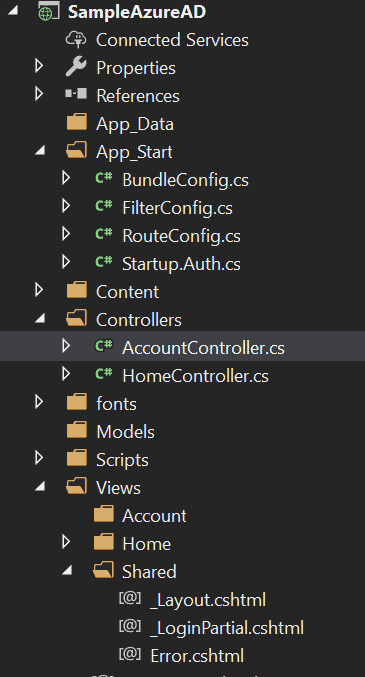
We have to add one more C# file in the App_Start folder named Startup.Auth.cs. Copy and paste the following code snippet in the Startup.Auth.cs file:
using Microsoft.Owin.Security;
using Microsoft.Owin.Security.Cookies;
using Microsoft.Owin.Security.OpenIdConnect;
using Owin;
using System.Configuration;
using System.Globalization;
using System.Threading.Tasks;

namespace SampleAzureAD
{
    public class Startup
    {
        private static string myclientId = ConfigurationManager.AppSettings["ClientId"];
        private static string mytenant = ConfigurationManager.AppSettings["Tenant"];
        private static string myaadInstance = ConfigurationManager.AppSettings["AADInstance"];
        private static string mypostLogoutRedirectUri = ConfigurationManager.AppSettings["PostLogoutRedirectUri"];
        private string authority = string.Format(CultureInfo.InvariantCulture, myaadInstance, mytenant);
        public void ConfigureAuth(IAppBuilder app)
        {
            app.SetDefaultSignInAsAuthenticationType(CookieAuthenticationDefaults.AuthenticationType);

            app.UseCookieAuthentication(new CookieAuthenticationOptions());

            app.UseOpenIdConnectAuthentication(

                            new OpenIdConnectAuthenticationOptions
                            {
                                ClientId = myclientId,
                                Authority = authority,
                                PostLogoutRedirectUri = mypostLogoutRedirectUri,
                                Notifications = new OpenIdConnectAuthenticationNotifications
                                {
                                    AuthenticationFailed = (context) =>
                                    {
                                        context.HandleResponse();
                                        context.OwinContext.Response.Redirect("/Home/Index");
                                        return Task.FromResult(0);
                                    }
                                }
                            });


        }
    }
}
Adding the AccountController Class
Next, add AccountController to the Controllers folder. The controller AccountController will have two methods: SignIn and SingOut:
Copy and paste the following code snippet in the AccountController.cs file:
using System.Web;
using System.Web.Mvc;
using Microsoft.Owin.Security;
using Microsoft.Owin.Security.Cookies;
using Microsoft.Owin.Security.OpenIdConnect;

namespace SampleAzureAD.Controllers
{
    public class AccountController : Controller
    {
        public ActionResult Index()
        {
            return View();
        }

        public void SignIn()
        {
            if (!Request.IsAuthenticated)
            {

                HttpContext.GetOwinContext()
                    .Authentication.Challenge(new AuthenticationProperties { RedirectUri = "/" },
                        OpenIdConnectAuthenticationDefaults.AuthenticationType);
            }
        }

        public void SignOut()
        {

                HttpContext.GetOwinContext().Authentication.SignOut(
                OpenIdConnectAuthenticationDefaults.AuthenticationType, CookieAuthenticationDefaults.AuthenticationType);
        }
    }
}
Finally, add a partial view named _LoginPartial.cshtml that will have links to the methods SingIn and SignOut of the AccountController:
The following code should be added to the partial view:
@if (Request.IsAuthenticated)
{
    <text>
        <ul class="nav navbar-nav navbar-right">
            <li>
                @Html.ActionLink(User.Identity.Name, "About", "Home", null, new { id = "about" })
            </li>
            <li>
                @Html.ActionLink("Sign out", "SignOut", "Account")
            </li>
        </ul>
    </text>
}
else
{
    <ul class="nav navbar-nav navbar-right">
        <li>@Html.ActionLink("Sign in", "SignIn", "Account", routeValues: null, htmlAttributes: new { id = "loginLink" })</li>
    </ul>
}
The last step is to replace ClientId and Tenant values with actual values found in the Azure AD portal.
Finally, compile and execute the MVC application.
Read more ASP.NET programming tutorials.


