Azure Firewall is a Microsoft-managed network virtual appliance (NVA) that provides the best of breed threat protection for cloud workloads running in Azure. It is a cloud-native and intelligent network firewall security service that allows developers and network administrators to centrally create, enforce, and monitor network security policies in virtual networks. In this cloud development tutorial, we will demonstrate how to configure Azure to achieve high security and protection across a network.
Read: How to Create an Azure File Sync Service
How to Configure Azure Firewall
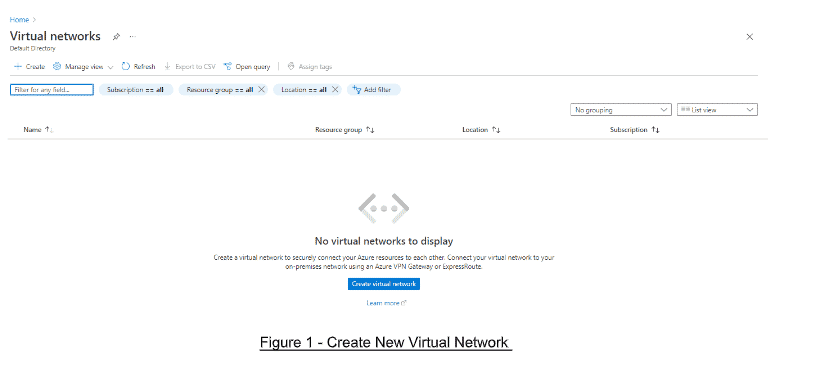
To begin learning how to configure Azure Firewall, we have to first create a virtual network. To do so, login to Azure Portal and search for the phrase Virtual Networks.
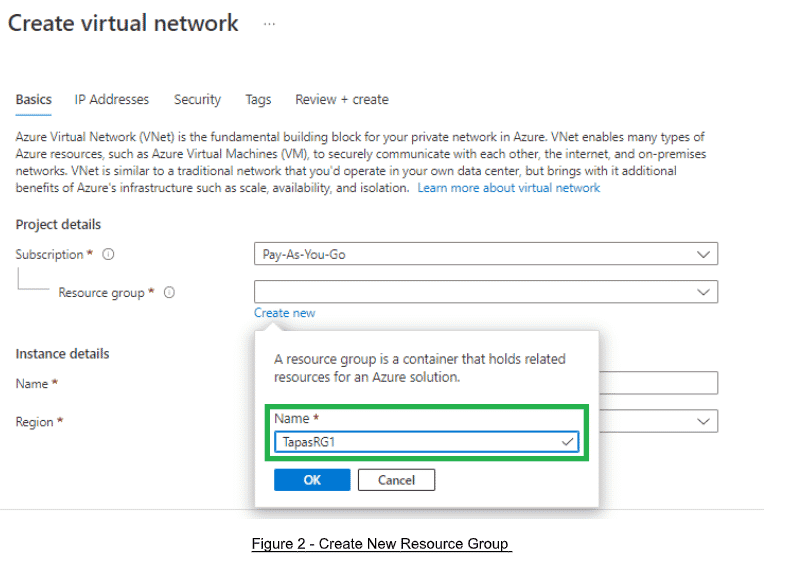
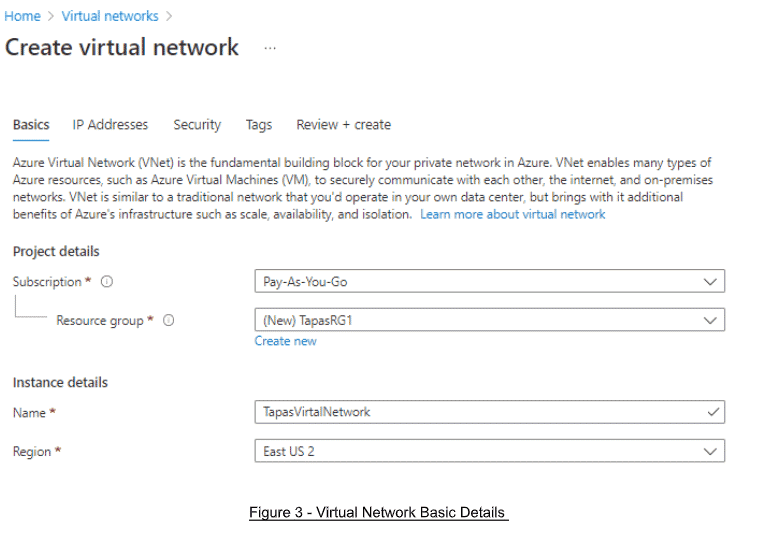
Click Create Virtual Network, select your Subscription and Resource Group. If you do not have one, go ahead and create a new Resource Group.
Next, add the name of your virtual network and select Region.
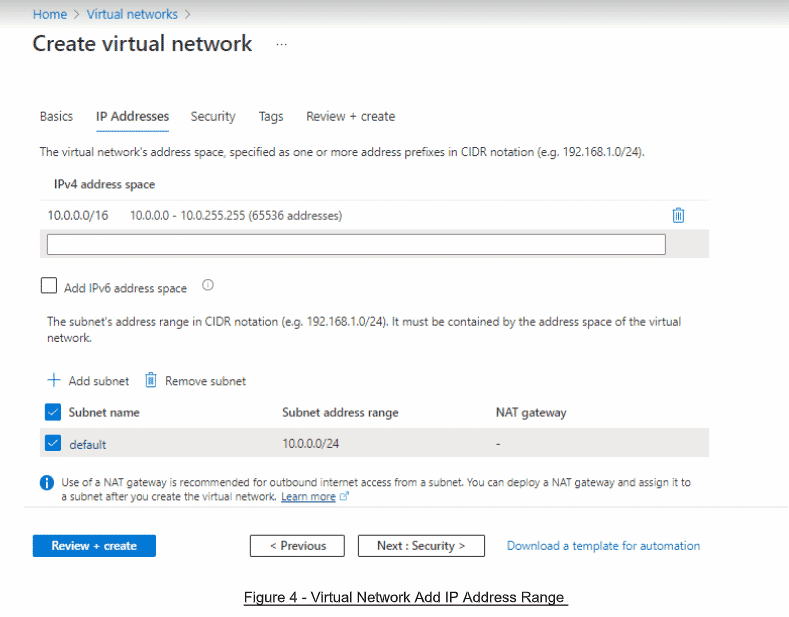
Click Next and then add or update your IP addresses:
Read: Azure Storage Account Replication Types
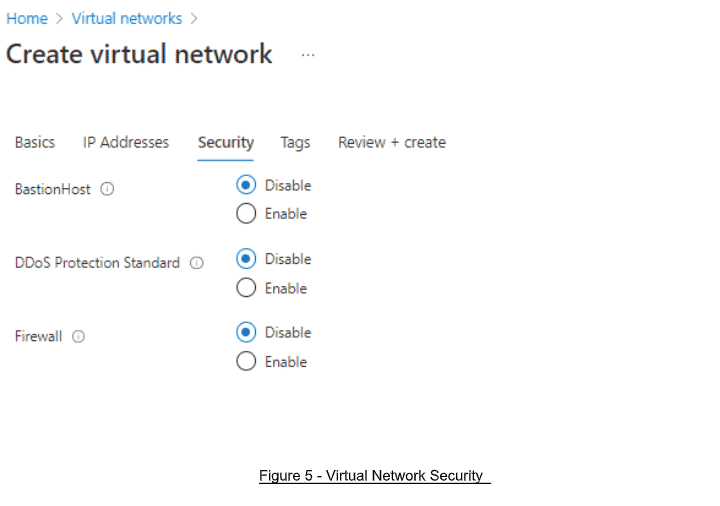
Then, in the Security tab, select the following options, as depicted in the next image:
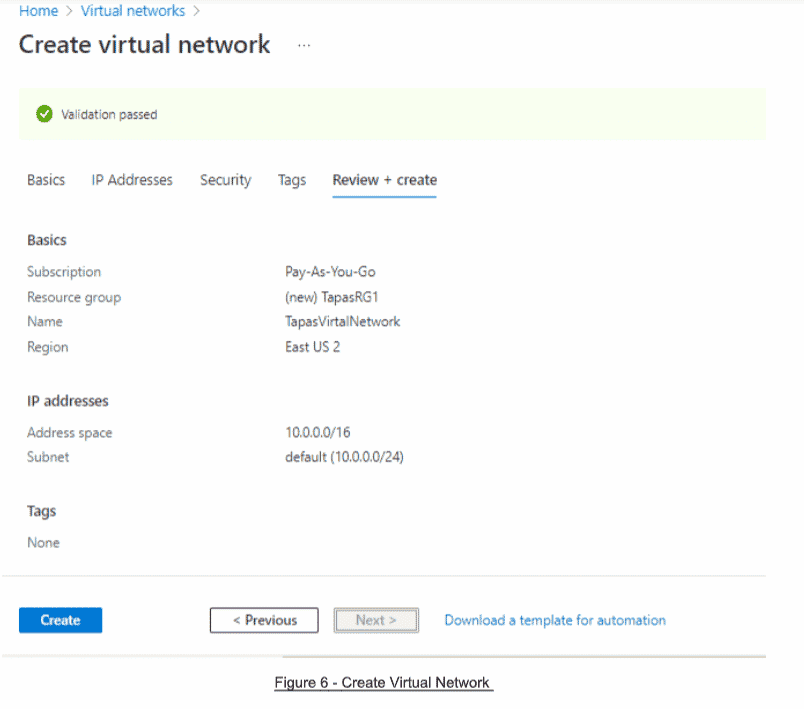
Click on the Review + Create tab, then click Create.
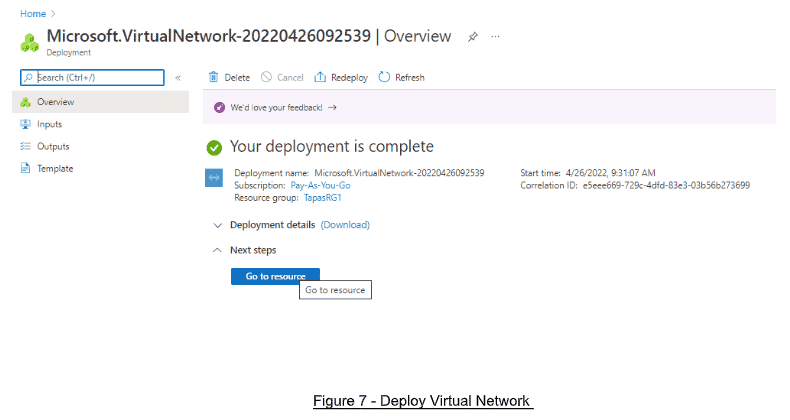
Wait for your deployment to complete. Once finished, click on Go to Resource.
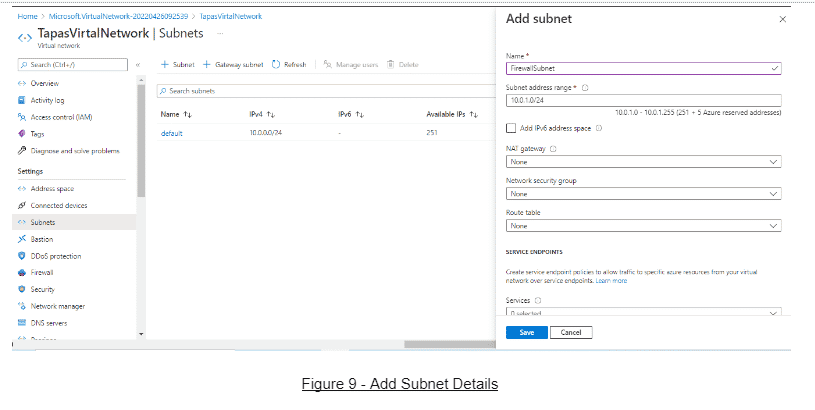
Choose + Subnet Link to a Subnet in the newly created virtual network.
Add all the details required for the subnet and save it. You will now have two subnets under the newly created virtual network.
Read: Configuring Load Balancer in Azure
How to Create a New Firewall in Azure Firewall
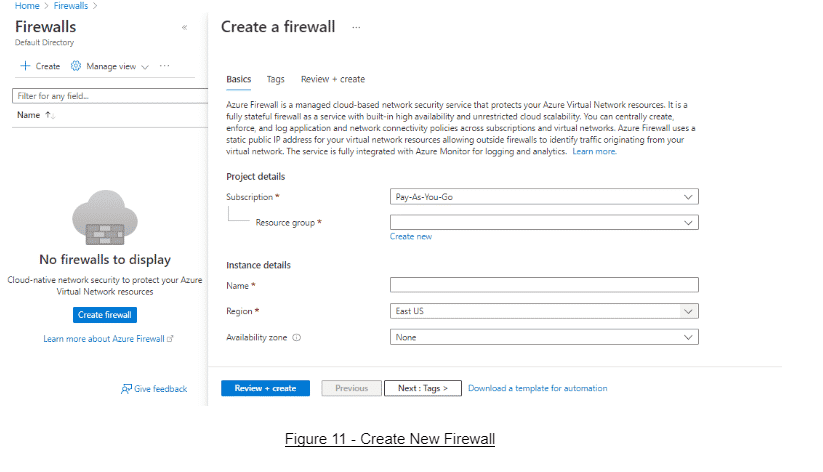
Next, we will need to create a new firewall. Search for the phrase Firewall in the Azure Portal and click Create.
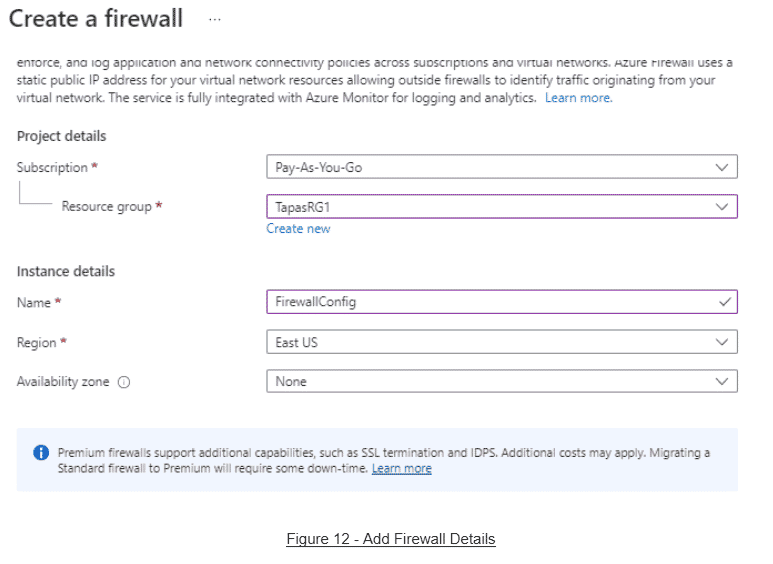
Add the name of the firewall, then select the Region, Resource Group, and Availability Zone.
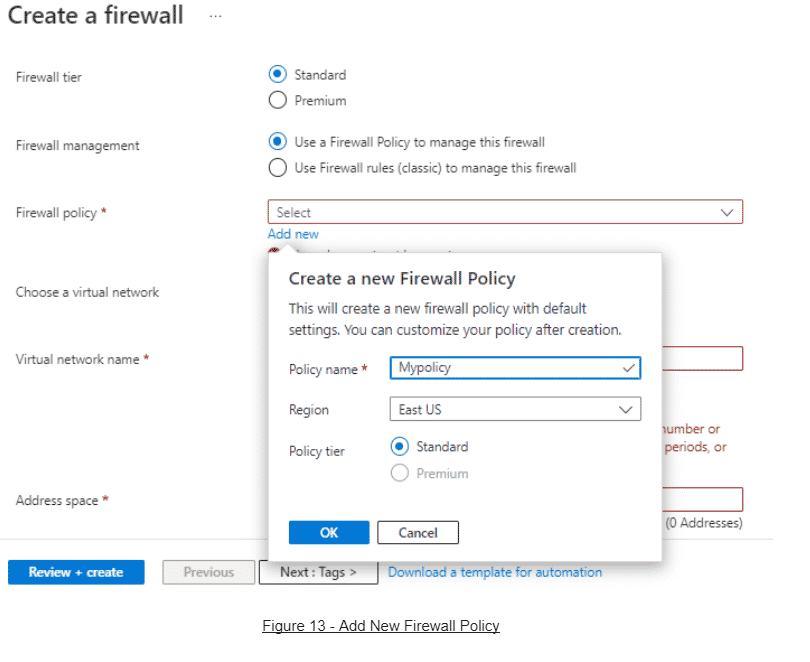
After this, we will want to select Firewall Tier Standard and then Firewall Management: Use a Firewall Policy to Manage This Firewall or create a new firewall policy, as depicted below:
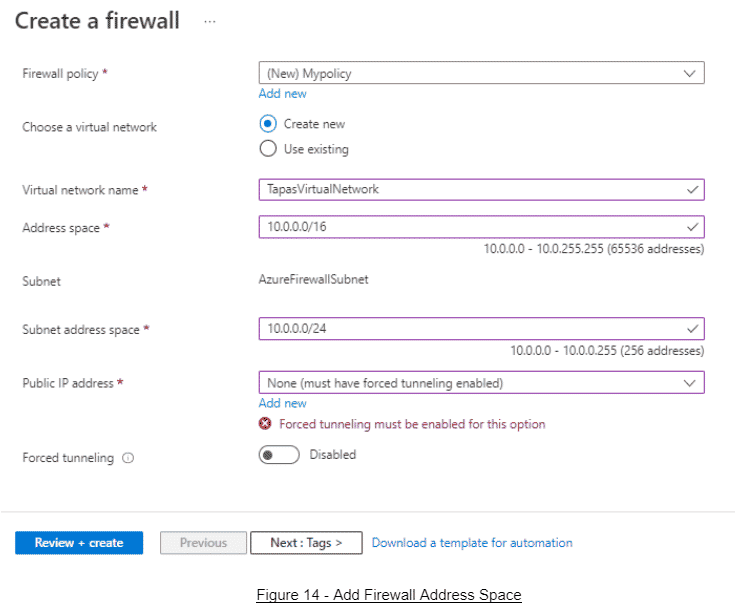
Select the previously created virtual network and update the IP Address space.
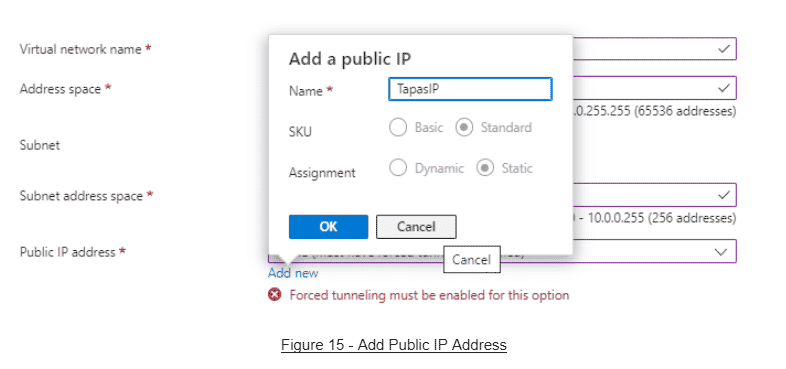
Next, create a Public IP or select an existing one if unused.
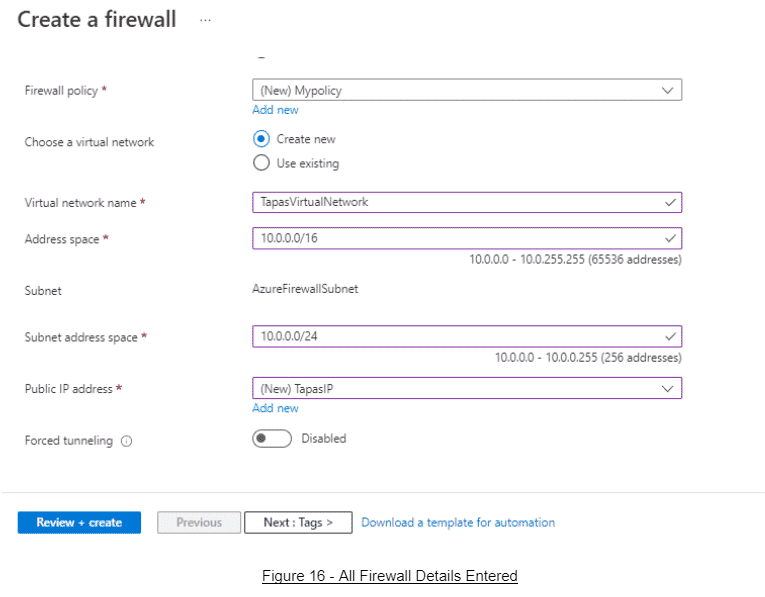
After adding all of the basic firewall details, the screen will look like the image below:
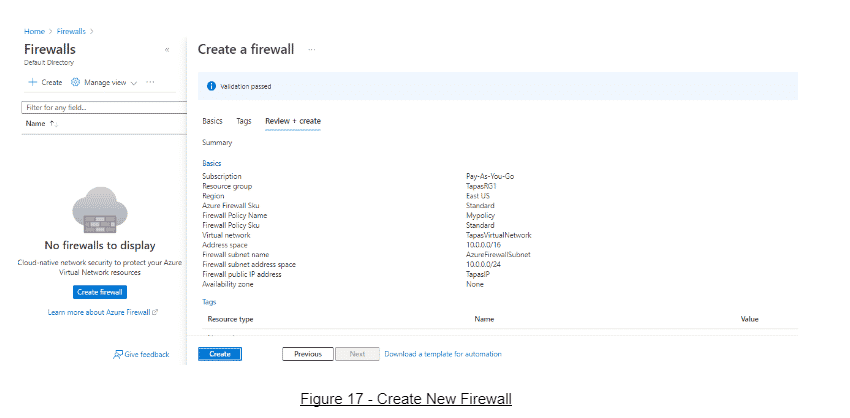
Finally, click Review + Create. Review all of the provided details to make sure they are accurate and create the firewall.
Now we have successfully deployed the Azure Firewall within our firewall. Take note of the Firewall Private IP, Firewall SKU, and the Firewall Subnet.
Read more Microsoft Azure tutorials and cloud development guides.


