

Introduction
Are you ready to start interacting with your Arduino? Do you want your Arduino to be aware of its surroundings? Take your Arduino project to the next level by using the plethora of available shields, sensors and input devices available for the Arduino platform. Arduino “shields” are add-on boards that connect directly on top of the Arduino. The majority of Arduino shields are designed so they can be stacked on top of each other allowing you to create awesome projects. For example: take an Arduino Uno, snap an Ethernet Shield on top, followed by the Sparkfun Weather Station Shield and you have an internet capable weather station for your home.
You will want to invest in a Breadboard for your Arduino projects. Breadboards allow you to create electronic circuits and connect them to your Arduino. You won’t need a breadboard for pre-made Arduino Shields, but once you get into making your own electronic circuits, you will need one.
Arduino Shields
An Arduino Shield is a pre-made board that stacks on top of the Arduino board using the headers and pins. Search the internet for “Arduino Shields” and you will discover a plethora of add-on shields that are available for the Arduino. Arduino Shields are extremely convenient when you are beginning to prototype an idea; they take the guess work out of interfacing with sensors and input devices by designing the circuit for you.
Tinker Kit
The quickest way to get started using sensors is to pick up an Arduino TinkerKit. The TinkerKit is a shield that contains several 3 pin connectors allowing you to connect other TinkerKit devices without having to worry about jumpers and breadboards. Devices such as LEDs, buttons, potentiometers, gyroscopes, accelerometers, and much more can be connected directly to the TinkerKit shield for instant interaction. Pick up a TinkerKit Basic or a TinkerKit Pro and you get the TinkerKit Shield along with miscellaneous modules to connect.
TinkerKit is the quickest and easiest way to learn how to interface with majority of the sensors available for Arduino.

Tinker Kit
Arduino Motor Shield
Perhaps building a robot is more your thing? Check out the Arduino Motor Shield. The Motor shield makes it easy to connect motors directly to your Arduino board using the 3 pin connectors and the screw down terminals on the shield. With this shield you are able to control two DC motors or one stepper motor. You can control direction, PWM (Pulse wave modulation), brake, and monitor the current. For more details about the Motor Shield, check out the Arduino website at http://arduino.cc/en/Main/ArduinoMotorShieldR3.
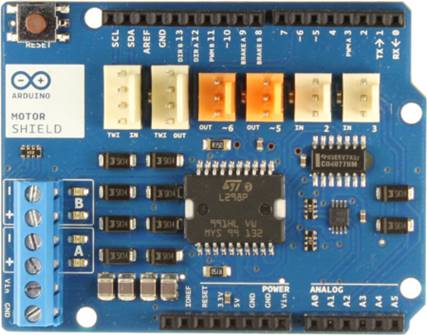
Arduino Motor Shield
Arduino Displays
At some point you are going to want to display some information that your Arduino is thinking. Perhaps you have a temperature sensor connected to your Arduino and you want to see what the current reading is, add a display shield to your Arduino! Displays come in all shapes and sizes for the Arduino; you can find Display Shields or standalone displays that require jumpers to connect to the Arduino board. The most common size display is the 16×2 display; that is 16 characters per line and 2 lines. Other display options include a TFT display that displays 16bit color as well as various LCD touch screens available to bring touch capability to your device.
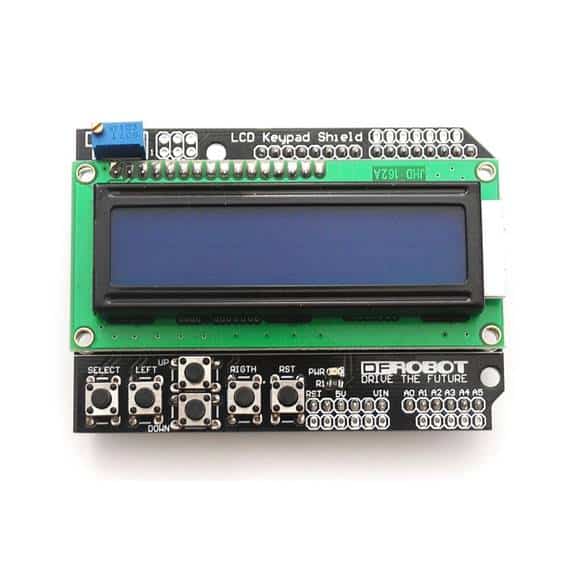
Arduino Displays
Xbee Shield
Do you have two Arduinos that need to talk to each other? Want to ditch wired communications? Look no further than the Xbee module with the Arduino Wireless Shield. The Xbee module can be used to communicate with any other Xbee enabled device within range of your Arduino, including other Arduinos. If you are interested in automating your home with your Arduino creations and you want wireless capability, invest in the Xbee module with the Arduino Wireless Shield.
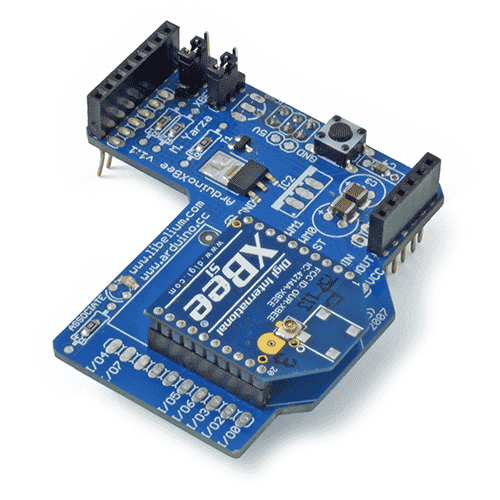
Xbee Shield
Arduino Ethernet Shield
The Arduino Ethernet Shield is the easiest way to connect your Arduino project to the rest of the world via the Internet. Turn your Arduino into an internet connected weather station using the Ethernet Shield with the Sparkfun Weather Shield. Serve up web pages displaying all the current weather information all from your Arduino. You can access your Arduino from any web browser in your home and see the current weather; or if you setup your home router correctly, you can access this information from anywhere in the world with internet access! You can also setup your Arduino to receive commands via the Ethernet Shield. This makes it easy to control your Arduino projects when you are away from the house. An example project would be to open and close your garage door from your smart phone!
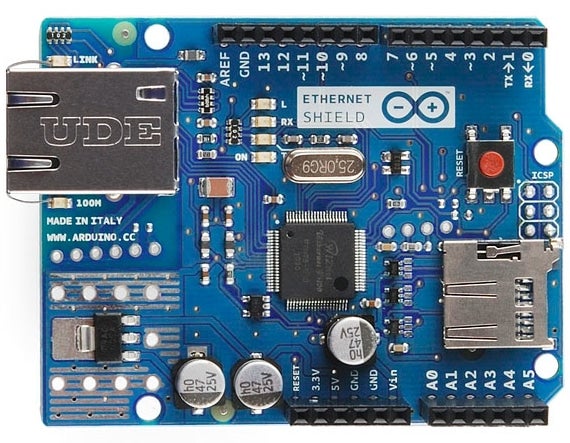
Arduino Ethernet Shield
Breadboard Shield
Do you want to start tinkering with individual electrical components and learn how to create your own electrical circuit? Breadboards make it easy to connect all your components together in a non-permanent way allowing you to alter the circuit as many times as you need to perfect it. Keep your Arduino project and breadboard in one piece with the Breadboard Shield.
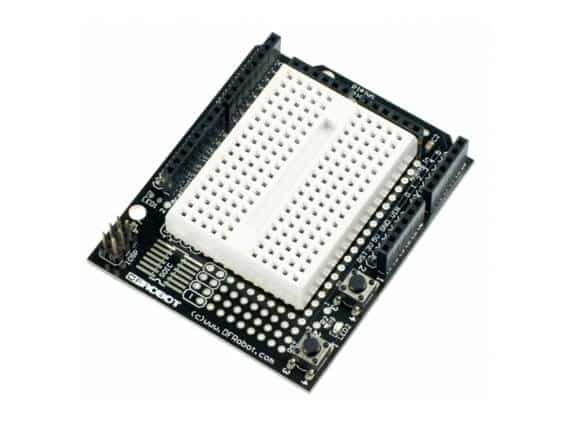
Breadboard Shield
Prototyping Shield
So you perfected your circuit on your breadboard and you want to make it permanent? Create your own Arduino shield with the Proto Shield. You can solder your circuit directly on this board to make your project permanent and keep it in one piece with your Arduino. The shield brings all the pins on the Arduino board directly to through holes for easy connections. Using this board is the best alternative to spending money to create a PCB.
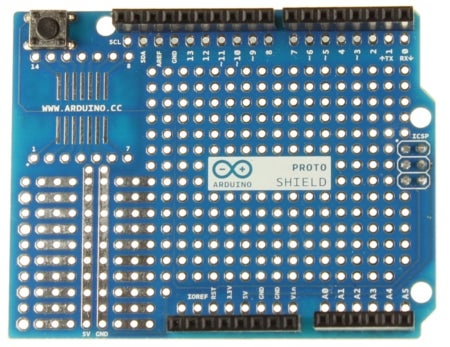
Prototyping Shield
Conclusion
The Arduino prototyping board by itself is pretty boring. To get more out of your Arduino board you will need to add shields to interact with different devices and the real world. Once you learn how to interact with the shields and the code associated with the shields, you will move on to bigger and better projects and you will quickly learn how to interact directly with individual electronics like LEDs and transistors by designing your own circuits without relying on shields.