

Who is the Audience for Microsoft Visual Studio LightSwitch?
Microsoft LightSwitch was recently released to the public in the form of a beta product. While Microsoft Visual Studio LightSwitch has the word Visual Studio in its name, unlike the other Visual Studio tools, the target audience of LightSwitch is not really hardcore developers. Rather, LightSwitch is likely more appropriate for Power Users who are somewhat familiar with development.
You pick Visual Basic or C# when you start a LightSwitch project, so there is a small expectation that you are familiar with development; however, you can create a line-of-businesses application without writing a line of code. Of course, a business user is going to have to be comfortable with topics such as properties, tables, data sources, and data types.
LightSwitch will let you create desktop, web, and cloud-based applications. Additionally, you can tap into SQL Azure, SQL Server, SharePoint, Office and more. You can use custom data source extensions to access third party items as well. By focusing on data, screens, and business logic, the user of LightSwitch can have something up and running quickly.
Installing Microsoft Visual Studio LightSwitch
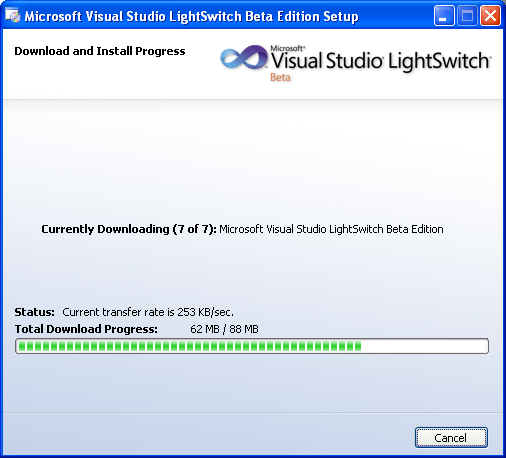
Installing LightSwitch is relatively easy. You can download the LightSwitch beta from http://www.microsoft.com/lightswitch. Running the download will install the various components of light switch onto your system.
Once installed, you can run LightSwitch like any other program. Upon startup, you’ll be presented with a pretty simple screen that allows you to start a new project or open an existing one.
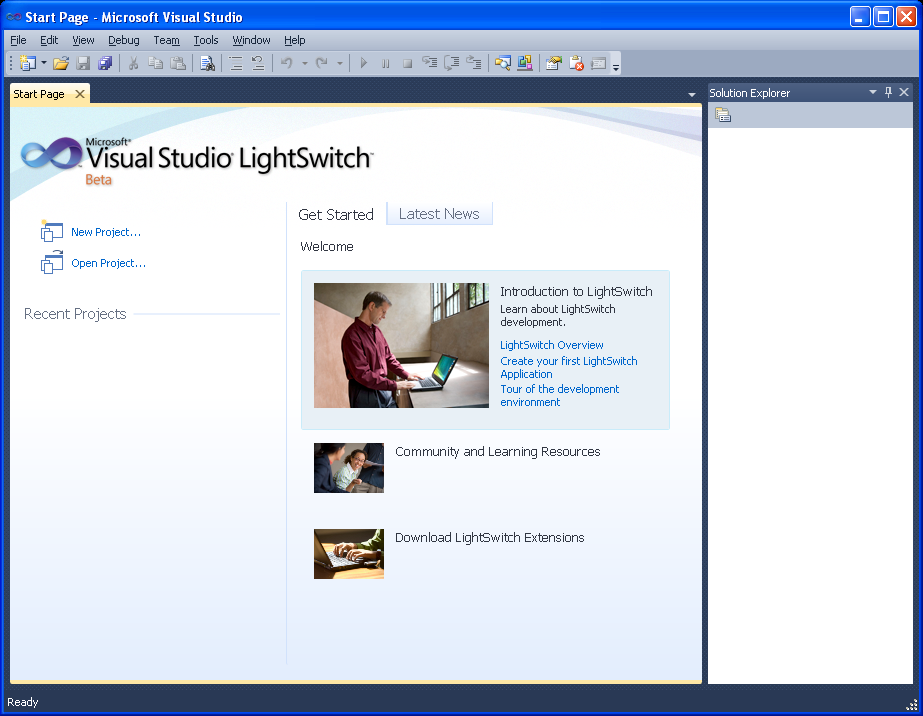
You can also choose to download extensions or review some additional information on LightSwitch. Clicking the option to create New Project will present the New Project dialog.
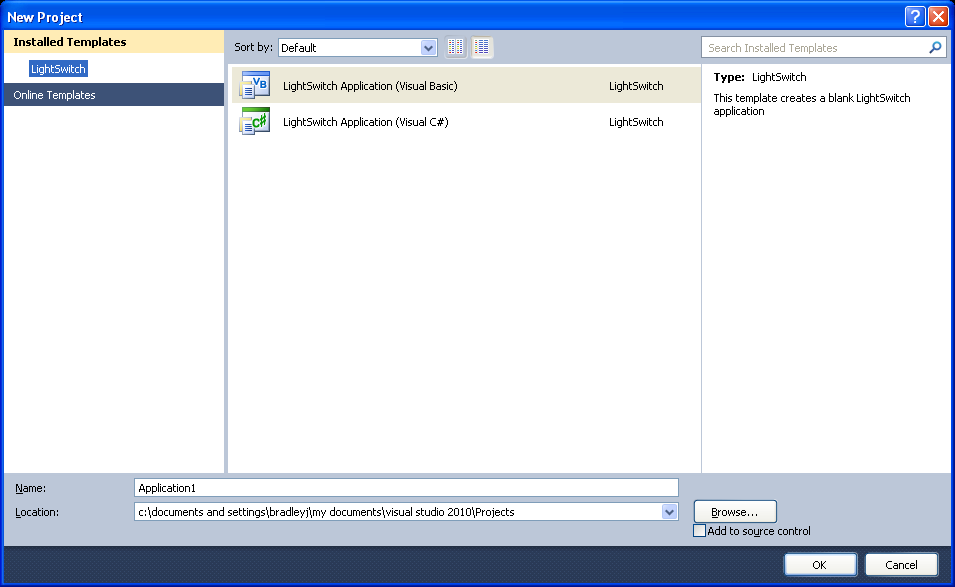
On this page you can elect to use Visual Basic or C# programming. You can also give your project a name as well as set the location where you’d like its files to be stored. Once you’ve set the values you want, click the OK button to continue creating your new application. This will present you with a new dialog allowing you to create a new table (database) or to attach to an existing database.

If you select to create a new table, then you’ll be presented with a designer for creating your data sources. Within the dialog shown, you can click on the Add Property area and add the name of an item to be stored in your database. You can then set the type as well. There are a types ranging from Strings (text) to PhoneNumbers. LightSwitch will add some editing features based on the type, so you should pick the type that fits best. There are a few non-standard types such as email address and money to choose from as well.

You can also create relationships, computed properties, queries, additional tables, and more. Of course, with data, there is likely also a need to create a screen to interact with that data. You can create the Screen option in the designer to be taken to a dialog for adding a new screen
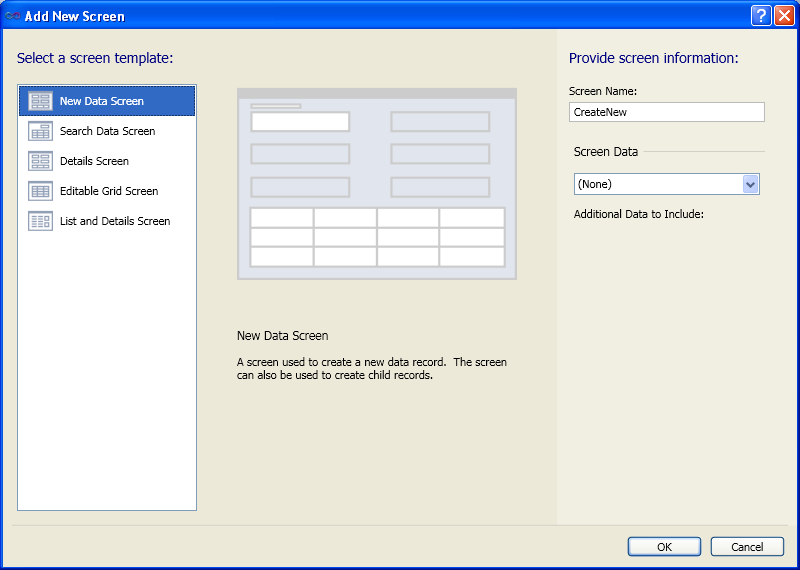
As you can see in the Add New Screen dialog, you have a variety of standard layouts to select from including one for adding new data, one for searching existing data, one for showing details of your data, one for editing the data in a grid, and one for listing the data alongside the details. As you click on each screen template, the display shows a rough layout. Once you’ve selected your layout style, you can pick a name for the screen file and select the data you want to use (most likely the table you just created or linked to). Clicking Ok will then create the screen.
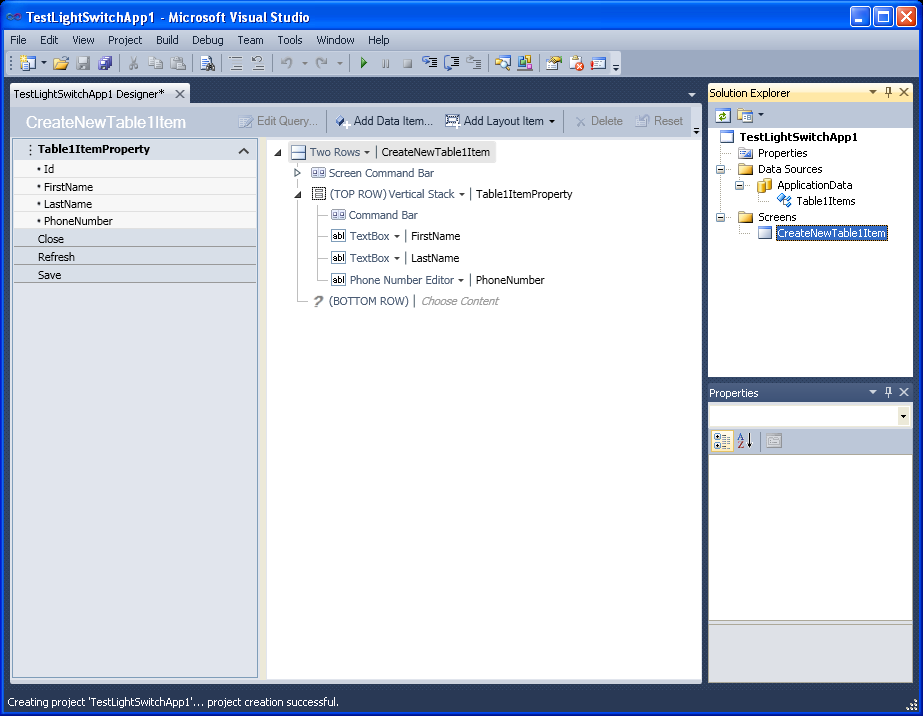
The resulting screen might surprise a non-developer as it doesn’t look like a screen; however, if you look at what is presented, you’ll see that a screen was created with a couple of text boxes and a phone number. You can see the actual screen by running the application or by right clicking on the screen name in the Solution Explorer on the right side and selecting Open. To run the application, press F5 or select Start Debugging from the Debug Menu. If you run the application, then if it builds correctly you’ll see something like the following:
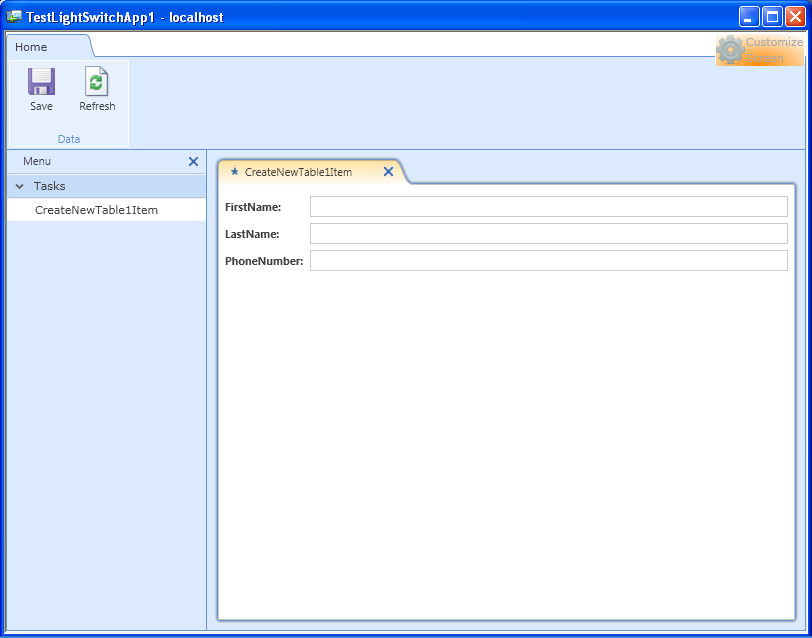
At this point you can enter data into the dialog in the application shown. You’ll see that it does format your phone number. Additionally, you can click the drop down arrow on the phone number field and see that it knows the parts of a phone number as well. Once you’ve entered data, you can click the Save button to save the information. If you want to add additional people, you can click on the CreateNew item on the menu to the left.
LightSwitch Goes Much Farther
This just scratches the surface of LightSwitch. This is just a simple article and within it I created a database, an entry screen, and an application without writing a single line of C# programming code. That is the power of LightSwitch. If you dig into it some more, you will see that Microsoft has worked to make creating basic business applications as easy as possible. In fact, they’ve tried to make it easy enough that power users can even be building applications.