

As you design your Web applications, consider how they will be deployed. If possible, try to minimize the system impact of any installation. This way, you can keep closer track of any changes to the application and ease the problem of deploying updates to an existing application. However, sometimes you will need to perform more complex installations (for example, reusing unmanaged code components or storing sensitive data securely in the Registry).
ASP.NET 2.0 provides a number of new features related to deploying a Web-based application. This article discusses the new features the .NET Framework 2.0 provides for packaging and deploying ASP.NET 2.0 Web applications onto target machines. Along the way, you will learn how to leverage Windows installer technology for creating sophisticated ASP.NET application setups and installers.
From ASP.NET 1.x to ASP.NET 2.0
ASP.NET 1.x versions provided a number of features that were aimed at greatly simplifying the deployment of ASP.NET applications. They relied heavily on the .NET Framework class libraries for much of their functionality because the class libraries could be very easily copied over the assemblies to the bin directory. The .NET Framework 2.0 and Visual Studio 2005 build on the foundation of the .NET Framework 1.x and enhance the deployment features by providing new options.
Before looking at the different deployment options available for deploying an ASP.NET 2.0 application, briefly consider the structure of an ASP.NET application.
Components of an ASP.NET Web Application
A typical ASP.NET application consists of all the Web pages (.aspx and HTML files), handlers, modules, executable code, and other files (such as images and configuration files) packaged into a virtual directory and its subdirectories on a Web server. An ASP.NET application can also include compiled assemblies such as business logic layer assemblies or data access layer assemblies. These assemblies are located in the bin directory underneath the application’s virtual directory.
You can deploy an ASP.NET application onto a target server in a number of ways. The next section discusses each of these options in detail and provides examples.
Deployment Options That .NET Supports
You can deploy an ASP.NET Web application using any one of the following four deployment options:
- XCOPY deployment
- The Copy Web Site option in Visual Studio 2005
- The Precompilation Options in Visual Studio 2005
- Visual Studio 2005 installer
The following sections provide an in-depth look at all of the deployment options available in .NET. For demonstration, create a new Web site by selecting File->New Web Site from the Visual Studio 2005 menu. In the New Web Site dialog box, select Visual Basic as the language and select ASP.NET Web Site from the list of Web site templates. Specify the Web site location as shown in Figure 1.
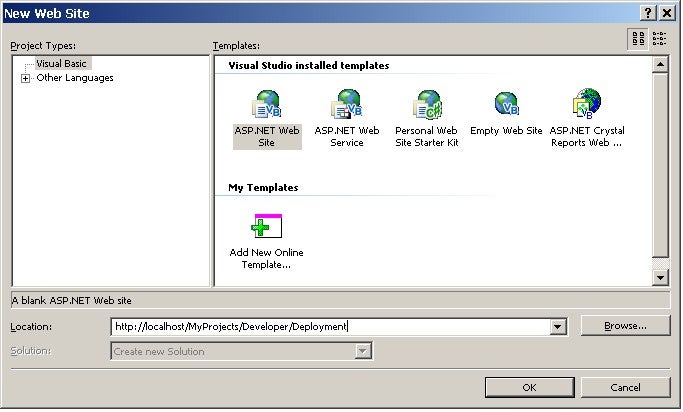
Figure 1. Specify the Location for Your New Web site
This tutorial uses the preceding project to demonstrate the different ways of deploying a Web application.
XCOPY deployment
One of the primary goals of the .NET framework is to simplify the deployment of Web-based applications by providing XCOPY deployment. XCOPY deployment makes deploying a Web application very simple. Just copy over all the required pages into the root folder and the dependant assemblies into the bin directory and you are done.
In Figure 2, you can see how a Web application named Deployment is xcopied to the c:\temp folder.

Figure 2. The Deployment Web Application Xcopied to the c:\temp Folder
The xcopy command takes a number of arguments. (For more information on the different options supported by the xcopy command, refer to this MSDN link.)
After the folder is copied over to the target server, create a virtual directory on the target server (using the Internet Information Manager MMC snap-in) and map that virtual directory to the physical directory that you used as the target in the XCOPY command. Now, you can browse to the Web page and start running the pages using a browser.
Using the Copy Web Site Option in Visual Studio 2005
The Copy Project option in Visual Studio .NET makes it very easy for you to deploy ASP.NET Web applications onto target servers. By using this option, you can copy the Web project to the same server or to a different server. Note that when you use this method, this utility simply copies the files from the source location to the target location without performing any type of compilation on those files. This means you need to ensure that the entire Web site compiles correctly before using this approach to copy the files over to the target location.
To copy the Web site onto the target server, select Web Site->Copy Web Site from the menu. Selecting that option will result in the dialog box displayed in Figure 3.
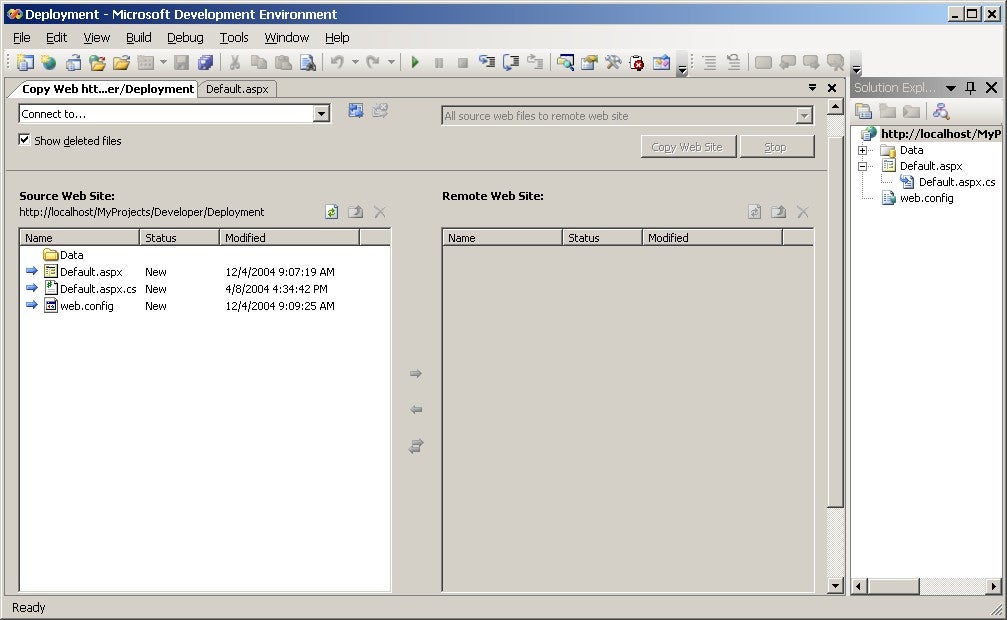
Figure 3. The Resulting Dialog Box from the Copy Web Site Option
The Copy Web Site dialog box provides the following options:
- Destination Project Folder: By clicking on the Connect to... item in the dropdown list, you can open the Open Web Site dialog box and specify the target location. The location can be the same server or a remote server.
- While moving the Web site files to the remote directory, you can perform any one of the following three types of moves. These options are available in the Move Files dropdown list:
- All source Web files to remote Web site
- All remote Web files to source Web site
- Synchronize source and remote Web sites
In the Copy Web Site dialog box, click the icon right next to the Connect to... dropdown box. That will result in the Open Web Site dialog box displayed in Figure 4.
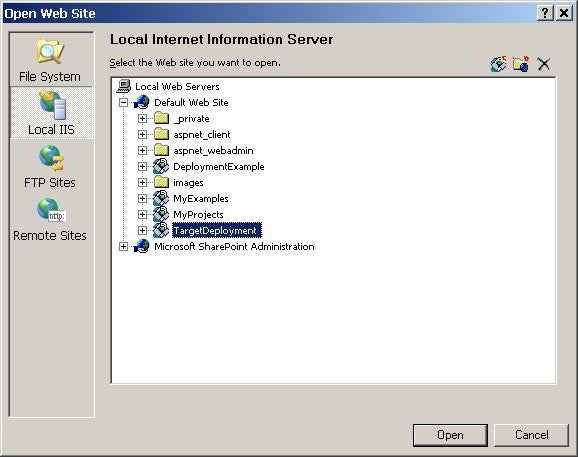
Figure 4. The Resulting Dialog Box from the Open Web Site Option
As you can see, you can deploy your Web site in any of the following locations:
- File system
- Local IIS
- FTP sites
- Remote sites
In the open Web site dialog box, create a virtual directory named TargetDeployment and click Open. Now, in the Copy Web Site dialog box, click the Copy Web Site button. This will result in the Deployment Web site being copied to the target directory.