

Introduction
Simply put, cloud computing
is a managed, on-demand, scalable computing service which can greatly
reduce the time and expense otherwise required to manage corporate IT
infrastructure. From the developer’s perspective, the implications of
delegating expensive and complex issues such as provisioning,
visibility, and security to a capable third-party are many, among them
the ability to focus the majority of one’s time building the most
capable, compelling application on the market.
Because no two corporate IT environments are alike, the success of
any cloud computing service is going to rest largely on the ability to
interoperate within even the most heterogeneous
environments. Microsoft’s Azure
Platform interoperability efforts are indicative of this importance,
with great strides being made to provide
developers with the ability to connect not only .NET applications to
Azure services, but also those built using languages such as Java, PHP,
Python, and Ruby. Support for PHP is particularly
strong, with the Windows Azure SDK for PHP Developers having been available since November of 2009, in addition to the
WindowsAzure4e Eclipse plug-in which greatly reduces the time required to develop and deploy PHP applications supporting Azure.
Azure’s PHP support was further strengthened last month with the
release of Zend Framework 1.10, which includes native Azure support via
the Zend_Service_WindowsAzure
component. In this article I’ll show you how to connect your Zend
Framework application directly to the Windows Azure cloud. In order to
follow along with the examples you’ll need to create a Windows Azure
account.
Creating a Microsoft Azure Account
One of the great advantages to cloud computing is the fact that you
only pay for the resources you use. At the same time, the cloud service
providers such as Microsoft want to encourage developers to experiment
with cloud computing and so it’s currently possible to create an Azure
account which includes a certain threshold of monthly resource usage at
no charge. According to the Azure Website this offer is slated to end
on July 31, 2010 so if you’re reading this article after the offer
expiration date be sure to consult the Website for the latest details.
To create your account head over to the Azure Website and click the Account
link. Because you could conceivably surpass the substantial monthly
free resource thresholds made available to all Azure users, you will
need to provide a credit card during the registration process. Once the
registration process is complete you’ll be provided with a confirmation
e-mail and you can begin using your Azure account.
Configuring Your First Microsoft Azure Project
Once you’ve received the account confirmation, login to your Windows Azure account via
the developer portal.
On your home page you will be provided with a list of Azure projects associated
with your account, which if you didn’t have an Azure account previously
will consist of just one default project created during the
registration process. Click on the project name, and then click on the New Service. From there
you’ll be able to choose between adding a Storage Account or Hosted Services to this project (see Figure 1). For the purposes of this tutorial we’ll be using the Azure storage services
so click the Storage Account link to proceed.
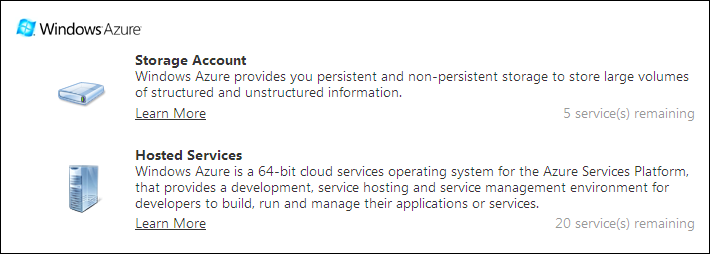
Figure 1. Adding services to your Microsoft Azure project
Next you’ll be prompted to assign a name and description with the
storage account. I’ll call my account NASCAR, as the examples which
follow will demonstrate how to use Azure and the Zend Framework to
store information about my favorite NASCAR tracks. With the service
created you’ll next be asked to provide a globally unique public name
for the storage account (see Figure 2), which is the URL endopoint
which you’ll use to manage your hosted data. This public name must
consist of at least 3 lowercase alphanumeric characters. You’ll also be
asked to assign an “affinity group”, which merely determines where in
the world your data should be stored. For instance, if you live in the
United States then you should probably choose Anywhere US as your affinity
group region. Once these values have been assigned click the Create button to create your storage account.
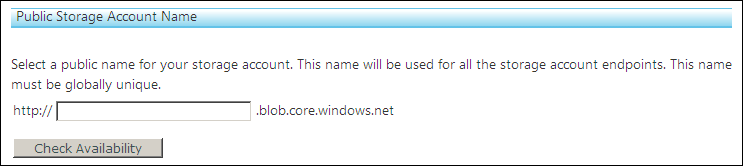
Figure 2. Creating a globally unique public name
Once the storage account has been created, you’ll be provided with
three endpoint URLs, a primary access key, and a secondary access key.
Each endpoint URL points is used in conjunction with Azure’s three data
storage solutions (tables, blobs, and queues). The tables solution allows you to store data using the conceptual notion of a database table,
whereas the blog solution allows you to store named files such as images and videos, and the queue solution allows you to manage application messaging. We’ll take a look
at the tables
solution in the forthcoming examples. The primary and secondary access
keys are used for authentication purposes, allowing Azure to know that
you indeed possess the necessary privileges to manipulate the account
data.
Using the Zend_Service_WindowsAzure Component
The Zend_Service_WindowsAzure component is bundled with the Zend
Framework version 1.10 and greater, so if you haven’t already upgraded
please take a moment to do so before proceeding. Once in place, go
ahead and create a new project, or consider adding a new controller and
corresponding view to experiment with the new Azure features.
Creating a New Storage Table
In order to store information regarding favorite NASCAR tracks in
the Azure cloud we’ll first need to create a storage table. Keep in
mind that although the nomenclature is shared, this is not a relational database table! However you can
continue visualizing tables as consisting of columns, rows, and
typed-value pairs. To create a table, you’ll first connect to the
storage service by defining the appropriate endpoint, storage service
name, and your primary access key, as demonstrated here:
$storageClient = new Zend_Service_WindowsAzure_Storage_Table(
  'table.core.windows.net', 'wjgnascar', 'PRIMARY_ACCESS_KEY'
);
Once connected, create the table using the createTable() method:
$result = $storageClient->createTable('tracks')
Adding Data to the Storage Table
Just as it’s possible to rigorously define a relational database
table schema in order to enforce what sort of data is inserted into
each row, so is it possible to control the type of data inserted into a
Windows Azure table. However you don’t formally create the table
definitions within the storage service; instead you’ll do so by
creating a client-side schema class in a fashion similar to creating a
Zend Framework model, and then populating the schema object before
sending the object to the service. Otherwise, you’re free to insert
just about anything you please into a storage table, even mixing and
matching data from one row to the next (although this is of course not
recommended). Let’s just fly by the seat of our pants and forego using
the client-side schema when adding a few tracks to the table:
When inserting data sans a schema class you’ll use the Zend_Service_WindowsAzure_Storage_DynamicTableEntity
class. The constructor accepts two parameters, including a partition
key and row key. The former is used to organize data in groups, whereas
the latter is the row’s primary key. See the MSDN documentation for more information about the purpose of these values.
With the partition and row keys defined, you can next assign the
key value pairs. In the following example we’ll create a new row which
defines the Atlanta Motor Speedway and its track length:
$row = new Zend_Service_WindowsAzure_Storage_DynamicTableEntity(
‘na’, ‘0001’
);$row->name = ‘Atlanta Motor Speedway’;
$row->length = 1.540;$storageClient->insertEntity(‘tracks’, $row);
Querying for Data
You can retrieve data according to its primary key by specifying the partition and row keys, like this:
$entity = $storageClient->retrieveEntityById(‘tracks’, ‘na’, ‘000001’);

echo “The {$entity->Name} track length is {$entity->Length} miles.”
Executing this snippet produces the following output:
The Atlanta Motor Speedway track length is 1.54 miles.
It’s also possible to retrieve data using a fluent interface
similar to that provided via the Zend_Db component. For instance, use
the following syntax to retrieve a list of all tracks stored in the
storage table:
$entities = $storageClient->retrieveEntities(
$storageClient->select()->from(‘tracks’)->where(‘PartitionKey eq ?’, ‘na’)
);foreach ($entities as $entity) {
echo “{$entity->Name} ($entity->Length miles)<br />”;
After adding a few tracks and executing the above code, you’ll see results similar to the following:
Atlanta Motor Speedway (1.54 miles)

Auto Club Speedway (2 miles)

Bristol Motor Speedway (0.533 miles)
Works like a charm! Inserting and retrieving data are just a few of
the operations you can do using the component. It’s also possible
to easily update and delete data using native operations.
See the component documentation for more information.
Conclusion
Although officially only less than one month old, the Zend Framework’s
Zend_Service_WindowsAzure component already holds great promise for
developers wishing to store application data
in the Azure cloud. If you’re an early adopter and have already started
using these new framework features within your applications, I’d love
to hear about what you’re doing!