

Since Microsoft introduced their App Services option in Azure, which includes Web Apps, Mobile Apps, and more. There’s been a great deal of choice when it comes to what you want, and how much control you’d like to have.
On one hand, you have a virtual machine; it’s fully controllable, and can be built upon and worked to you heart’s content. However, this comes at a price. Maintenance, configuration, and security come to mind. Now, these might be things you need to have complete control over; but, if it’s just a Web site you need, with all the standard requirements, this could be overkill. This is where Web Apps come into play. Azure takes over all the heavy lifting, and all you need to do—especially if you’re using Visual Studio—is to publish your Web app, and maybe pass it an environment setting or two.
However, there is a problem with this approach. When it comes to a VM, you can very easily drop some other applications in there, too. These could be simple console applications or a Windows service; all have the task of performing some regular maintenance on data, as an example. They run on a separate process to your Web application, making better use of system resources.
So, the question you might have is… Can we do the same with Web apps, which don’t allow you direct access to the VM they are running on?
The answer to that question is yes, and the answer comes in the form of Azure WebJobs.
Creating a WebJob
There are several file types that Azure will accept for WebJobs. These include the following…
.cmd, .bat, .exe, .ps1, .sh, .php, .py, .js, and .jar
For this article, we’ll stick with .exe and create a standard .NET C# console application in Visual Studio. Before I show you the code I have in my console application, I want to bring your attention to the WebJobs SDK. For this article, our WebJob will be very simple, but in a real application of this technology, you will certainly need more. The WebJobs SDK allows you trigger your jobs under several circumstances, one of them being a job trigged by a message from Azure Queues.
You may find the SDK here. It can be installed through NuGet, with a search for Microsoft.Azure.WebJobs. Given that setting up the SDK will take a little more time than what we have for in this article, let’s look at the code in our application.
class Program
{
   static void Main(string[] args)
   {
      DisplayTime();
   }

   public static void DisplayTime()
   {
      Console.WriteLine(DateTime.UtcNow.TimeOfDay);
   }
}
It’s very simple; we’re going to output the time to the console this application was run at; then, it will exit. But, before we ship this application off up to our Azure Web site—and you will need at least a free Web instance—we’re going to add one small detail.
Build your application, which for me gave this result in the bin folder.
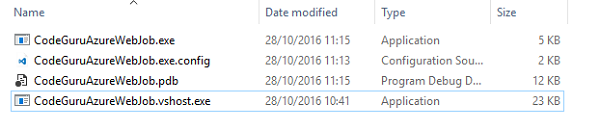
Figure 1: The build output
Now, along with that output, add another file named settings.job. And, using a simple text editor, add the following…
{
   "schedule": "0 */1 * * * *"
}
This is a CRON expression, if you aren’t familiar with it. It will be used to schedule the frequency of the execution of our WebJob. The previous expression dictates that our WebJob will trigger on every minute. If you would like to know more about CRON expressions, you can find a detailed description here.
Moving on, now package your application, along with the settings.job, into a zip like so…
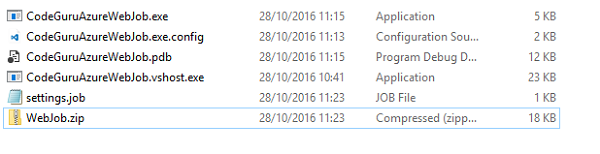
Figure 2: The output packed into a zip, along with the settings.job file
Deploying the WebJob
As we mentioned before, you’ll need an active Web App running in Azure to complete the remainder of this article. A free instance will be sufficient; and, if you navigate to your Web app and select WebJobs from the navigation menu, you’ll end up with what I’m looking at here…
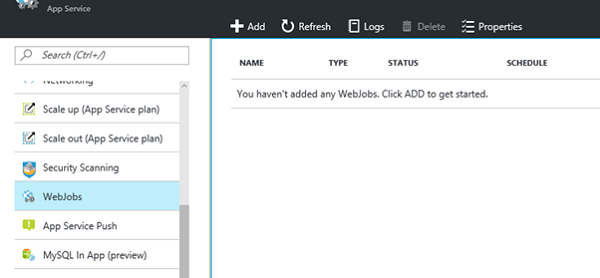
Figure 3: Our Web app’s empty list of WebJobs
Click ‘add’ at the top. This will present a form to you like below. I’ve already filled in the settings as an example.
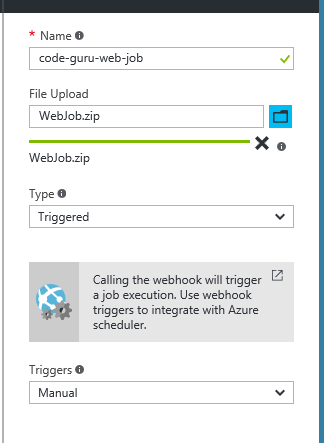
Figure 4: The complete add WebJob form
There are a few options for some of the drop-downs, but the settings we’ll use for this article will be Type: Triggered and Triggers: Manual. Click Okay, which should be at the bottom, and Azure will take the needed time to add the WebJob to your instance. Once it’s completed, you’ll see the WebJob in the list. For me, it looks like this…
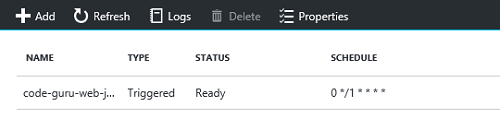
Figure 5: The added WebJob
Note that the ‘Status’ above is currently reading Ready; it won’t remain that way for long. As you should recall, we specified a schedule in our settings.job file; it can be seen in Figure 5 under ‘Schedule’. Give it a few minutes, hit refresh, and you’ll see that the ‘Status’ changed to Completed Just now.
But, that doesn’t tell us much, nor can we see the current time we chose to output in our code. To see this, select your WebJob in the list, and click the Logs button at the top. This will navigate you to a different Web page, from where you can see logged information about your WebJob. I’ve given at least six minutes since I deployed my job, and my log currently looks something like this…
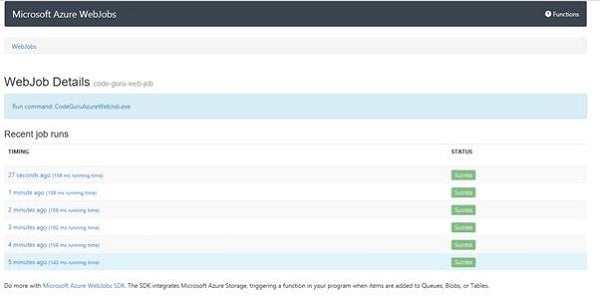
Figure 6: The information logged by our WebJob
If you then click the timings of any of those logged runs, you will be presented with the console output; and ultimately, the time we wanted to see produced by our code…

Figure 7: The console output from our WebJob
In Figure 7, second item from the bottom, you can see the output from this line of code…
Console.WriteLine(DateTime.UtcNow.TimeOfDay);
Granted, this is a very simple example, but we can see how easy it is to deploy a WebJob, which runs in the background in a separate process from our Eeb site. Put it in a prime position to perform heavy lifting tasks, or just regular data clean ups.
If you were to add the WebJobs SDK, you can bring in more of what Azure has to offer; for example, storage, queues, and more. While keeping in with the semi manage environment of Azure App Services, you can have the best of both the freedom to add more than just a Web app, but allowing Azure to take care of the maintenance and upkeep of the VM itself.
If you have any questions on this article, you may find me on Twitter @GLanata.