

Swagger is an open-source project widely used standard for documenting APIs. Swagger allows us to generate documentation from our code, and also provides an interface for interacting with an API through the browser.
Swagger is a popular tool that allows developers to document and test APIs. It makes it easy to create and consume APIs, and it has many features that make it valuable for developers. It is popular in the ASP.Net community because it makes it easy to create and consume APIs.
This ASP.NET programming tutorial talks about Swagger, why it is important, its features, and how you can use Swagger in ASP.NET 6 applications.
Looking to learn C# programming to boost your ASP.NET coding skills? Check out our article listing the Best Online C# Courses.
Why Should Developers Use Swagger?
Swagger is an open-source framework used to document RESTful APIs. It is language agnostic, (i.e., it can be used with any programming language). Swagger is a popular choice for designing APIs because it is easy to use and has a wide range of features. Swagger is easy to use, and it has many features that make it valuable for developers.
Some of the benefits of using Swagger are that it can help you automatically generate documentation for your API, it can help you test your API, and it can make your API more accessible to third-party developers. Swagger is also easy to integrate with existing development tools and frameworks.
Some of the features of Swagger at a quick glance include:
- The ability to generate documentation for an API
- The ability to test an API
- The ability to generate client code for an API
Read: API Development with Swagger
How to Create a new ASP.NET Web API Project in Visual Studio 2022
In this section, we will examine how we can build a new ASP.NET 6 Web API project:
- Open Visual Studio 2022 IDE
- Click on “Continue without code.”
- Navigate to File | New | Project
- Now select the “ASP.NET Core Web API” project template
- Click Next
- Specify the name of the project to be created and the location where it should be created in the disk
- If you would like the solution file to be created in the same directory as the project, select the checkbox that says “Place solution and project in the same directory”; leave it deselected otherwise.
- Click Next to move on
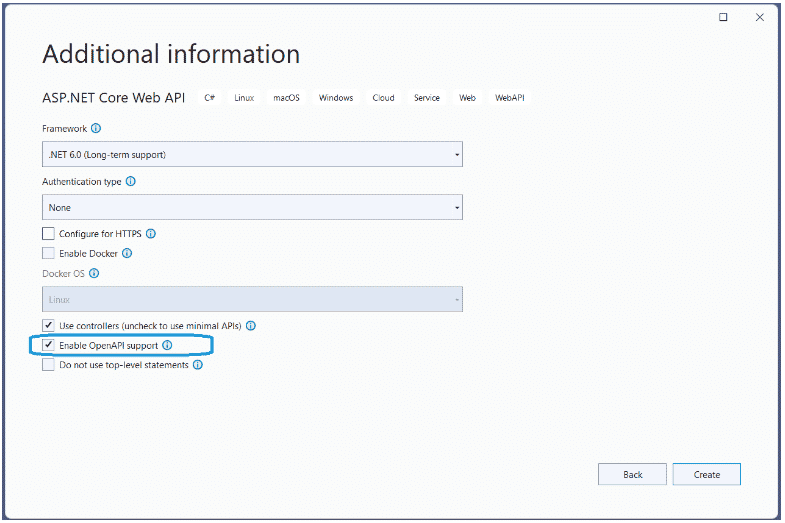
- In the “Additional information” screen, specify the target framework you would like to use
- Specify the authentication type or select “None” if you do not need it.
- Ensure that you have unchecked the Enable Docker checkbox
- You can deselect the other checkboxes
- Click Create to complete the process so that a new ASP.NET 6 web application project is created in the path you specified earlier
By default, the WeatherForecast controller will be created with the following code inside:
using Microsoft.AspNetCore.Mvc;
namespace SwaggerDemo.Controllers
{
    [ApiController]
    [Route("[controller]")]
    public class WeatherForecastController : ControllerBase
    {
        private static readonly string[] Summaries = new[]
        {
        "Freezing", "Bracing", "Chilly", "Cool", "Mild", "Warm", "Balmy", "Hot", "Sweltering", "Scorching"
    };
        private readonly ILogger _logger;
        public WeatherForecastController(ILogger logger)
        {
            _logger = logger;
        }
        [HttpGet(Name = "GetWeatherForecast")]
        public IEnumerable Get()
        {
            return Enumerable.Range(1, 5).Select(index => new WeatherForecast
            {
                Date = DateTime.Now.AddDays(index),
                TemperatureC = Random.Shared.Next(-20, 55),
                Summary = Summaries[Random.Shared.Next(Summaries.Length)]
            })
            .ToArray();
        }
    }
}
Read: How to Version REST APIs
What is the The OpenAPI Specification?
The OpenAPI Specification, previously known as the Swagger Specification, provides an API interface description language that is machine-readable and independent of any programming language. Swagger offers a RESTful interface for quickly building and consuming an API.
How to Set Up Swagger in ASP.NET 6
Note that you would need to install the Swagger NuGet package only if you have not selected OpenAPI support when creating the project. If you have already selected the OpenAPI support when creating your new project, you can skip this step.
Swagger can be installed via NuGet by using the following command at the NuGet Package Manager Console:
Install-Package Swashbuckle.AspNetCore
You can also install this package using the Package Manager UI inside the Visual Studio 2022 IDE.
Once you have installed this package, the Program.cs file will be updated. Here is how it would look in code:
var builder = WebApplication.CreateBuilder(args);
// Add services to the container.
builder.Services.AddControllers();
builder.Services.AddEndpointsApiExplorer();
builder.Services.AddSwaggerGen();
var app = builder.Build();
// Configure the HTTP request pipeline.
if (app.Environment.IsDevelopment())
{
    app.UseSwagger();
    app.UseSwaggerUI();
}
app.UseAuthorization();
app.MapControllers();
app.Run();
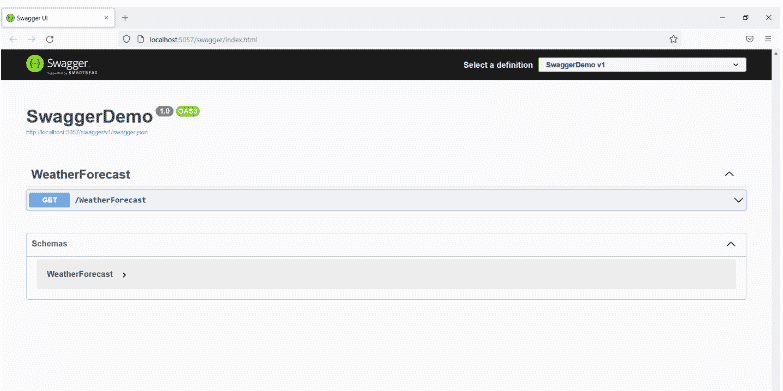
The Swagger UI
When you execute the application, here is how the Swagger UI will look:
Now create a new WebAPI controller with the following code in there:
using Microsoft.AspNetCore.Mvc;
namespace SwaggerDemo.Controllers
{
    [Route("api/[controller]")]
    [ApiController]
    public class DemoController : ControllerBase
    {
        [HttpGet]
        public string Get()
        {
            return "Hello World!";
        }
        [HttpGet("{id}")]
        public string Get(int id)
        {
            return id.ToString();
        }
    }
}
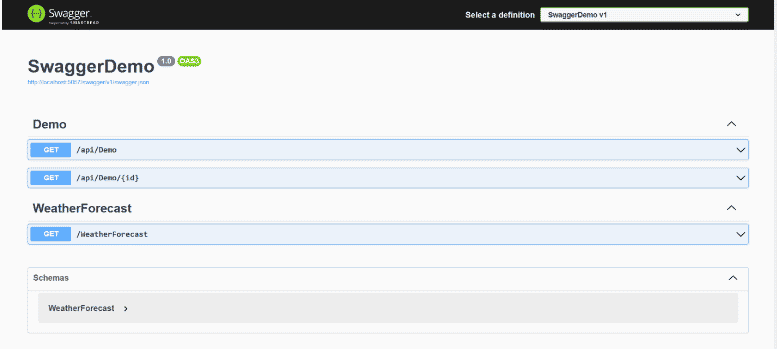
When you execute the application, here is how the endpoints of the new controller class would be shown in Swagger:
When developers execute the HttpGet action method in Swagger, here is how the output will appear:

Final Thoughts on Swagger and ASP.NET
Swagger is a great tool for documenting your APIs. Additionally, it provides an interface for executing the action methods as well. You can customize Swagger to suffice your needs. As an example, you can add additional information to your API documentation and also customize how Swagger tests your API.
Now that you have learned the basics of working with Swagger in ASP.NET, we recommend you check out our tutorial on the Best Practices to Design RESTful APIs.