

Introduction
Using a single user ID and password across multiple web sites is not a new idea. Software companies have played with this idea with varying success. Unfortunately developers often find it complicated to implement support for these systems in their ASP.NET web sites. That is where Browser ID initiative from Mozilla Labs shines. Browser ID offers a simple way of authenticating users of your web site using their single sign-on credentials. Under Browser ID scheme, users can use any verified email address as their user ID. The actual login credentials are not stored in your database but in the Browser ID system. Thus users are free to use a single user ID and password across all the web sites that support Browser ID. In this article you will learn to use ASP.NET Forms Authentication and Browser ID hand in hand.
What is Browser ID?
Browser ID is an effort by Mozilla Labs to provide a simple solution for single sign-on. The official web site for Browser ID is https://browserid.org and you can use it to create your own Browser ID. As per Browser ID documentation:
“BrowserID is an easy way to sign into websites. Instead of making up a hard-to-remember username and password for each site, BrowserID lets you use your email address and a single password to sign in to any site that supports it.”
Thus you will create a Browser ID using your existing email address. The email address needs to be confirmed by clicking on a link in a verification email sent by the Browser ID system. You will also specify a password for your Browser ID during the registration. This combination of email address and password will be used to sign in to any web site that supports Browser ID. The following figure shows the Browser ID creation page of the Browser ID web site.
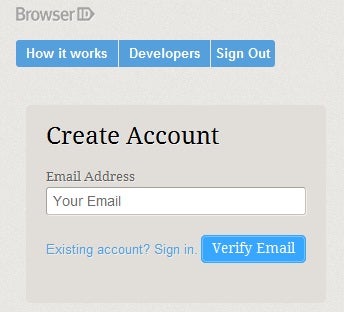
Browser ID Creation Page
Though we won’t go into more details of the internals of BrowserID, you can read more about it here. For the rest of the article, we will assume that you have created a Browser ID using the step just mentioned.
Configuring an ASP.NET Web Site
To support Browser ID scheme in your ASP.NET web site you first need to configure it to use Forms Authentication. So, create a new empty ASP.NET application and open its web.config file. Add the following markup to the web.config file:
<authentication mode="Forms">
  <forms loginUrl="~/LoginViaBrowserID.aspx" defaultUrl="~/Default.aspx" />
</authentication>

<authorization>
  <deny users="?"/>
</authorization>
Here, you first configured the web site to use Forms authentication using <authentication> section and mode attribute. The loginUrl is set to LoginViaBrowserID.aspx and defaultUrl is set to Default.aspx. You will develop both of these web forms in the next sections.
The <authorization> section denies access to anonymous users.
Developing a Login Web Form
Now, add a new web form to the web site and name it LoginViaBrowserID.aspx. The LoginViaBrowserID.aspx simply contains a few lines of markup as shown below:
<form action="LoginViaBrowserID.aspx" runat="server" method="post" id="loginForm">
    <div align="center">
        <input type="hidden" name="assertion" value="" id="assertion" />
        <input id="signin" type="button" value="Sign In" />
        <asp:Label ID="lblMessage" runat="server" />
    </div>
</form>
Notice the lines marked in bold letters. The hidden field named assertion is intended to store an ‘assertion’ issued by the Browser ID system after signing in. An assertion is a string containing a signed claim that the user owns a particular email address. This string is issued by the Browser ID system and you use a hidden field to pass it to the server side code. The “Sign In” button is a plain HTML button. You can also use an image button with some standard images as shown here.
Next, go to the <head> section of the LoginViaBrowserID web form and add the script references as shown below:
<script type="text/javascript" src="scripts/jquery-1.7.2.min.js"></script>
<script src="https://browserid.org/include.js" type="text/javascript"></script>
The first script reference is for jQuery library. You will later use jQuery for client side scripting. The second script reference refers to the BrowserID library. The BrowserID library exposes certain in built functions that allow you to work with the system.
Now, add the following jQuery code in a <script> block.
function onAssertion(assertion) {
    if (assertion) {
        document.getElementById('assertion').value = assertion;
        document.getElementById('loginForm').submit();
    }
    else {
        alert('Error while performing Browser ID authentication!');
    }
}

$(document).ready(function () {
    $("#signin").click(function () {
        navigator.id.get(onAssertion);
        return false;
    });
});
The ready() event handler wires the click event of the “Sign In” button to a function. The event handler function calls the navigator.id.get() function from the BrowserID library referred earlier. It also passes a callback function onAssertion to the get() function. The get() function will prompt the user to sign in with an email address. It will then generate a signed assertion containing the supplied email address. The assertion string is passed to the callback function. If generation of assertion fails due to any reason then the callback function will be called with a null value. The callback function then sends the assertion string to the server for verification.
The callback function onAssertion sets the hidden field with the assertion string value and then submits the form using the JavaScript submit() method. This way the web form is posted to the server and server side code can then access the assertion string.
Once the form is posted to the server, you should verify the assertion. The verification process needs two things – audience and assertion. The audience is the hostname and optional port number of your site. The assertion is the assertion string you receive in the hidden field. The following code shows how the verification is done:
protected void Page_Load(object sender, EventArgs e)
{
    if (Request.Form["assertion"] != null)
    {
        string assertion = Request.Form["assertion"];
        string audience = Request.Url.Host + ":" + Request.Url.Port.ToString();
        BrowserID browserid = new BrowserID(audience, assertion);
        if (browserid.Validate())
        {
            FormsAuthentication.SetAuthCookie(browserid.Email, true, "/");
            FormsAuthentication.RedirectFromLoginPage(browserid.Email, true, "/");
        }
        else
        {
            lblMessage.Text = "Invalid Browser ID!";
        }
    }
}
The code retrieves the assertion string using Request.Form collection. It also forms an audience string by concatenating host and port number. It then creates an instance of the BrowserID class and passes audience and assertion as the constructor parameters. The BrowserID class is a custom class that you need to create. It talks with the BrowserID system for the purpose of verifying the assertion. The BrowserID class will be discussed in the next section.
Once the assertion is verified by calling the Validate() method of the BrowserID class you can issue a Forms Authentication cookie. You do that using the SetAuthCookie() method of the FormsAuthentication class. The user is then taken to the default page.
The BrowserID Class
The BrowserID class does the job of verifying the assertion string with the Browser ID system. After successful verification the Browser ID system returns user details such as email address, status, validity and issuer in the form of a JSON string. To convert this JSON string into a .NET object, you will use Json.NET. Json.NET is a high-performance JSON framework for .NET applications. So, make sure to refer the Json.NET assembly in your web site.
Then add a class named BrowserID to your web site and key-in the following code:
public class BrowserID
{
    public string Audience { get; set; }
    public string Assertion { get; set; }
    public string Email { get; set; }
    public string Validity { get; set; }
    public string Issuer { get; set; }

    public BrowserID(string audience, string assertion)
    {
        this.Audience = audience;
        this.Assertion = assertion;
    }

    public bool Validate()
    {
        string url = "https://browserid.org/verify";
        NameValueCollection parameters = new NameValueCollection();
        parameters.Add("assertion", this.Assertion);
        parameters.Add("audience", this.Audience);

        WebClient client = new WebClient();
        byte[] data = client.UploadValues(url, parameters);
        string jsonDataString = Encoding.UTF8.GetString(data);

        JsonUser jsonDataObject = JsonConvert.DeserializeObject<JsonUser>(jsonDataString);

        if (jsonDataObject.status == "okay")
        {
            this.Email = jsonDataObject.email;
            this.Validity = jsonDataObject.validity;
            this.Issuer = jsonDataObject.issuer;
            return true;
        }
        else
        {
            return false;
        }
    }
}
The BrowserID class consists of five public properties, viz. Audience, Assertion, Email, Validity and Issuer. The constructor of the BrowserID class accepts audience and assertion as the parameters. The main method of the BrowserID class is Validate(). It sends a request to BrowserID system (https://browserid.org/verify) along with audience and assertion values. Notice the use of the WebClient class to send a request to the Browser ID system. The data returned from the request is a JSON string. You need to convert this string into a .NET object use it further. This is done using the JsonConvert class of Json.NET library. The DeserializeObject() method takes a JSON string and returns a .NET object as indicated by the generic type. The JsonUser class looks like this:
public class JsonUser
{
    public string email { get; set; }
    public string status { get; set; }
    public string validity { get; set; }
    public string issuer { get; set; }
}
Once the request is successful, you simply assign the respective properties of BrowserID class for later use.
Ok. Now you are ready to test the sign in functionality. Run LoginViaBrowserID web form and click on the “Sign In” button. This will open a window and will allow you enter your Browser ID credentials.
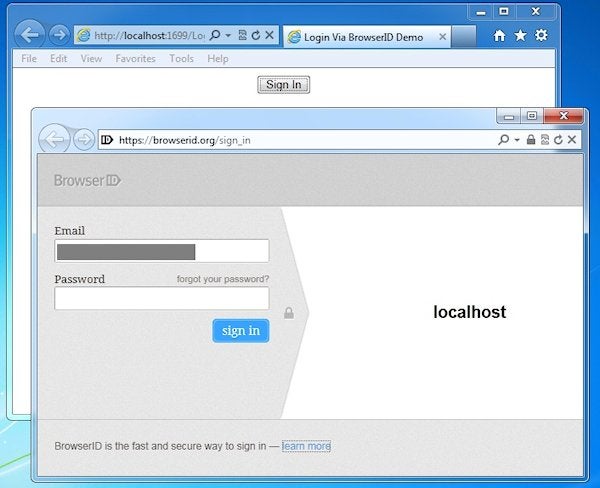
Sign-in Page
Upon successful signing in you will be taken to the Default.aspx web form.
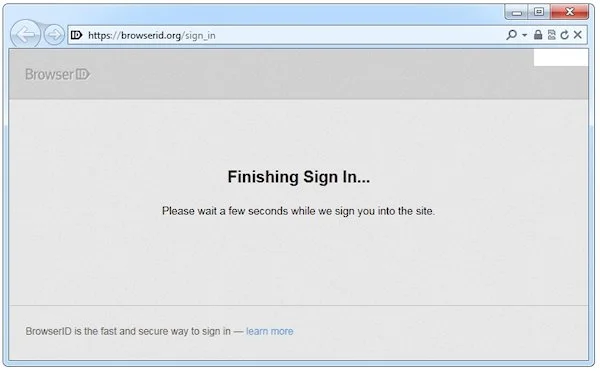
Finishing Signing In
Developing Default Web Form
Default.aspx is a simple web form that displays a welcome message to the currently signed in user. It also shows a “Sign Out” button so that the user can log out of the system. The markup of the default web form is shown below:
<form id="defaultForm" runat="server">
<div>
    <asp:Label ID="Label1" runat="server" Text="Label"></asp:Label>
    <br /><br />
    <input type="hidden" name="signout" value="" id="signout" />
    <input id="logout" type="button" value="Sign Out" />
</div>
</form>
As you can see, the web form consists of a Label, a hidden field and a button. The click event of the “Sign Out” button is handled via jQuery as shown below:
function onSignOut() {
    document.getElementById('signout').value = 'true';
    document.getElementById('defaultForm').submit();
}

$(document).ready(function () {
    $("#logout").click(function () {
        navigator.id.logout(onSignOut);
        return false;
    });
});
The click event handler of the “Sign Out” button invokes navigator.id.logout() function. As of now, this function is not fully implemented and simply calls the callback function supplied as the parameter upon completion. The callback function, onSignOut(), sets the hidden field value to “true” and then submits the form.
The server side code of Default.aspx is shown below:
protected void Page_Load(object sender, EventArgs e)
{
    if (Request.Form["signout"] == "true")
    {
        FormsAuthentication.SignOut();
        Response.Redirect(FormsAuthentication.LoginUrl);
    }
    else
    {
        Label1.Text = "Welcome " + Page.User.Identity.Name + " !";
    }
}
The code checks the signout hidden field value and if true calls SignOut() method of FormsAuthentication class. Otherwise, a welcome message is displayed to the user. Notice the use of User.Identity.Name property that reflects the email address of the user. The following figure shows a sample run of default.aspx.
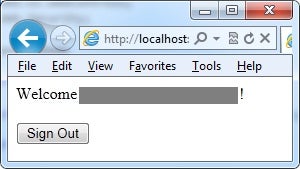
Sign Out
Summary
Browser ID allows you to use a single user ID and password to access all the web sites supporting Browser ID. The user ID takes the form of a verified email address. The user login credentials are not stored in your database but in the Browser ID system. At run time you validate a user against his Browser ID credentials. You can then integrate ASP.NET Forms Authentication with the Browser ID. You can also extend the integration further and develop a role based system based for Browser ID users.
Download the code for this article.