

Introduction
Windows Phone platform supports the ability to have tasks running in the background. This enables applications to play music in the background while the user is using another application in the foreground.
In this article, we will explore how to build a simple Windows Phone application that can play audio tracks in the foreground and background.
Basics
Before we gets hands on, here is a brief architectural overview of background audio. This is important since our application needs to operate both in the foreground as well as background.
Background audio application relies on the background agents feature, which was introduced in the recent versions of the Windows Phone platform.
On the Windows Phone platform, media is played through the Zune media queue. Interaction with the media queue happens through the background audio application, which can specify to set the current track, start/stop playback, pause, go forward and go reverse. The BackgroundAudioPlayer class can be used for this.
Because the Universal Volume Control directly supports interacting with the media queue, our audio application’s volume can also be controlled by the volume controls (without needing a specific volume control within the application).
A simple audio track listener would comprise of two components – (i) front end, which is responsible for the user interface for playback, and (ii) implementation of the AudioPlayerAgent class, which is designed to play audio in the background.
The architecture of an audio track listener application can be represented as below.
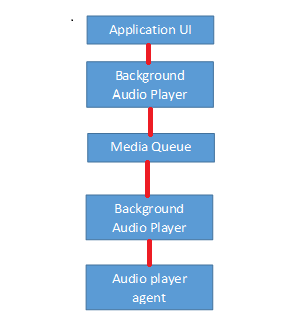
Architecture of an Audio Track Listener App
Now that we have seen the architecture, we can start developing a very simple application.
Hands On
Create a new empty Visual Studio solution called WPAudioPlayerDemo.
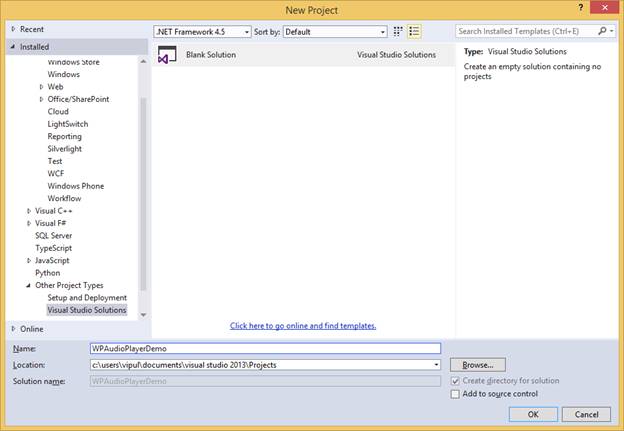
New Project
Add a new Windows Phone Audio Playback Agent project “WPAudioPlaybackAgent” to the solution.
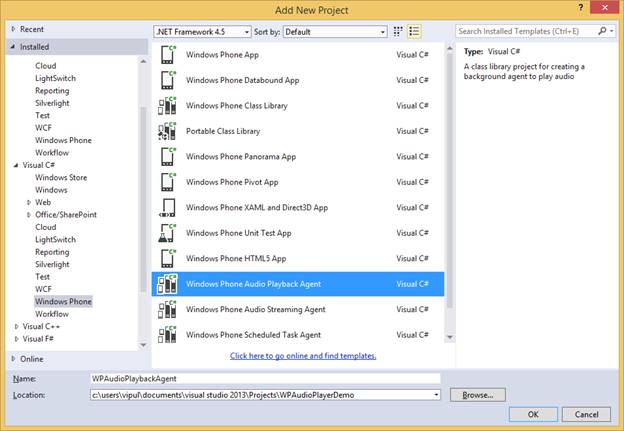
Windows Phone Audio Playback Agent
Next, we create a new Windows Phone app project and add it to the solution. We will call it WPAudioPlayer.
For the purpose of the demo, you can add a few media files to the solution (In your actual application, you should query your media library and populate the media queue from there).
If you are copying the media, make sure you specify to copy it to the output directory.
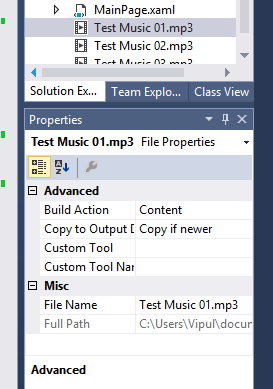
Copy Media to the Output Directory
We will now add a reference to the WPAudioPlaybackAgent project in our WPAudioPlayer project. Right click WPAudioPlayer project in Solution Explorer and select “Add Reference…”.
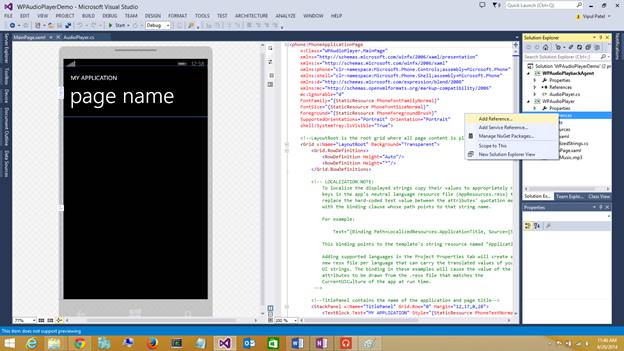
Add Reference
The Reference Manager dialog opens. Select Solution from the left bar and select the WPAudioPlaybackAgent project and click OK.
Before we build the UI for our media player application, we will annotate the application manifest file with the background tasks for our application.
Open WMAppManifest.xml as code and add the highlighted blurb in your file.
<?xml version="1.0" encoding="utf-8"?>

<Deployment xmlns="http://schemas.microsoft.com/windowsphone/2012/deployment" AppPlatformVersion="8.0">
  <DefaultLanguage xmlns="" code="en-US"/>
  <App xmlns="" ProductID="{2b93fda2-fe28-461f-a433-597862f70c97}" Title="WPAudioPlayer" RuntimeType="Silverlight" Version="1.0.0.0" Genre="apps.normal"  Author="WPAudioPlayer author" Description="Sample description" Publisher="WPAudioPlayer" PublisherID="{b504c18a-5538-450f-81f2-8b93a5dec08b}">
    <IconPath IsRelative="true" IsResource="false">Assets\ApplicationIcon.png</IconPath>
    <Capabilities>
      <Capability Name="ID_CAP_NETWORKING"/>
      <Capability Name="ID_CAP_MEDIALIB_AUDIO"/>
      <Capability Name="ID_CAP_MEDIALIB_PLAYBACK"/>
      <Capability Name="ID_CAP_SENSORS"/>
      <Capability Name="ID_CAP_WEBBROWSERCOMPONENT"/>
    </Capabilities>
    <Tasks>
      <DefaultTask  Name ="_default" NavigationPage="MainPage.xaml"/>
      <ExtendedTask Name="BackgroundTask">
        <BackgroundServiceAgent Specifier="AudioPlayerAgent" Name="WPAudioPlaybackAgent" Source="WPAudioPlaybackAgent" Type="WPAudioPlaybackAgent.AudioPlayer" />
      </ExtendedTask>
    </Tasks>
    <Tokens>
      <PrimaryToken TokenID="WPAudioPlayerToken" TaskName="_default">
        <TemplateFlip>
          <SmallImageURI IsRelative="true" IsResource="false">Assets\Tiles\FlipCycleTileSmall.png</SmallImageURI>
          <Count>0</Count>
          <BackgroundImageURI IsRelative="true" IsResource="false">Assets\Tiles\FlipCycleTileMedium.png</BackgroundImageURI>
          <Title>WPAudioPlayer</Title>
          <BackContent></BackContent>
          <BackBackgroundImageURI></BackBackgroundImageURI>
          <BackTitle></BackTitle>
          <DeviceLockImageURI></DeviceLockImageURI>
          <HasLarge></HasLarge>
        </TemplateFlip>
      </PrimaryToken>
    </Tokens>
    <ScreenResolutions>
      <ScreenResolution Name="ID_RESOLUTION_WVGA"/>
      <ScreenResolution Name="ID_RESOLUTION_WXGA"/>
      <ScreenResolution Name="ID_RESOLUTION_HD720P"/>
    </ScreenResolutions>
  </App>
</Deployment>
Now, we will build the UI for our media player application.
The UI of our application:
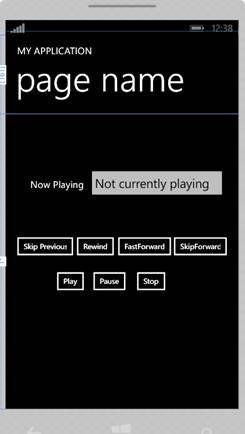
Application UI
The XAML for the above display is below:
<phone:PhoneApplicationPage
    x:Class="WPAudioPlayer.MainPage"
    xmlns="http://schemas.microsoft.com/winfx/2006/xaml/presentation"
    xmlns:x="http://schemas.microsoft.com/winfx/2006/xaml"
    xmlns:phone="clr-namespace:Microsoft.Phone.Controls;assembly=Microsoft.Phone"
    xmlns:shell="clr-namespace:Microsoft.Phone.Shell;assembly=Microsoft.Phone"
    xmlns:d="http://schemas.microsoft.com/expression/blend/2008"
    xmlns:mc="http://schemas.openxmlformats.org/markup-compatibility/2006"
    mc:Ignorable="d"
    FontFamily="{StaticResource PhoneFontFamilyNormal}"
    FontSize="{StaticResource PhoneFontSizeNormal}"
    Foreground="{StaticResource PhoneForegroundBrush}"
    SupportedOrientations="Portrait" Orientation="Portrait"
    shell:SystemTray.IsVisible="True">

    <!--LayoutRoot is the root grid where all page content is placed-->
    <Grid x:Name="LayoutRoot" Background="Transparent">
        <Grid.RowDefinitions>
            <RowDefinition Height="Auto"/>
            <RowDefinition Height="*"/>
        </Grid.RowDefinitions>

        <!-- LOCALIZATION NOTE:
            To localize the displayed strings copy their values to appropriately named
            keys in the app's neutral language resource file (AppResources.resx) then
            replace the hard-coded text value between the attributes' quotation marks
            with the binding clause whose path points to that string name.

            For example:

                Text="{Binding Path=LocalizedResources.ApplicationTitle, Source={StaticResource LocalizedStrings}}"

            This binding points to the template's string resource named "ApplicationTitle".

            Adding supported languages in the Project Properties tab will create a
            new resx file per language that can carry the translated values of your
            UI strings. The binding in these examples will cause the value of the
            attributes to be drawn from the .resx file that matches the
            CurrentUICulture of the app at run time.
         -->

        <!--TitlePanel contains the name of the application and page title-->
        <StackPanel x:Name="TitlePanel" Grid.Row="0" Margin="12,17,0,28">
            <TextBlock Text="MY APPLICATION" Style="{StaticResource PhoneTextNormalStyle}" Margin="12,0"/>
            <TextBlock Text="page name" Margin="9,-7,0,0" Style="{StaticResource PhoneTextTitle1Style}"/>
        </StackPanel>

        <!--ContentPanel - place additional content here-->
        <Grid x:Name="ContentPanel" Grid.Row="1" Margin="12,0,12,0">
            <Button x:Name="buttonPlay" Content="Play" HorizontalAlignment="Left" Margin="82,314,0,0" VerticalAlignment="Top" Click="buttonPlay_Click" FontSize="15"/>
            <Button x:Name="buttonStop" Content="Stop" HorizontalAlignment="Left" Margin="247,314,0,0" VerticalAlignment="Top" Click="buttonStop_Click" FontSize="15"/>
            <Button x:Name="buttonForward" Content="FastForward" HorizontalAlignment="Left"  Margin="208,242,0,0" VerticalAlignment="Top" FontSize="15" Click="buttonForward_Click"/>
            <Button x:Name="buttonRewind" Content="Rewind" HorizontalAlignment="Left" Margin="123,242,0,0" VerticalAlignment="Top" FontSize="15" Click="buttonRewind_Click"/>
            <Button x:Name="buttonPause" Content="Pause" HorizontalAlignment="Left" Margin="157,314,0,0" VerticalAlignment="Top" Click="buttonPause_Click" FontSize="15"/>
            <Button x:Name="buttonSkipForward" Content="SkipForward" HorizontalAlignment="Left" Margin="323,242,0,0" VerticalAlignment="Top" FontSize="15" Click="buttonSkipForward_Click"/>
            <Button x:Name="buttonSkipPrevious" Content="Skip Previous" HorizontalAlignment="Left" Margin="0,242,0,0" VerticalAlignment="Top" FontSize="15" Width="139" Click="buttonSkipPrevious_Click"/>
            <TextBox x:Name="textBoxNowPlaying" HorizontalAlignment="Left" Height="72" Margin="154,106,0,0" TextWrapping="Wrap" Text="Not currently playing" VerticalAlignment="Top" Width="292"/>
            <TextBlock HorizontalAlignment="Left" Margin="39,131,0,0" TextWrapping="Wrap" Text="Now Playing" VerticalAlignment="Top"/>

        </Grid>

        <!--Uncomment to see an alignment grid to help ensure your controls are
            aligned on common boundaries.  The image has a top margin of -32px to
            account for the System Tray. Set this to 0 (or remove the margin altogether)
            if the System Tray is hidden.

            Before shipping remove this XAML and the image itself.-->
        <!--<Image Source="/Assets/AlignmentGrid.png" VerticalAlignment="Top" Height="800" Width="480" Margin="0,-32,0,0" Grid.Row="0" Grid.RowSpan="2" IsHitTestVisible="False" />-->
    </Grid>

</phone:PhoneApplicationPage>
Now, open up the AudioPlayer.cs file in the WPAudioPlaybackAgent project and make the following changes.
Include the following namespaces in your AudioPlayer.cs file.
using
System.Collections.Generic;
We will add a few variables to track the current track and a list for audio tracks.
public class AudioPlayer : AudioPlayerAgent
    {
        static int currentTrack;
        static List<AudioTrack> audioTracks = new List<AudioTrack>
        {
            new AudioTrack(new Uri("Test Music 01.mp3", UriKind.Relative), "Test Music 01", "Some Singer 1", "Some Singer 1", null),
            new AudioTrack(new Uri("Test Music 02.mp3", UriKind.Relative), "Test Music 02", "Some Singer 2", "Some Singer 2", null),
            new AudioTrack(new Uri("Test Music 03.mp3", UriKind.Relative), "Test Music 03", "Some Singer 3", "Some Singer 3", null)
        };
        /// <remarks>
        /// AudioPlayer instances can share the same process.
        /// Static fields can be used to share state between AudioPlayer instances
        /// or to communicate with the Audio Streaming agent.
        /// </remarks>
        static AudioPlayer()
Change the constructor of AudioPlayer class to be static.
Change:
public AudioPlayer()
To:
static AudioPlayer()
Make the following highlighted changes in OnUserAction method.
        protected override void OnUserAction(BackgroundAudioPlayer player, AudioTrack track, UserAction action, object param)
        {
            switch (action)
            {
                case UserAction.Play:
                    if (player.PlayerState != PlayState.Playing)
                    {
                        player.Track = audioTracks[currentTrack];
                        player.Play();
                    }
                    break;
                case UserAction.Stop:
                    player.Stop();
                    break;
                case UserAction.Pause:
                    player.Pause();
                    break;
                case UserAction.FastForward:
                    player.FastForward();
                    break;
                case UserAction.Rewind:
                    player.Rewind();
                    break;
                case UserAction.Seek:
                    player.Position = (TimeSpan)param;
                    break;
                case UserAction.SkipNext:
                    player.Track = GetNextTrack();
                    break;
                case UserAction.SkipPrevious:
                    AudioTrack previousTrack = GetPreviousTrack();
                    if (previousTrack != null)
                    {
                        player.Track = previousTrack;
                    }
                    break;
            }

            NotifyComplete();
        }
Change the GetNextTrack() method to use the next track after the current track.
        private AudioTrack GetNextTrack()
        {

            AudioTrack track = audioTracks[++currentTrack];

            // specify the track

            return track;
        }
Make similar changes to the GetPreviousTrack() method.
        private AudioTrack GetPreviousTrack()
        {

            AudioTrack track = audioTracks[--currentTrack];

            // specify the track

            return track;
        }
Now, open the codebehind for the MainPage.xaml (MainPage.xaml.cs) and add a method to save a music file to the isolated storage.
        private void SaveToIsoStore(string fileName)
        {
            IsolatedStorageFile isolatedStorageFile = IsolatedStorageFile.GetUserStoreForApplication();
            if (!isolatedStorageFile.FileExists(fileName))
            {
                StreamResourceInfo resource = Application.GetResourceStream(new Uri(fileName, UriKind.Relative));

                using (IsolatedStorageFileStream isolatedStorageFileStream = isolatedStorageFile.CreateFile(fileName))
                {
                    int chunkSize = 1024;
                    byte[] bytes = new byte[chunkSize];
                    int byteCount;

                    while ((byteCount = resource.Stream.Read(bytes, 0, chunkSize)) > 0)
                    {
                        isolatedStorageFileStream.Write(bytes, 0, byteCount);
                    }
                }

            }


        }
Now, we implement the methods for the click events on the buttons.
        private void buttonPlay_Click(object sender, RoutedEventArgs e)
        {
            if (BackgroundAudioPlayer.Instance.PlayerState != PlayState.Playing)
                BackgroundAudioPlayer.Instance.Play();
        }
        private void buttonSkipPrevious_Click(object sender, RoutedEventArgs e)
        {
            if (BackgroundAudioPlayer.Instance.PlayerState == PlayState.Playing)
                BackgroundAudioPlayer.Instance.SkipPrevious();
        }

        private void buttonRewind_Click(object sender, RoutedEventArgs e)
        {
            if (BackgroundAudioPlayer.Instance.PlayerState == PlayState.Playing)
                BackgroundAudioPlayer.Instance.Rewind();
        }

        private void buttonForward_Click(object sender, RoutedEventArgs e)
        {
            if (BackgroundAudioPlayer.Instance.PlayerState == PlayState.Playing)
                BackgroundAudioPlayer.Instance.FastForward();
        }

        private void buttonSkipForward_Click(object sender, RoutedEventArgs e)
        {
            if (BackgroundAudioPlayer.Instance.PlayerState == PlayState.Playing)
                BackgroundAudioPlayer.Instance.SkipNext();
        }

        private void buttonPause_Click(object sender, RoutedEventArgs e)
        {
            if (BackgroundAudioPlayer.Instance.PlayerState == PlayState.Playing)
                BackgroundAudioPlayer.Instance.Pause();
            textBoxNowPlaying.Text = "Paused";
        }

        private void buttonStop_Click(object sender, RoutedEventArgs e)
        {
            if (BackgroundAudioPlayer.Instance.PlayerState == PlayState.Playing)
                BackgroundAudioPlayer.Instance.Stop();
            textBoxNowPlaying.Text = "Playback stopped";
        }
Then, we implement the BackgroundPlayStateChanged event handler. We use this event to change the “Now playing” content.
        void BackgroundPlayStateChanged(object sender, EventArgs e)
        {
            if (BackgroundAudioPlayer.Instance.Track != null)
            {
                textBoxNowPlaying.Text = BackgroundAudioPlayer.Instance.Track.Title;
            }
        }
Next, update the constructor for MainPage class to call the SaveToIsoStore() API to store all the files we have. In addition, we will also wire the BackgroundPlayState changed event.
        public MainPage()
        {
            InitializeComponent();
            SaveToIsoStore("Test Music 01.mp3");
            SaveToIsoStore("Test Music 02.mp3");
            SaveToIsoStore("Test Music 03.mp3");
            BackgroundAudioPlayer.Instance.PlayStateChanged += new EventHandler(BackgroundPlayStateChanged);
            // Sample code to localize the ApplicationBar
            //BuildLocalizedApplicationBar();
        }
Finally, we update the OnNavigatedTo event to update the now playing text when the application is brought to the foreground (from background).
        protected override void OnNavigatedTo(NavigationEventArgs e)
        {
            if (BackgroundAudioPlayer.Instance.PlayerState == PlayState.Playing)
            {
                textBoxNowPlaying.Text = BackgroundAudioPlayer.Instance.Track.Title;
            }
        }
Our application is now code complete. If you are having trouble following along, you can download the sample code below.
When you run the application the first time, you will see the screen below.
Opening Screen
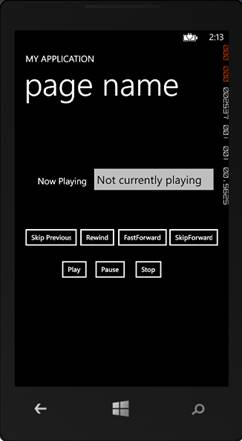
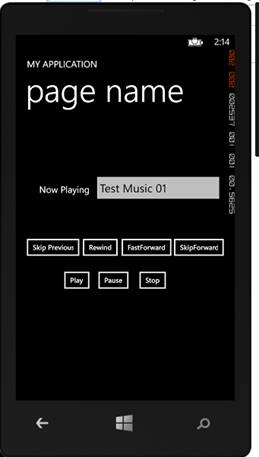
When you click “Play”, you will see
‘Play’ Screen
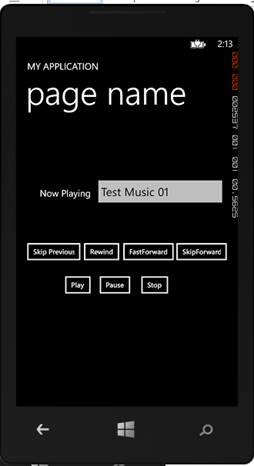
When you click Skip Forward, the track changes to the next one.
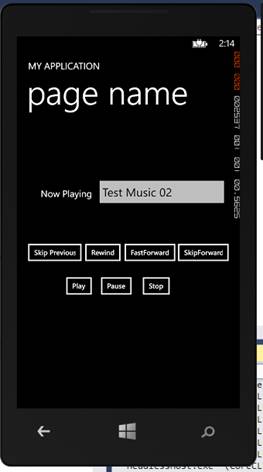
‘Skip Forward’ Screen
When you click “Skip Previous”, it goes back to:
‘Skip Previous’ Screen
Your music player is now complete.
Summary
In this article, we learned how to build a simple music player application that can play audio tracks. I hope you have found this information useful.
About the author
Vipul Patel is a Program Manager currently working at Amazon Corporation. He has formerly worked at Microsoft in the Lync team and in the .NET team (in the Base Class libraries and the Debugging and Profiling team). He can be reached at vipul.patel@hotmail.com