

Introduction
The first version of Windows Phone platform did not support recording video for non-native applications. However, with Windows Phone 7.1 onwards, Microsoft has provided platform support for capturing video. This has enabled application developers to integrate video capturing capability with their applications.
Before we dive into how we can capture video in a Windows Phone application, let us first understand the basics of video recording.
Basics of video Recording
To record video in an application, you need to declare it as part of the capability in the application manifest file. Needless to say, it is useful to also declare the microphone capability unless you only want to capture video without any audio.
The ability to capture video is offered through the System.Windows.Media.CaptureSource class. The output of the capture needs to be directly to a System.Windows.Media.FileSink object.
To use the capture source, you need to create a new instance of CaptureSource class.
Next, we need to call the CaptureDeviceConfiguration.GetDefaultVideoCaptureDevice API to get the default Video Capture device. We would need to initialize it first, and then invoke the CaptureSource.Start() method to start capturing the video stream.
Capturing the video stream does not equal recording the video (video recording only happens when you direct the captured video stream to an instance of a FileSink object by setting the CaptureSource property.
We will now explore building a very simple video recording application.
Hands On
Create a new Visual Studio Windows Phone App project titled WPVideoRecordingDemo.
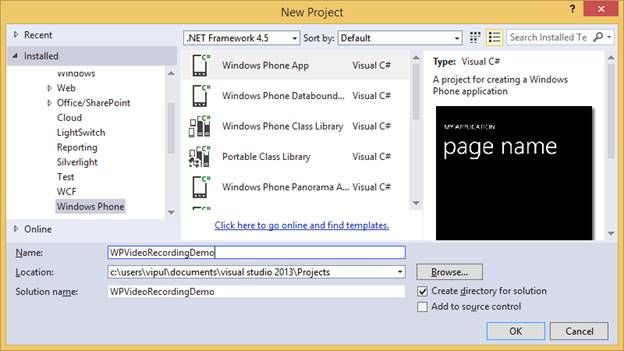
New Visual Studio Windows Phone App project
Open the application manifest file by double clicking on WMManifest.xml.

Open WMManifest.xml
Declare the ID_CAP_ISV_CAMERA and ID_CAP_MICROPHONE capabilities under the capabilities tab.
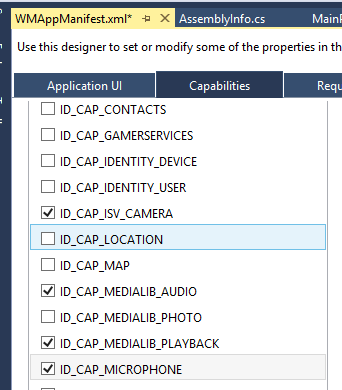
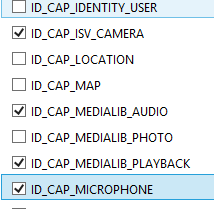
The ID_CAP_ISV_CAMERA and ID_CAP_MICROPHONE
If you want, you can also demand that either a front-facing or rear-facing camera be present as a condition of install by specifying it as part of the requirements.
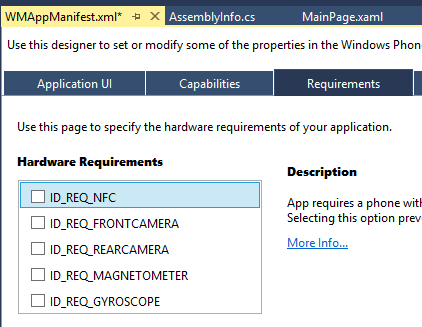
Hardware Requirements
Next, we will build the UI for presenting the view of what we will be recording.
It is recommended that all video capture applications have landscape orientation. You can set that by updating the phone:PhoneApplicationPage element in MainPage.xaml.
Changes are highlighted below.
<phone:PhoneApplicationPage
    x:Class="WPVideoRecordingDemo.MainPage"
    xmlns="http://schemas.microsoft.com/winfx/2006/xaml/presentation"
    xmlns:x="http://schemas.microsoft.com/winfx/2006/xaml"
    xmlns:phone="clr-namespace:Microsoft.Phone.Controls;assembly=Microsoft.Phone"
    xmlns:shell="clr-namespace:Microsoft.Phone.Shell;assembly=Microsoft.Phone"
    xmlns:d="http://schemas.microsoft.com/expression/blend/2008"
    xmlns:mc="http://schemas.openxmlformats.org/markup-compatibility/2006"
    mc:Ignorable="d"
    FontFamily="{StaticResource PhoneFontFamilyNormal}"
    FontSize="{StaticResource PhoneFontSizeNormal}"
    Foreground="{StaticResource PhoneForegroundBrush}"
    SupportedOrientations="Landscape" Orientation="LandscapeLeft"
    shell:SystemTray.IsVisible="True">
Next, we will build the UI for displaying what we are capturing.
By default, there will be a Grid element named LayoutRoot just below the phone:PhoneApplicationPage element. We will replace it with a canvas where we will render what we are capturing.
The canvas will have the name of LayoutRoot. In this canvas, we will add a rectangle, which will host a media element for displaying the video being captured.
Our LayoutRoot element is shown below.
<Canvas x:Name="LayoutRoot" Background="Transparent">

        <!--Camera viewfinder >-->
        <Rectangle
            x:Name="myViewfinderRectangle"
            Width="640"
            Height="480"
            HorizontalAlignment="Left"
            Canvas.Left="80"/>

        <MediaElement
            x:Name="MyVideoPlayer"
            Width="640"
            Height="480"
            AutoPlay="True"
            RenderTransformOrigin="0.5, 0.5"
            VerticalAlignment="Center"
            HorizontalAlignment="Center"
            Stretch="Fill"
            Canvas.Left="80"/>
    </Canvas>
For our application, we will start recording when we tap on the recording and stop recording when we tap on it again.
Our XAML for the rectangle will now look like:
<Rectangle
            x:Name="myViewfinderRectangle"
            Width="640"
            Height="480"
            HorizontalAlignment="Left"
            Canvas.Left="80" Tap="myViewfinderRectangle_Tap"/>
Now, we will make changes in MainPage.xaml.cs.
We will now declare the variables of type VideoBrush (for capturing video), CaptureSource (for source for capturing video), VideoCaptureDevice (device for capturing video), and a FileSlink (for storing the recording).
We will also add a variable to track if we are recording or not.
public partial class MainPage : PhoneApplicationPage
    {
        private VideoBrush myVideoRecorderBrush;
        private CaptureSource myCaptureSource;
        private VideoCaptureDevice myVideoCaptureDevice;
        private FileSink myFileSink;
        private bool recordingStarted = false;
        private bool playbackStarted = false;

        // Constructor
public MainPage()
Next, we will write code to initialize the video recorder.
public MainPage()
        {
            InitializeComponent();
            myCaptureSource = new CaptureSource();
            myFileSink = new FileSink();
            // Get a handle to the camera on the device.
            myVideoCaptureDevice = CaptureDeviceConfiguration.GetDefaultVideoCaptureDevice();
            myCaptureSource.CaptureFailed += myCaptureSource_CaptureFailed; // setting up what to do in case of capture failed.
            if (myVideoCaptureDevice != null)
            {
                myVideoRecorderBrush = new VideoBrush();
                myVideoRecorderBrush.SetSource(myCaptureSource); // set the source so that we can render what the camera sees on the screen
                myViewfinderRectangle.Fill = myVideoRecorderBrush;
                myCaptureSource.Start(); // start the video camera
            }
        }
We will now implement the event handler when the capture fails.
void myCaptureSource_CaptureFailed(object sender, ExceptionRoutedEventArgs e)
        {
            MessageBox.Show("Capture failed");
        }
Next, we will implement the method to start recording.
public void StartRecording()
        {
            // stop recording if it is in progress.
            if (myCaptureSource.VideoCaptureDevice != null
            && myCaptureSource.State == CaptureState.Started)
            {
                myCaptureSource.Stop();
                recordingStarted = false;

                myFileSink.CaptureSource = myCaptureSource;
                myFileSink.IsolatedStorageFileName = "FileRecording1.mp4";
            }

            // Begin recording.
            if (myCaptureSource.VideoCaptureDevice != null
                && myCaptureSource.State == CaptureState.Stopped)
            {
                myCaptureSource.Start();
                MessageBox.Show("Recording started");
                recordingStarted = true;
                playbackStarted = false;
            }
        }
Next in line is the method that will stop the recording.
public void StopRecording()
        {
            if (myCaptureSource.State == CaptureState.Started)
            {
                myCaptureSource.Stop();
                MessageBox.Show("Recording stopped");
            }

            recordingStarted = false;
            playbackStarted = false;
            myFileSink.CaptureSource = null;
            myFileSink.IsolatedStorageFileName = null;
        }
We will now implement the method to handle taps on the screen. With every tap, we will either start or stop recording.
private void myViewfinderRectangle_Tap(object sender, System.Windows.Input.GestureEventArgs e)
        {
            if (recordingStarted == false)
                StartRecording();
            else
                StopRecording();
        }
Finally, we need to clean up the resources when the user navigates away from the application.
private void CleanupVideoRecorder()
        {
            if (myCaptureSource != null)
            {
                if (myCaptureSource.VideoCaptureDevice != null
                    && myCaptureSource.State == CaptureState.Started)
                {
                    myCaptureSource.Stop();
                    recordingStarted = false;
                }

                myCaptureSource.CaptureFailed -= myCaptureSource_CaptureFailed;

                myCaptureSource = null;
                myVideoCaptureDevice = null;
                myFileSink = null;
                myVideoRecorderBrush = null;
            }
        }
This cleanup code is called as shown below.
protected override void OnNavigatedFrom(NavigationEventArgs e)
        {
            // Dispose of camera and media objects.
            CleanupVideoRecorder();

            base.OnNavigatedFrom(e);
        }
Our application is now complete. When you run this application, you will get messagebox notification when the recording has started and when it stops. You can start/stop recording by tapping on the screen.
If you have trouble following along, you can download the sample code below.
Summary
In this article, we learned how to build a simple video recording application on Windows Phone 8. I hope you have found this information useful.
About the Author
Vipul Patel is a Program Manager currently working at Amazon Corporation. He has formerly worked at Microsoft in the Lync team and in the .NET team (in the Base Class libraries and the Debugging and Profiling team). He can be reached at [email protected]