

By Eric D. Boyd & Nathaniel Clark
Overview
If you are already developing web and mobile applications, it is a common next step to start using data in and from the cloud. In this two part series, you will learn how to setup data in the cloud and use it within an application. Since the holidays are coming, we will use a holiday shopping list as our example database and application.
In the this article, Storing Data in the Cloud, we will walk through the process of setting up a Windows Azure SQL Database and populate it with data.
In the second article in this series, Accessing Cloud Data using an OData Web Service, you will learn how to access your data from a web, desktop or mobile app by building an OData web service in the cloud. And you will learn how to consume your OData web service from a simple ASP.NET MVC website that will display your data.
By following along with these steps, you will also become familiar with the Windows Azure Management Portal (if you haven’t been using Windows Azure already).
Once finished with this series, you will be equipped to apply what you’ve learned to your own projects, enabling you to utilize cloud data within your own web, mobile and desktop apps.
In order to setup a database in the cloud, you will need services from a cloud vendor. You can get a Windows Azure trial account at no charge from Microsoft, so I’ll use that in this article. If you don’t currently have a Windows Azure subscription you can start a FREE trial by visiting http://bit.ly/eCampTrial. If you have an MSDN subscription, as part of your MSDN subscription benefits you get up to $150 each month to spend on Windows Azure services. To get started with your MSDN Windows Azure benefits, visit http://bit.ly/eCampMSDN.
Getting a Windows Azure Free Trial
When you sign up for the Windows Azure trial, you will be asked to login with your Microsoft Account (previously known as Live ID).
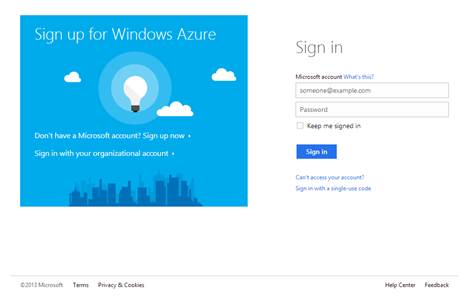
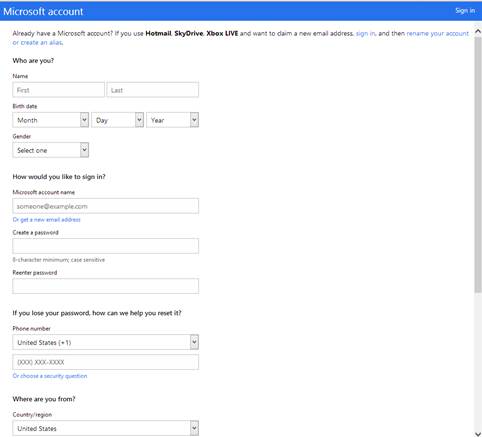
If you don’t already have a Microsoft Account, click on the Don’t have a Microsoft account? Sign up now link in the blue box on the left. This will display a Microsoft Account registration form.
Once you’ve signed in with your Microsoft Account, you’ll then be asked for standard contact information and a phone number. The phone number will be used for identity verification and you can choose to verify using a text message or a phone call.
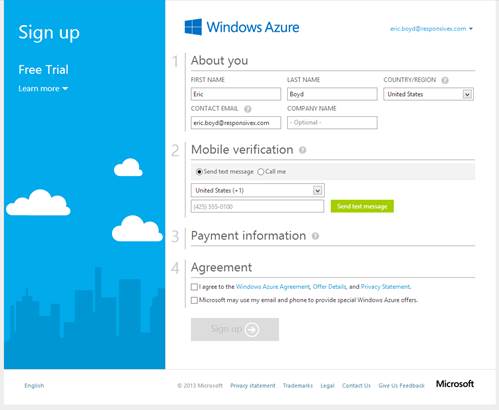
After your phone number is verified, you will be asked for credit card information. Don’t panic, the credit card will not be billed during your free trial. The mobile phone number and credit card are used to verify your identity. Your Windows Azure trial will have a $0 spending limit so that you won’t be billed if you go over your allotted credit during the free trial. Instead, when you get to the end of your freely allotted credits, your account will be suspended until you either get another credit (such as the monthly MSDN credits), or until you change the spending limit.
After you finish signing up, you will be redirected to your new Windows Azure Account. In your Windows Azure Account you can all of your Windows Azure Subscriptions including your new Free Trial, and you can go to the Windows Azure Management Portal to create and manage your Windows Azure services by clicking the Portal button in the upper right corner.
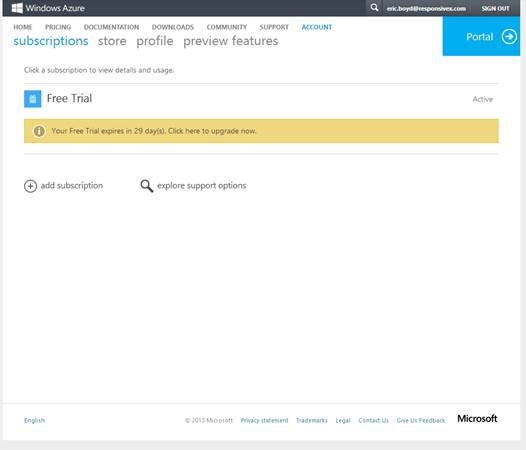
The first time you visit the Windows Azure Management Portal you will see a short wizard that will show you around the Management Portal. You can go through the walk through or close that wizard to begin create and managing services in your Windows Azure subscription.
Setup up a Windows Azure SQL Database
Once you have a Windows Azure subscription, you are ready to start using the cloud! To begin storing data in the cloud, you’ll need a database. In these steps, you will take advantage of Windows Azure’s built in relational database service, Windows Azure SQL Database.
Browse to http://manage.windowsazure.com/ and then login to the Windows Azure Management Portal using the credentials associated with your Windows Azure subscription.
Once you are inside the Windows Azure Management Portal, click on SQL Databases in the menu that is on the left-hand side.
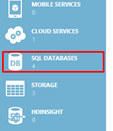
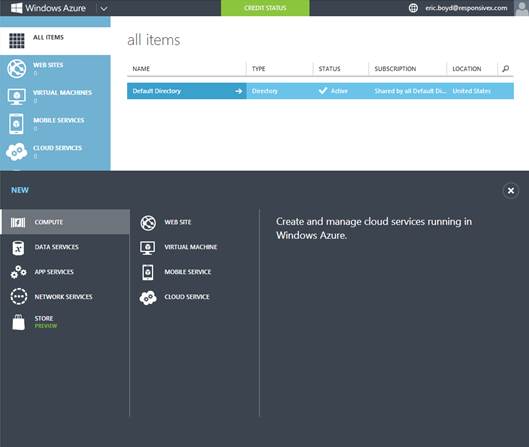
This will display a list of the databases you have created in Windows Azure. At the bottom of the Windows Azure Management Portal, you will see a toolbar with a New button on the left.
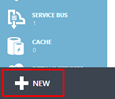
The New button exists throughout the Windows Azure Management Portal and will enable you to provision new services within your Windows Azure subscription. This button is also context aware, so if your focus is currently within the SQL Database service, clicking this button will default the selections for creating a new Windows Azure SQL Database.
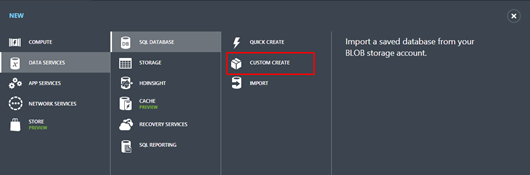
Click on the New button. You should now be presented with a menu to create a new Windows Azure SQL Database. Notice that the menu has a list of the Windows Azure service categories on the left, followed by the services within the selected category, and options for creating your new service in the third column. Click Custom Create to begin setting up your Windows Azure SQL Database.
You should now see the New SQL Database – Custom Create wizard.
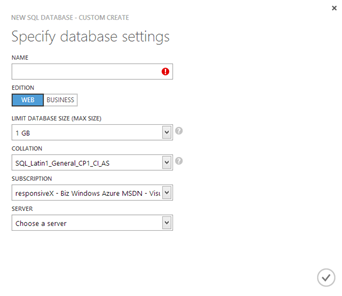
In the Name text box enter MyShoppingList.
In the Subscription drop down, select the Windows Azure subscription where you would like to create your SQL Database.
In the Server drop down, select the Windows Azure SQL Database server that you would like to use for your new database. If you have created a Windows Azure SQL Database server previously, you can select that server, otherwise, select New SQL database server.
The remaining fields you can leave set to their defaults.
Click the checkmark in the lower right corner to advance to the next step in the wizard.
If you chose to create a New SQL database server, you should now see the SQL Database server settings screen.
In the Login Name text box, enter the user name you would like to use to login to your SQL Database.
In the Login Password and Confirm Password text boxes, enter the password you would like to use to login to your SQL Database.
In the Region drop down, select the Windows Azure data center where you would like your new SQL Database server provisioned. For optimal latency and cost of data transfer between data centers, it is recommended that you provision all of the services for an application that are dependent on one another in the same data center.
Lastly, leave the Allow Windows Azure Services to Access The Server check box checked. This will allow other services in Windows Azure, like the Windows Azure Web Site that we will create in future steps to access your SQL Database.
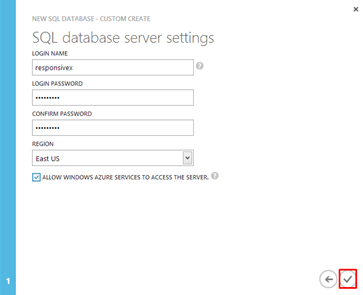
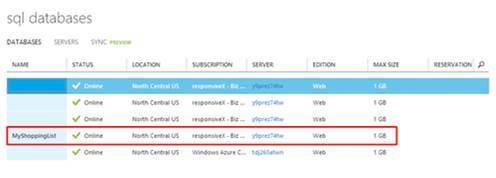
After you have provided all of the details for your new SQL Database server, click the checkmark in the lower right hand corner to finish the wizard and create your database. You will see progress in the toolbar at the bottom, and once your database has been created, you should see a success message like the following. Click the OK button in the notification bar to dismiss the message.

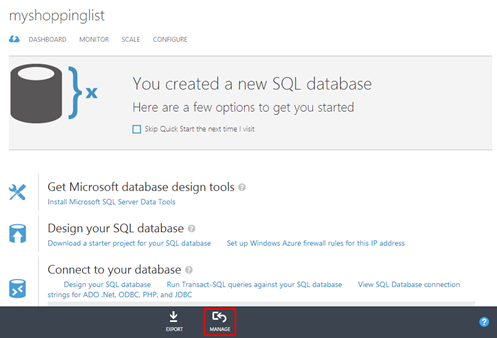
Once your database has been successfully created, go ahead and click on the Name in the list of databases, which will display information about your database and additional options and configuration.
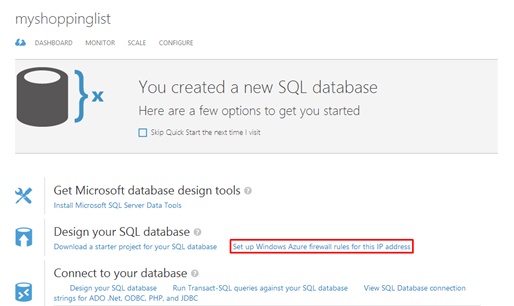
The next thing we need to do is configure access to your SQL Database. By default, Windows Azure SQL Database firewalls all IP address from connecting to your server. As a result, you need to grant access to connect and manage your server. To grant access to your IP, click on Set up Windows Azure firewall rules for this IP address.
Your database is now ready! So now you are ready to add some tables and data.
Creating Tables in Your SQL Database
While on the home screen of your SQL Database, click on the Manage button in the toolbar at the bottom.
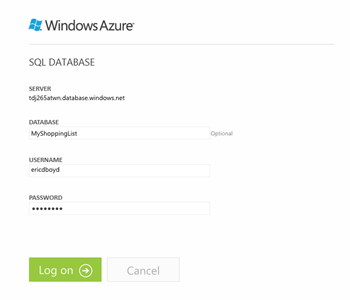
This will display the SQL Database Management Portal login screen. Enter the username and password that you used when creating your SQL Database and click the Log on button.
Select your newly created MyShoppingList database and click on the Design button in the menu on the left.
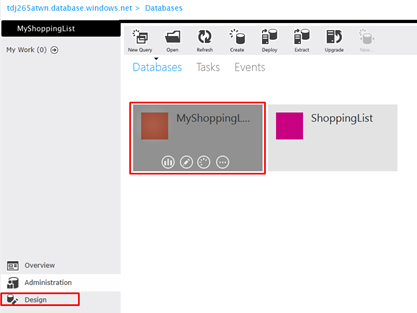
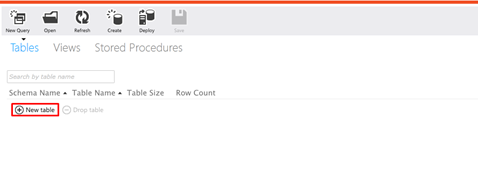
You should now see options to design the schema of your database including Tables, Views and Stored Procedures.
Click on the New table button in the middle of the screen.
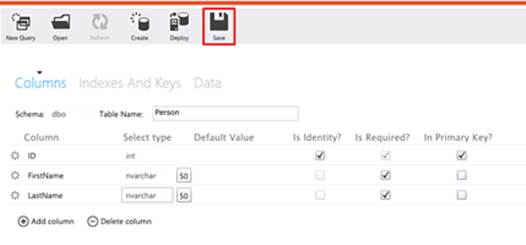
Enter Person in the Table Name text box.
On the ID column that was added by default, check the Is Identity? check box.
On the Column1 column that was added by default, enter FirstName under Column, leave the defaults for Type set to nvarchar and the Length to 50.
On the Column2 column that was added by default, enter LastName under Column, leave the default for Type set to nvarchar and set the Length to 50.
Click the Save button in the toolbar at the top to save the Person table.
Click on the Design button in the toolbar on the left and then click the New table button again to create a second table.
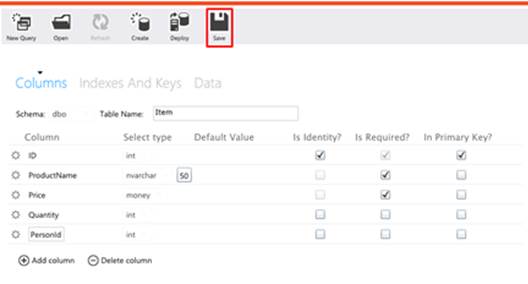
Enter Item in the Table Name text box.
On the ID column that was added by default, check the Is Identity? check box.
On the Column1 column that was added by default, enter ProductName under Column, leave the defaults for Type set to nvarchar and the Length to 50.
On the Column2 column that was added by default, enter Price under Column and select money for the Type.
Click on the Add column button, and in the new row enter Quantity under Column and select int for the Type.
Click on the Add column button again, and in the new row enter PersonId under Column and select int for the Type.
Click the Save button in the toolbar at the top to save the Item table.
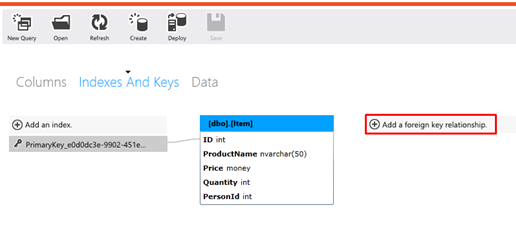
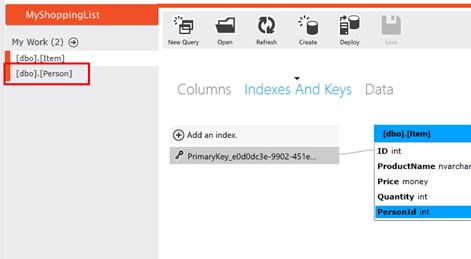
You now have your tables defined and you need to link these tables by created a foreign key relationship between the two.
Click on Indexes and Keys in the menu above the table definition.

Click the Add a foreign key relationship button.
Check the PersonId check box in the Item table.
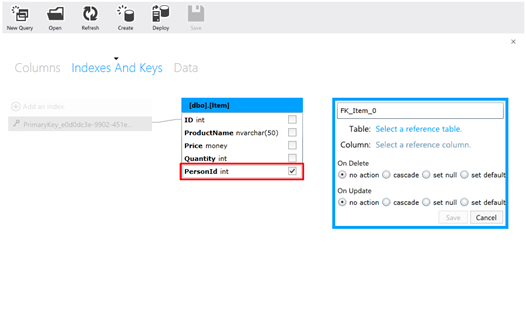
Change the name of the foreign key relationship from FK_Item_0 to FK_Item_Person.
Click Select a reference table and choose the Person table.
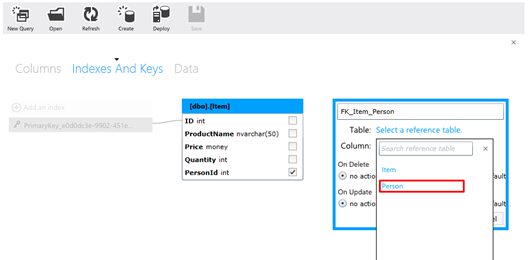
Click Select a reference column and choose ID.

Leave the default no action selected for On Delete and On Update cascade operations and click the Save button.

You are now finished setting up your schema with a couple of tables and a foreign key relationship between the tables.
Adding Data to Your Database
Now that you have the structure of our database setup, it is time to enter data into your tables. The same web-based SQL Database Management Portal that you used to setup the structure and schema of your database, you can use to add data to your database.
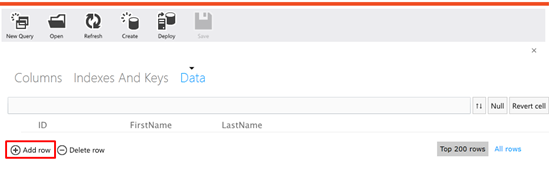
To begin, you will add some people to the Person table, so select the Person table in the menu on the left.
Now that your Person table is selected, click on the Data tab at the top and a list of rows from the Person table will be displayed. At this point, the list of rows should be empty, because you should have an empty table.
Click the Add row button to add a new row to the Person table.
The ID column is setup as an identity column and it will get automatically incremented and assigned when a record is added, which means you should leave this column blank.
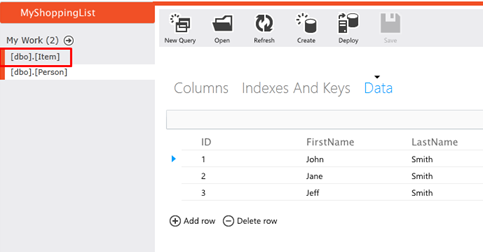
Enter John in the FirstName column.
Enter Smith in the LastName column.
Repeat these steps two more times to add two more people to the Person table. You are welcome to come up with some original names, or you can follow along with our unoriginal names and use Jane Smith and Jeff Smith.
Once finished adding rows to the table, click the Save button in the toolbar at the top to save your new rows to the table.
Now that you have people in your Person table, you need to add Items to their Shopping Lists.
Click on the Item table in the menu on the left.
Click on the Data tab at the top and an empty list of rows from the Item table will be displayed.
Click the Add row button to add a new row to the Item table.
The ID column is setup as an identity column and it will get automatically incremented and assigned when a record is added, which means you should leave this column blank.
Enter Surface 2 in the ProductName column.
Enter 499 in the Price column.
Enter 1 in the Quantity column.
Enter 1 in the PersonId column. If 1 is not the PersonId of the first person in your Person table, then use the PersonId that is associated with the first person in your Person table.
Repeat these steps three more times to add three more shopping list items to the Item table. You are welcome to dream big and come up with some original shopping list items, or you can follow along with our awesome tech gadgets and use the following.
|
ProductName |
Price |
Quantity |
PersonId |
|
Surface Pro 2 |
899 |
1 |
2 |
|
XBOX One |
499 |
1 |
3 |
|
Lumia 1020 |
199 |
1 |
3 |
Once finished adding rows to the Item table, click the Save button in the toolbar at the top to save your new rows to the table.
Congratulations! You have now built a database and stored data in the cloud!
Now that you have people in your Person table and shopping list items in your Item table, you are done setting up your database and can now close the SQL Database Management Portal and move on to building your web service and application.
Summary
If you followed along with this article, you just:
1. Created a database in the Cloud using Windows Azure SQL Database
2. Setup a couple of tables and defined your database’s schema
3. Added data to your database using the web-based SQL Database Management Portal
And all of that was pretty simple, painless and quick, and you didn’t have to talk to any server administrators or DBA’s to make it happen. You can now apply this to your own projects to create databases in the cloud using Windows Azure and not worry about the infrastructure and servers to make it all work.
In the next article, Accessing Data in the Cloud using OData Web Services, you will take the shopping list database you just created and make the data accessible using an OData web service and consume that web service in an ASP.NET MVC web app.
| Editor’s Note: Check out our Azure Activities page where you can receive badges and possibly other awards. You can earn your first badge in Activity 2 by simply replicating what the author shows you in this article. It is that easy! For more information, go to https://www.codeguru.com/azure_activities/ and check out activity 2! |
Authors
Eric D. Boyd
Eric D. Boyd is the Founder and CEO of responsiveX, a Windows Azure MVP, and a regular speaker at international conferences, regional code camps and local user groups. He is so passionate about apps and cloud services that he founded responsiveX (www.responsiveX.com), a management and technology consultancy that helps customers create great web, mobile and client experiences, and these apps are often powered by cloud services. Eric launched his technology career almost two decades ago with a web development startup and has served in multiple roles since including developer, consultant, technology executive and business owner. You can find Eric blogging at http://www.EricDBoyd.com and on Twitter at http://twitter.com/EricDBoyd.
Nathaniel Clark
Nathaniel works for Chicago-based technology consultancy responsiveX, where he works on web development projects, marketing initiatives and authoring content for the company. Nathaniel loves all things tech and invests countless hours playing with technology, mobile devices and apps.