

Introduction
As some of you may have gathered, I am very inquisitive and always like to experiment with all my different (and somewhat strange) ideas. Today’s topic is no different. Today, you will learn how to display the DOS command prompt inside a VB form.
In Case You Do Not Know…
Some of you may not know what the DOS command prompt is. If you were to click your Start button and type CMD.EXE, you will see a screen similar to Figure 1. This is usually the first screen you see upon switching on your computer.
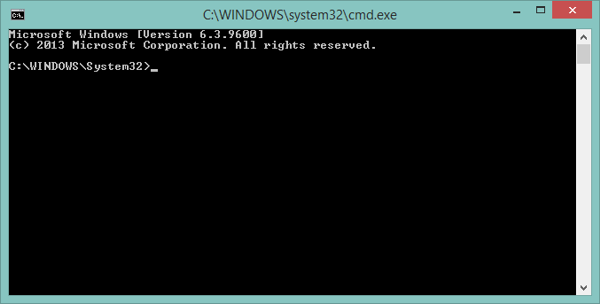
Figure 1: The DOS prompt. Bring back memories?
Before Windows, there was DOS: Disk Operating System. It didn’t have a graphical user interface (GUI) and you had to type commands to go to different directories, copy & move files, and delete files. Later, the DOS Shell was launched, making things a bit more user friendly.
I decided to use CMD.EXE here today because I thought it would be quite interesting as well as show you how to host an external app inside your VB Forms application. There is a lot of work today, so let’s get started.
Design
Start Visual Studio and create a new VB Windows Forms application. You may name it anything you like. There aren’t any objects you need place on the form, but you may want to resize your form so that it is not too small.
Code
Let’s start with creating the variable objects that we will be using throughout this Form’s Class:
Private txtInput As New TextBox()
Private txtOutput As New TextBox()
Private btnSend As New Button()
These should be quite self-explanatory, but just in case you are very new to VB, let me explain what I have done here. The first two objects are dynamic TextBoxes. The last object is a dynamic button. Now, the only difference between a normal textbox, for example, and a dynamic textbox is that the latter gets created dynamically; in other words: upon run time. That is why you didn’t have to add objects to your form’s design. More on this later.
Add the following variables, also in General Declarations:
Private strResults As String
Private intStop As Integer

Private swWriter As System.IO.StreamWriter

Private thrdCMD As System.Threading.Thread
strResults will hold the value of the command sent to the Command Prompt window. intStop will hold the value of where the command should end. The last two objects are a streamwriter that will allow me to write the command to the command window, and a thread object that will run the CMD.EXE application in a separate thread so that it does not block the form’s thread. Read here for more information regarding streamwriters: https://msdn.microsoft.com/en-us/library/system.io.streamwriter%28v=vs.110%29.aspx?f=255&MSPPError=-2147217396.
Add the following to the General Declarations section:
Private Delegate Sub Update()
Private uFin As New Update(AddressOf UpdateText)
Here, I have created a delegate sub procedure that will handle the updating of text written to the command prompt window. If you haven’t heard of delegates before, have a read through this article: https://www.codeguru.com/visual-basic/delegates-and-vb-net/.
Add the Form_Load event:
Private Sub Form1_Load(ByVal sender As System.Object, _
   ByVal e As System.EventArgs) Handles MyBase.Load

   txtOutput.Multiline = True
   txtOutput.Height = 200
   txtOutput.Dock = DockStyle.Fill
   txtOutput.ScrollBars = ScrollBars.Both
   txtOutput.BackColor = Color.Black
   txtOutput.ForeColor = Color.LightGray

   AddHandler txtOutput.KeyDown, AddressOf txtOutput_KeyDown
   Me.Controls.Add(txtOutput)

   thrdCMD = New System.Threading.Thread(AddressOf Prompt)

   thrdCMD.IsBackground = True

   thrdCMD.Start()

End Sub
Because we created the Textboxes and Button dynamically, we obviously have to create their associated events dynamically, too. Not only that, we also need to set their various properties dynamically. This is what happens inside the Form_load sub. I set the properties for the Textbox; then, I add a dynamic event handler to the textbox. I spawn a new thread, which functionality I will add now, and start the thread.
For more information regarding Threads, read here: https://msdn.microsoft.com/en-us/library/ms173178.aspx.
Let’s give the thread its purpose:
Private Sub Prompt()

   Dim procCMDWin As New Process

   AddHandler procCMDWin.OutputDataReceived, _
      AddressOf CMDOutput

   procCMDWin.StartInfo.RedirectStandardOutput = True
   procCMDWin.StartInfo.RedirectStandardInput = True
   procCMDWin.StartInfo.CreateNoWindow = True

   procCMDWin.StartInfo.UseShellExecute = False


   procCMDWin.StartInfo.FileName = "cmd.exe"
   procCMDWin.StartInfo.WorkingDirectory = "c:\"

   procCMDWin.Start()

   procCMDWin.BeginOutputReadLine()

   swWriter = procCMDWin.StandardInput

   Do Until (procCMDWin.HasExited)
   Loop

   procCMDWin.Dispose()

End Sub
The Prompt sub procedure launches the CMD.EXE window and sets some properties such as in which folder to start the prompt as well as setting up the process object so that it does not interfere with the Windows Form’s process. For more information on the Process object, have a read through here: https://msdn.microsoft.com/en-us/library/system.diagnostics.process%28v=vs.110%29.aspx.
Add the UpdateText sub procedure:
Private Sub UpdateText()

   txtOutput.Text += strResults

   txtOutput.SelectionStart = _
      txtOutput.TextLength - 1

   txtOutput.Focus()

   intStop = txtOutput.SelectionStart

   txtOutput.ScrollToCaret()

End Sub
This is the delegate you had created earlier. What happens inside the UpdateText sub is the following:
- We concatenate the text written to one whole command.
- We then set the focus to the textbox and Let intStop know where the command should end.
- Lastly, you set the DOS window’s cursor to the location of the last character that you have sent to the command window.
Now, sending a command to this window is as simple as typing a character, so there is nothing special needed. Add the following sub:
Private Sub CMDOutput(ByVal Sender As Object, _
   ByVal OutputLine As DataReceivedEventArgs)

   strResults = OutputLine.Data & Environment.NewLine

   Invoke(uFin)

End Sub
This displays what you have entered inside the DOS window.
Add the txtOutput_KeyDown event:
Private Sub txtOutput_KeyDown(ByVal sender As System.Object, _
   ByVal e As System.Windows.Forms.KeyEventArgs)

   Select Case e.KeyCode

      Case Keys.Enter

         e.Handled = True

         txtOutput.SelectionStart = intStop
         txtOutput.SelectionLength = txtOutput.TextLength - 1

         Dim cmdToSend = txtOutput.SelectedText

         swWriter.WriteLine(cmdToSend & Environment.NewLine)

      Case Keys.Left, Keys.Right, Keys.Back

         If (txtOutput.SelectionStart < intStop) Then

            e.SuppressKeyPress = True

         End If

      Case Keys.Home

         txtOutput.SelectionStart = intStop

         e.SuppressKeyPress = True

      Case Keys.End

         txtOutput.SelectionStart = txtOutput.TextLength - 1

         e.SuppressKeyPress = True

      Case Else

         If ((e.KeyValue < 32) Or (e.KeyValue > 127)) Then

            e.SuppressKeyPress = True

         End If

   End Select

End Sub
The purpose of this event is to know what key has been pressed. For example: when End is pressed, the cursor should run to the end of the entered command. When Enter is pressed, the CMD.EXE window should know that the command entered should be sent. When Home is pressed, the cursor should be at the beginning of the entered command.
If none of the above is pressed, it should know what characters are allowable and interpretable.
Add the last event:
Private Sub Form1_FormClosing(ByVal sender As System.Object, _
   ByVal e As System.Windows.Forms.FormClosingEventArgs) _
   Handles MyBase.FormClosing

   swWriter.Dispose()

End Sub
When the Form is closed, the StreamWriter object should be disposed of from memory.
I have attached a working sample with this article.
Conclusion
I hope you have enjoyed today’s article. Until next time, cheers!