All developers, sooner or later, face the need/desire to write your own DLL. This operation is not always trivial, especially the first time. I have studied many examples and, after that, I chose the following solution. I believe that there is nothing more straightforward and simple.
Before I begin, it is appropriate to mention a few brief theoretical points. What is a a DLL? Or, perhaps, it might be better to ask what the difference is between an EXE and a DLL.
The two structures are almost identical; the only difference is that the DLL has an exports table (the name betrays its meaning; in fact, this table contains the names of all the functions that the DLL exports outwards (EXE or another DLL). Anything that is not present in this table will remain private at the DLL.
Usually, when you learn to use the DLL, projects take a new form; you start with one, and then you have two. You end with many different DLLs.
The DLL is a very versatile instrument, but it does not solve all problems; if you abuse DLLs, they can create problems. Before you start a new project, it is well worth studying its structure, so you don’t drive yourself crazy when you compile it! In fact, the order of compilation is not random; it must be well studied. I do not think there are precise rules; I think that experience makes the difference.
My article gives a whole example with the DLL’s sources and a minimal application that shows how to use it. I’ve created a solution that I called TestSolution; the solution is made by the application that I called TestEXE and by the DLL that I called TestDLL.
So…
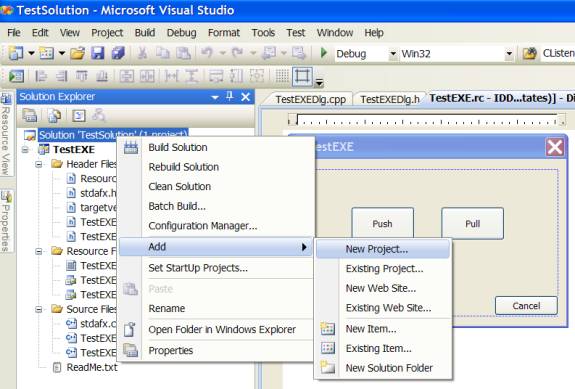
- Create the project of the application that will use the DLL (for convenience, I opted for a dialog based; but, of course, you could choose any other type: MDI, SDI, and so forth.
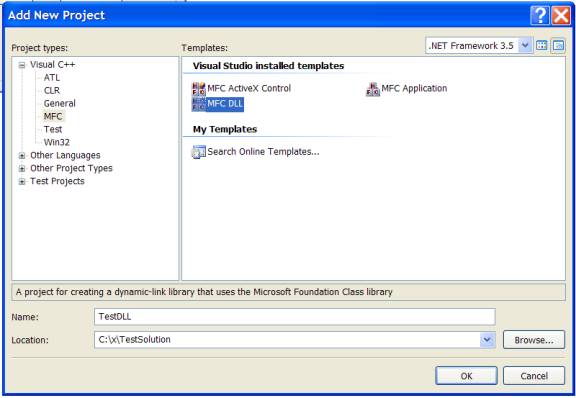
- Create the project DLL.
- Select MFC DLL.
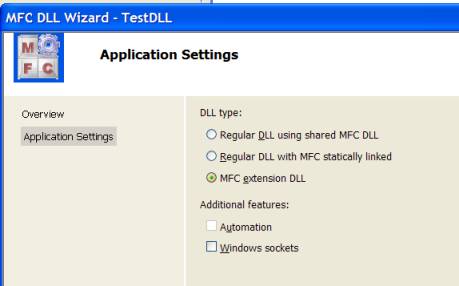
- Select the MFC extension DLL option.
At this point, the solution is complete. Now, you will focus on the code….
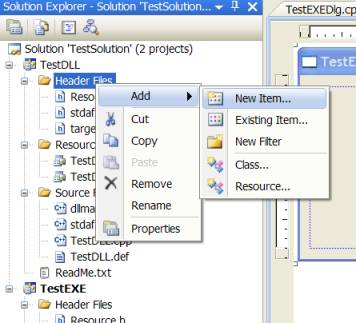
Add to the TestDLL project a new file that includes what I’ll call TestDLL.h.
TestDLL.h is perhaps the part where you should concentrate more. You must keep the following statement in your mind:
#ifdef TESTDLL_EXPORT
   #define TESTDLL_API __declspec(dllexport)
#else
   #define TESTDLL_API __declspec(dllimport)
#endif
Also, in this case it is appropriate to give you some more information. Microsoft has introduced with the 16-bit compiler the keyword __export. This directive automatically generates the names of functions to be exported; these statements are in a .LIB file.
When it was introduced in the 32-bit compiler, the keyword was changed to __declspec(dllexport). This new statement, unlike the previous one, puts the list of functions to be exported directly in the object file, with the obvious advantage of not having to use the .DEF.
The EXE (or other DLL) that will use functions exported from a DLL should use the __declspec(dllimport) keyword. In substance, it will be enough to use the same .H file of the DLL; that exposes the functions to be exported and precedes all functions you want to import with the __declspec(dllimport) statement.
Of course, there’s a more cunning method you can use; you can generate a macro (see TESTDLL_EXPORT) so, with a single .H file, you can export and import all the desired functions. It’s a convenient, simple, and blank way!
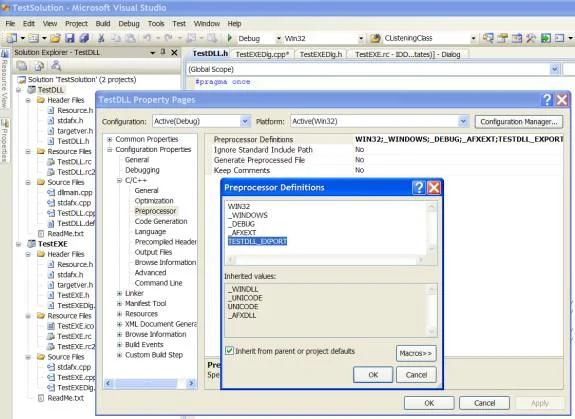
It is absolutely necessary that you remember to add the following definition, TESTDLL_EXPORT, in the properties of the project DLL.